


Luciel
-
Posts
163 -
Joined
-
Last visited
Content Type
Profiles
Forums
Events
Posts posted by Luciel
-
-
Right, I´m at then end of D-Day -1, tomorrow is the last day.
Now, a lot of stuff has been finished but because some where still drying I didnt want to risk mounting what I need to measure for the piping till tomorrow morning, then as I mentioned in the previous post, piping time.
Anyhow...
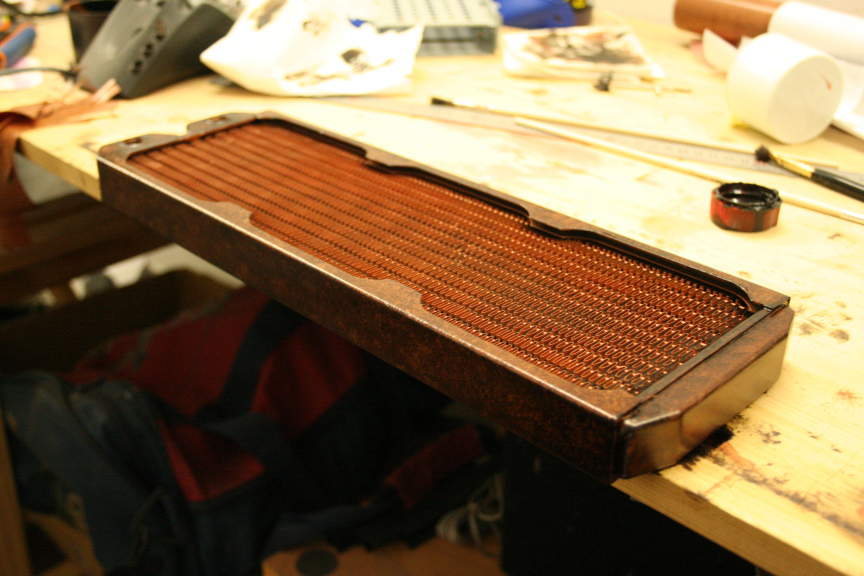
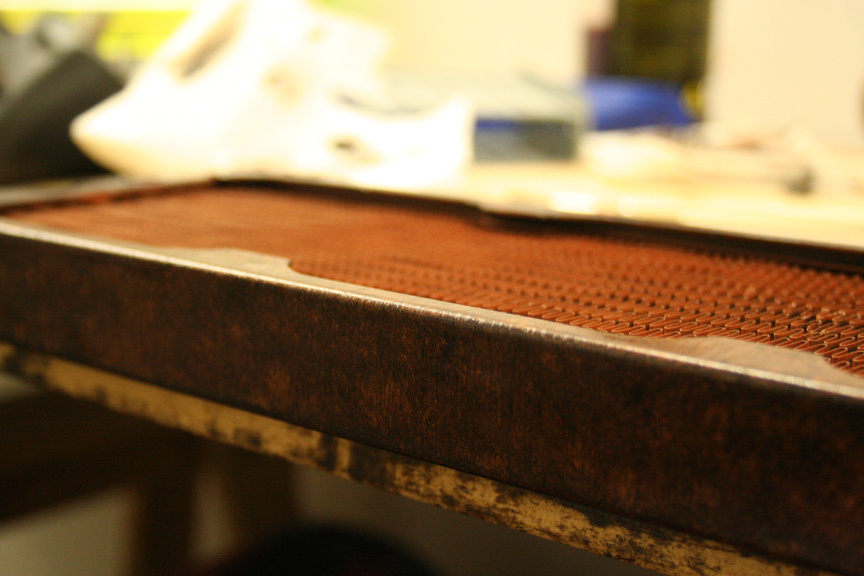
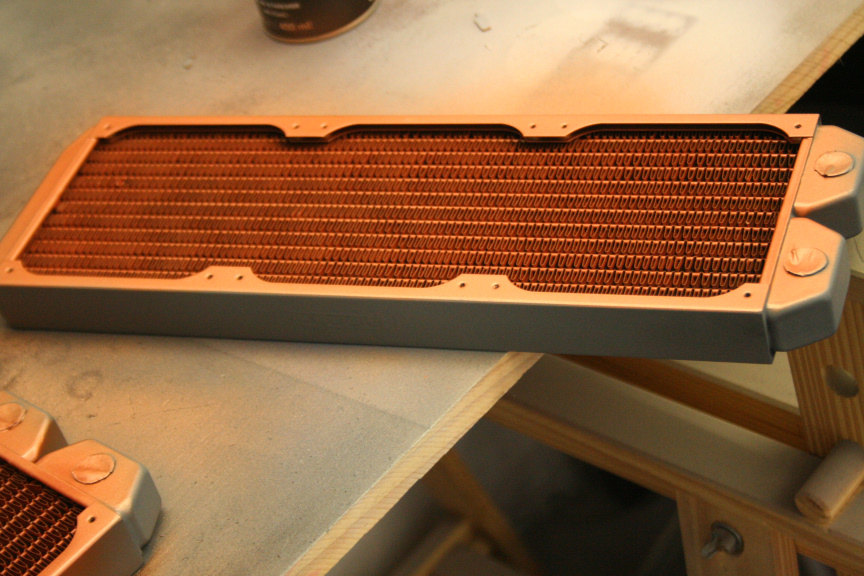
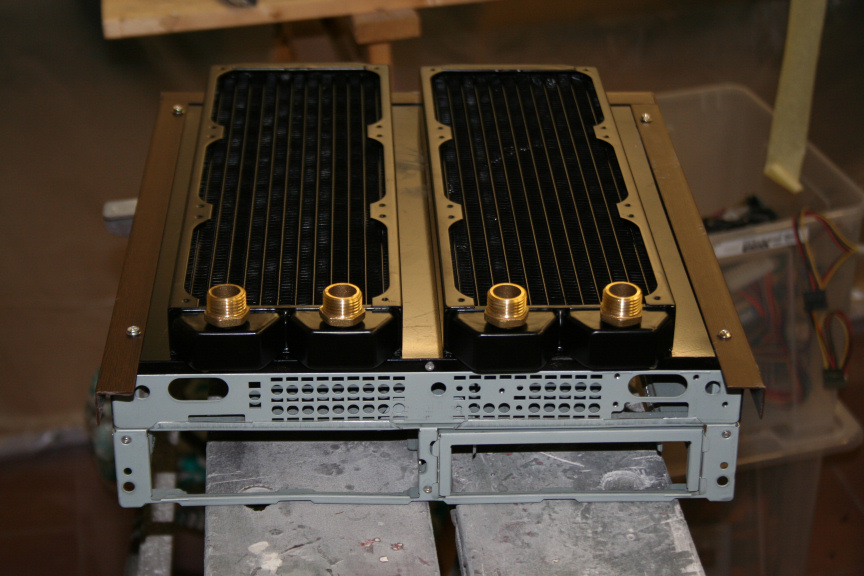
Rads finished.

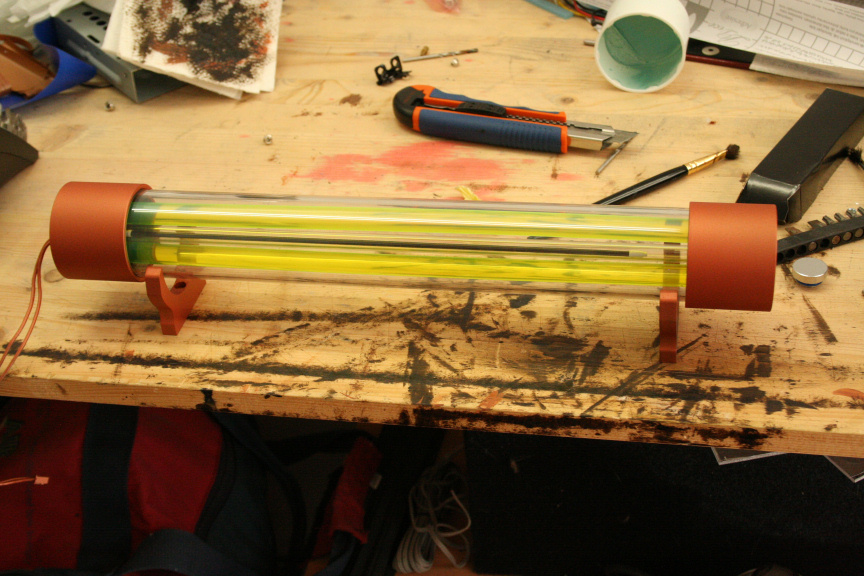
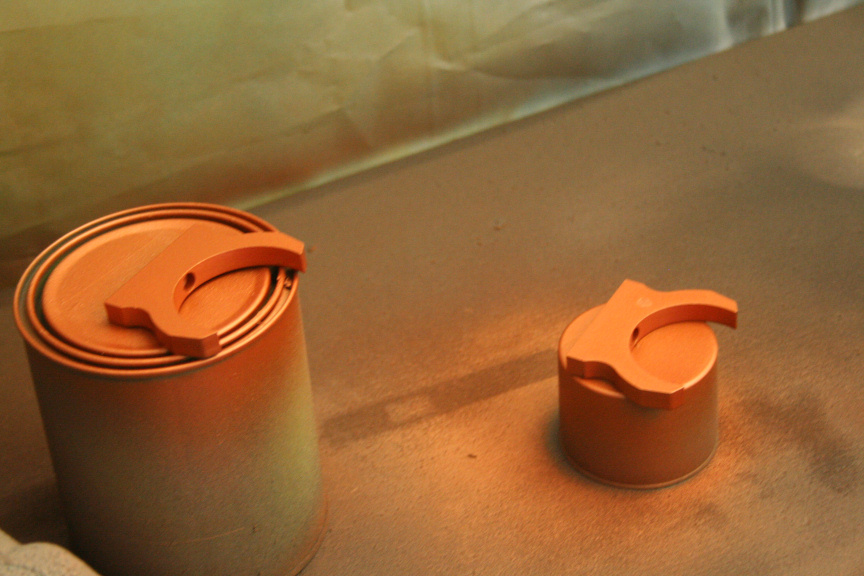
Reservoir unmasked...
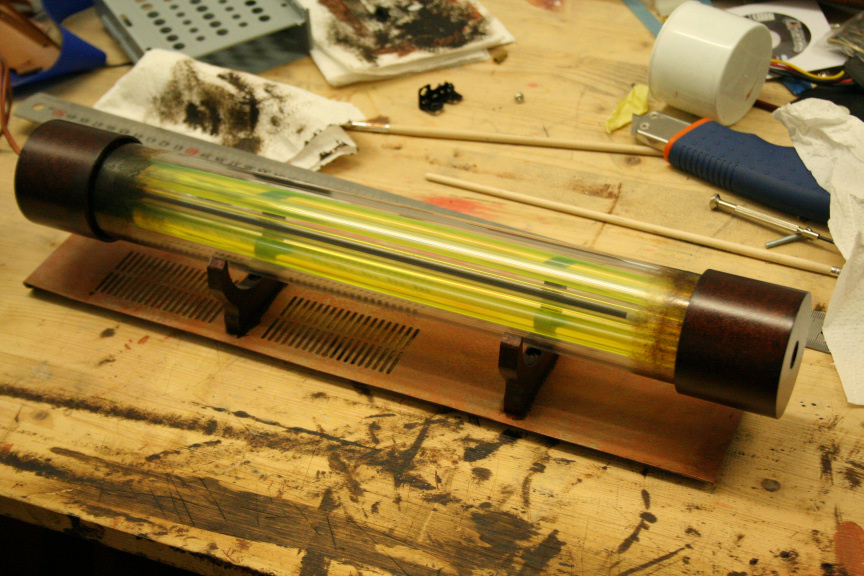
...and aged with a touch of "filth".
If all goes well, tomorrow 1 to 2 updates + final update... after that, beer and a nervous breakdown
-
First update of D-Day -1.
I am plausibly going slightly crazy...
...yes
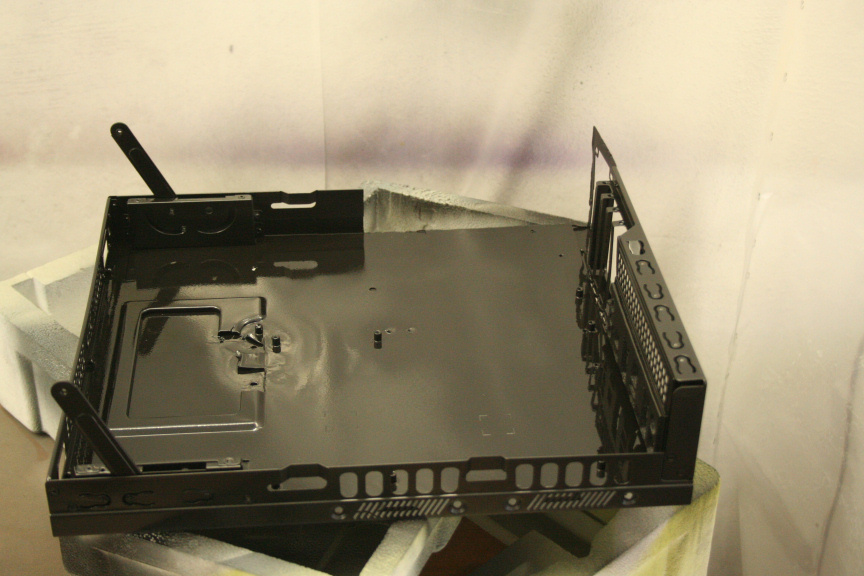
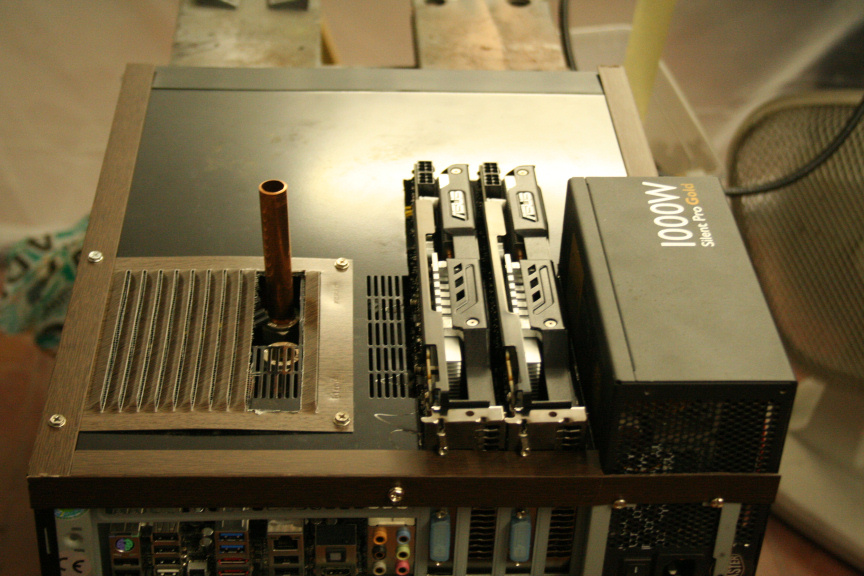
Started drilling based on measurements taken yesterday and test mounted both radiators.
Matt black painted the chasis, even though in the picture it doesn´t look matt, that´s because paint wasn´t dry yet.
Painted one side of both radiators (mainly the middle as the the non-radiator-y-bits will receive the wood treatment later today. Before anyone goes crazy about loosing performance and all that. I´ll say what I´ve said every other time I´ve painted a rad or heatsink and noticed no loss of performance. If you do it with acrylic paint, it´s fine. It´s not fine when you do it with synthetic or plastic paints. You can argue all you want, but I wouldn´t be doing it if I hadn´t tested it countless times : )
I´m hoping I can run the system without fans on the radiator to acceptable temps, since there´s 2 rads and all they are cooling is the cpu, if not, will add fans at a later point, but for the "final" look they won´t have fans on them.
Painted the plastic parts of the reservoir...
...and it´s mounts.
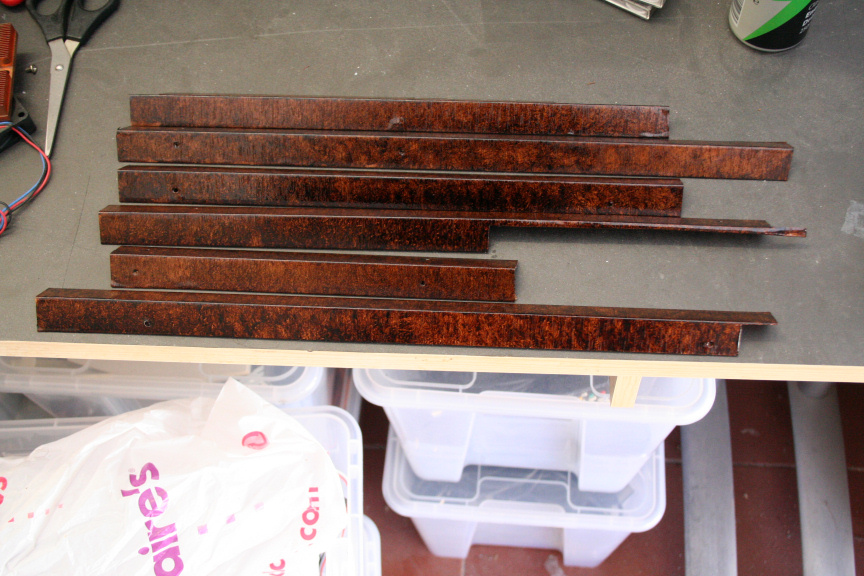
And finished all the wood effect trimmings.
Piping won´t be done today as all the parts need to be mounted and while that will happen today, it won´t before the plumbing supplies shop closes for the day.
So will be going hopefully first thing tomorrow morning and getting all the piping done, leave the loop running for as many hours as I can allow it to and still have time to mount the hardware and psu in and finish by midning tomorrow.
...I can´t believe I haven´t aplied the matt clear coat finish yet...
Now I have to go to my actual job and pretend like I´m not freaking out about not finishing this in time :S
-
Of course no problem, I´m sure brands do make them, the only reason I went custom is because it was local and it was going to take less time to get them than ordering them online, plus they are made precisely for the copper tubing : )
-
nope, they are custom order made 1/4 to 3/8 convertors from my local pluming supliers : )
-
Update:
Today I haven´t done much progress in the sense of progress I can show you with pictures. The 3 hours I had today to work on the project I pretty much spent measuring up and deciding mounting of the liquid cooling components (yes, they arrived today).
But, for the sake of posting a picture, here´s a teaser on where the rads will be.
Initially I had planned to mount them with spaces, however, I´ve decided against it for two reasons. First, the weight of the rads would provably unbalance the tower if separated. Secondly the metal sheeting, while thick, isn´t thick enough to keep the rads firmly straight and I don´t like them being able to move at all if touched as it can weaken the sheet metal.
So due to these 2 reasons I will be mounting them straight on the metal plate.
Hopefully, a rather big update tomorrow in prepation for the final update (I´ve taken tomorrow morning and friday morning off work in order to have enough time to finish this by friday midnight, the deadline for the competition, wish me luck!
-
hahahahaha
The liquid cooling parts parcel arrived!
-
hahaha its ok, i´ve been pulling my hair for the last 2 weeeks :P
-
Update,
Had some internet issues last night so you couldn´t upload the pictures.
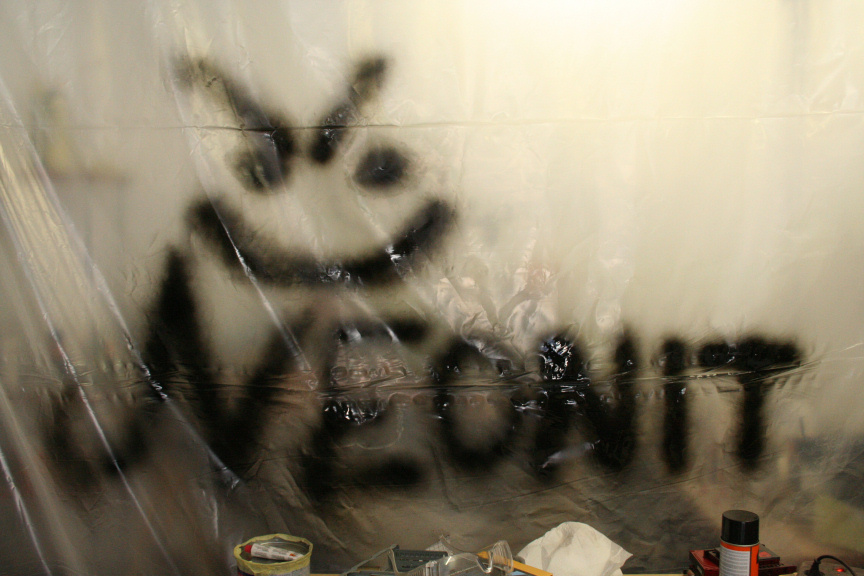
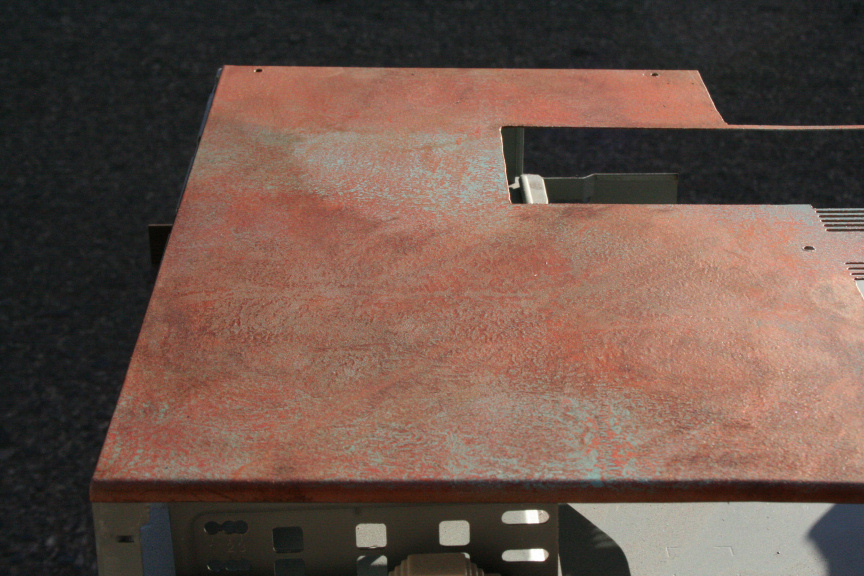
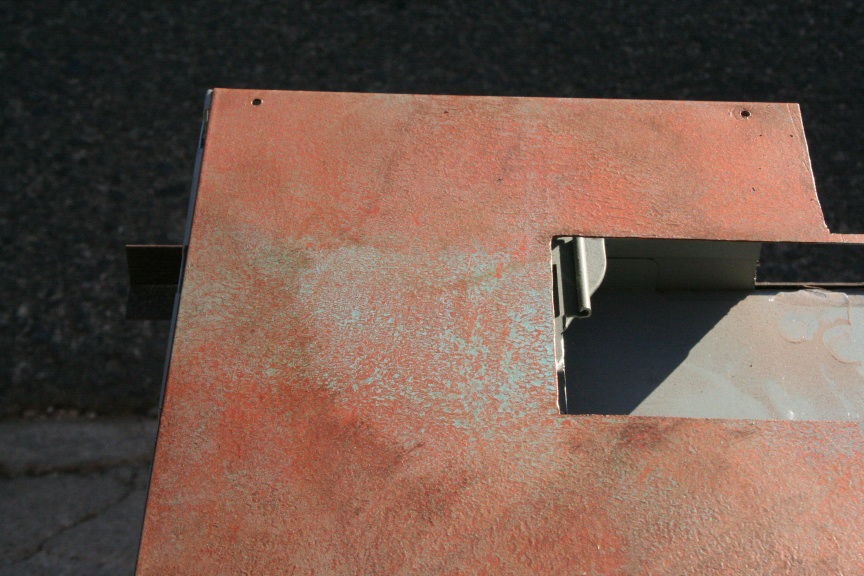
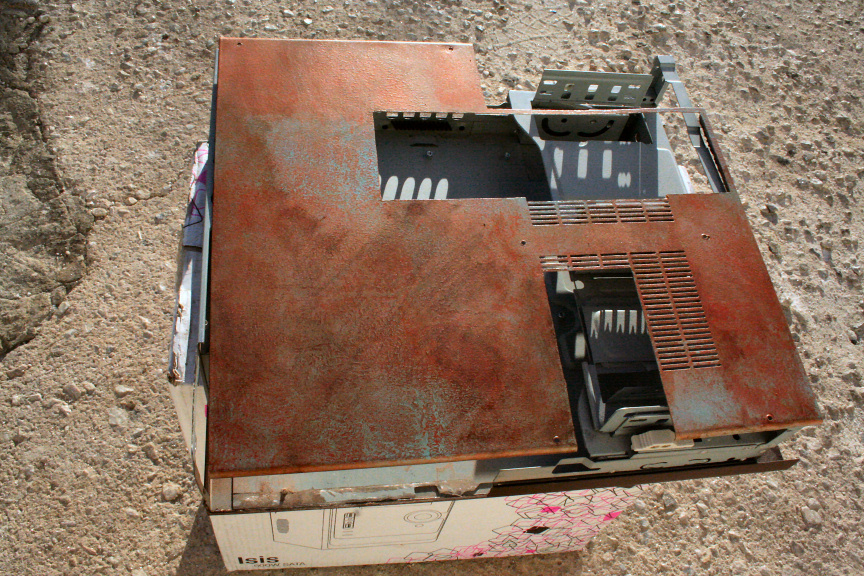
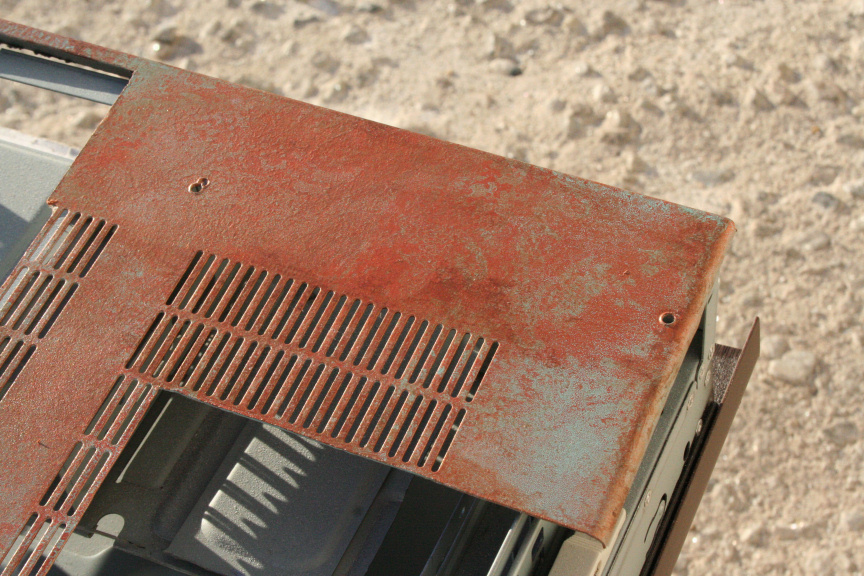
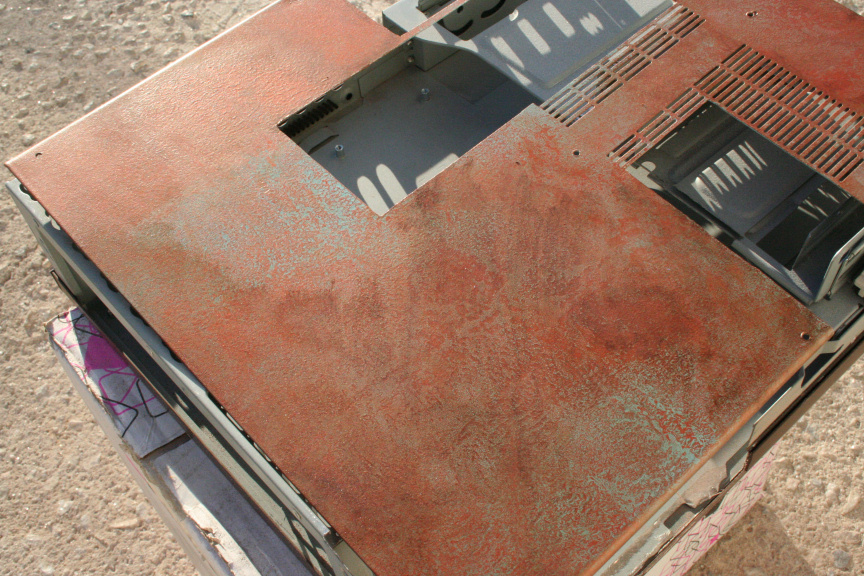
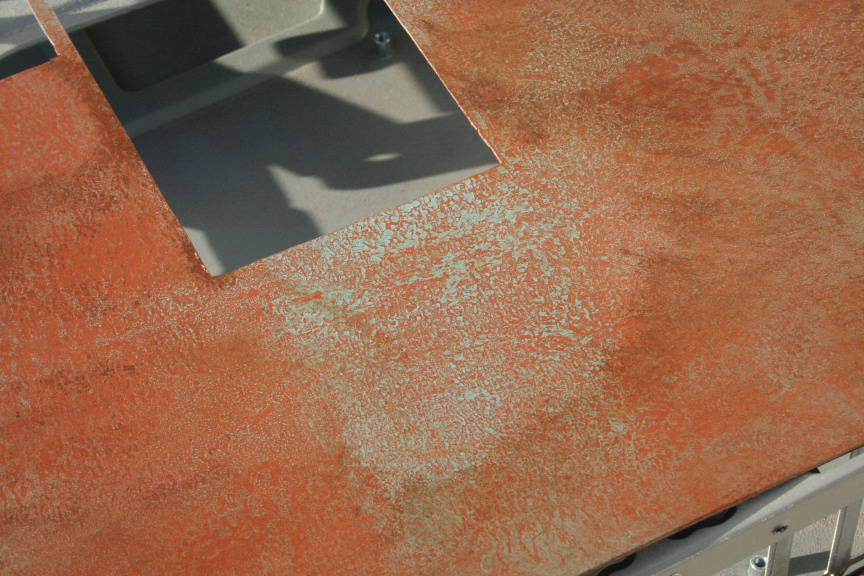
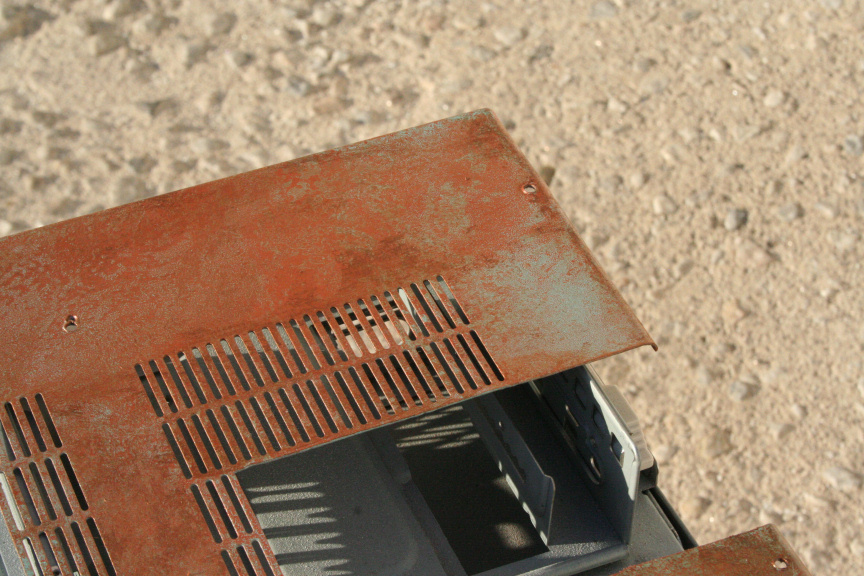
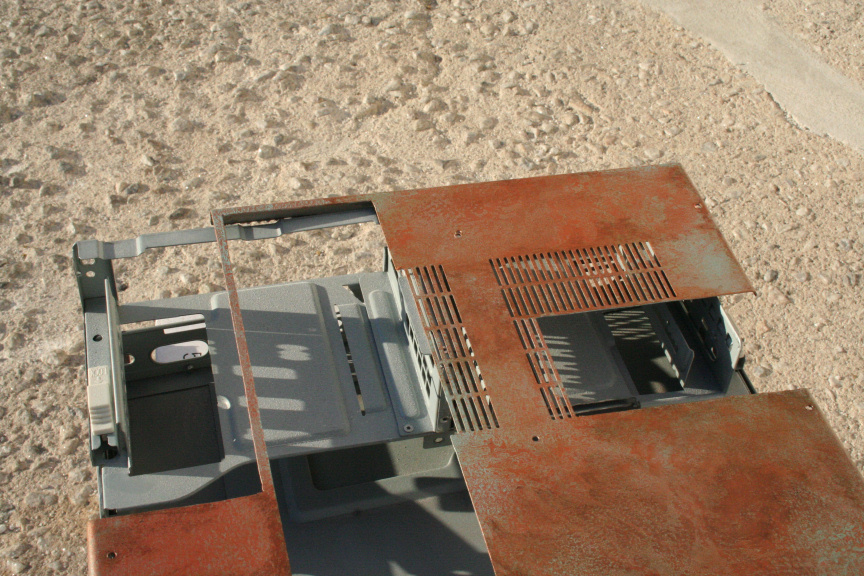
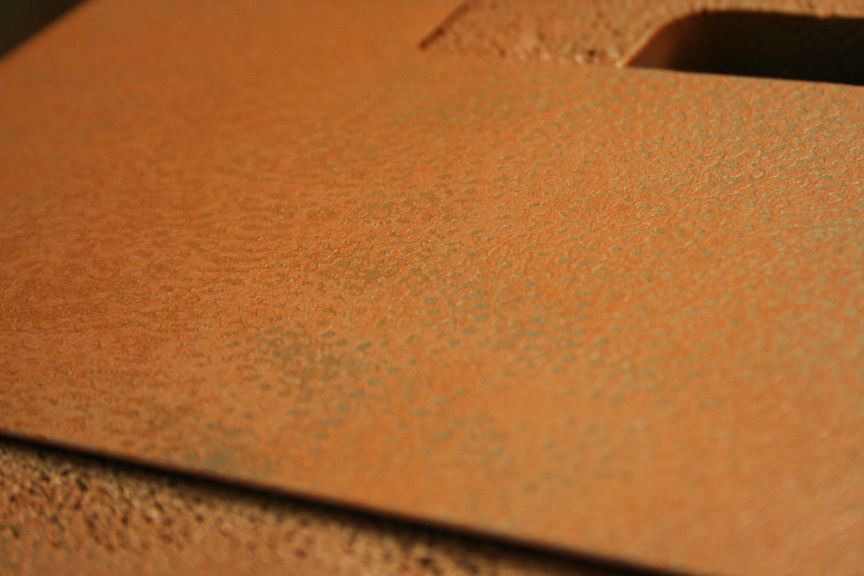
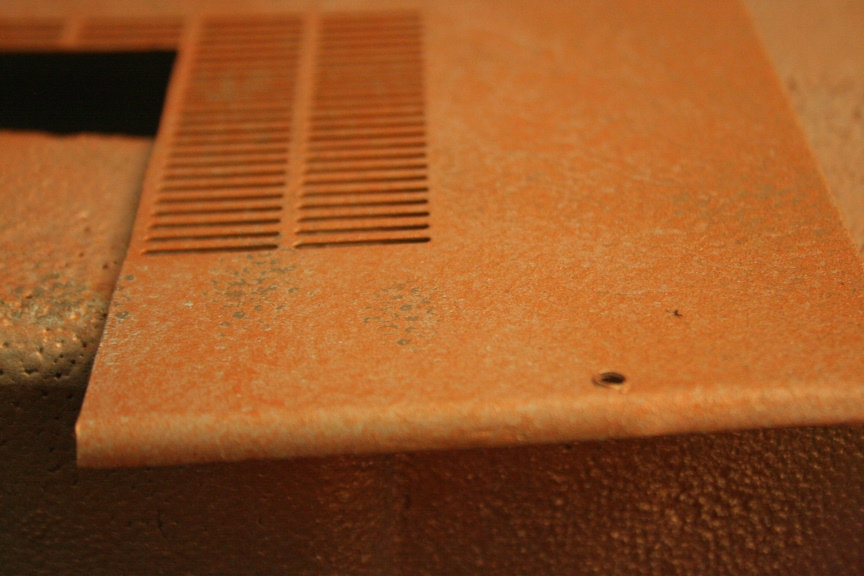
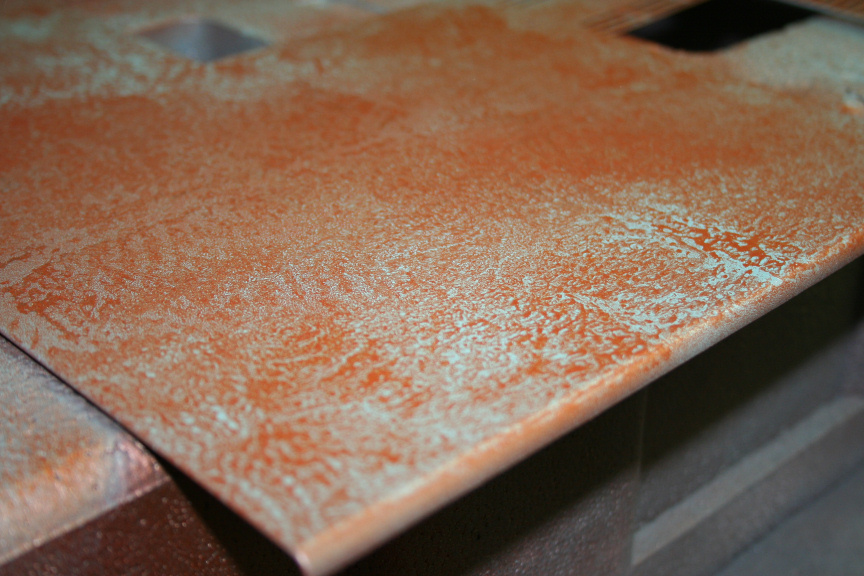
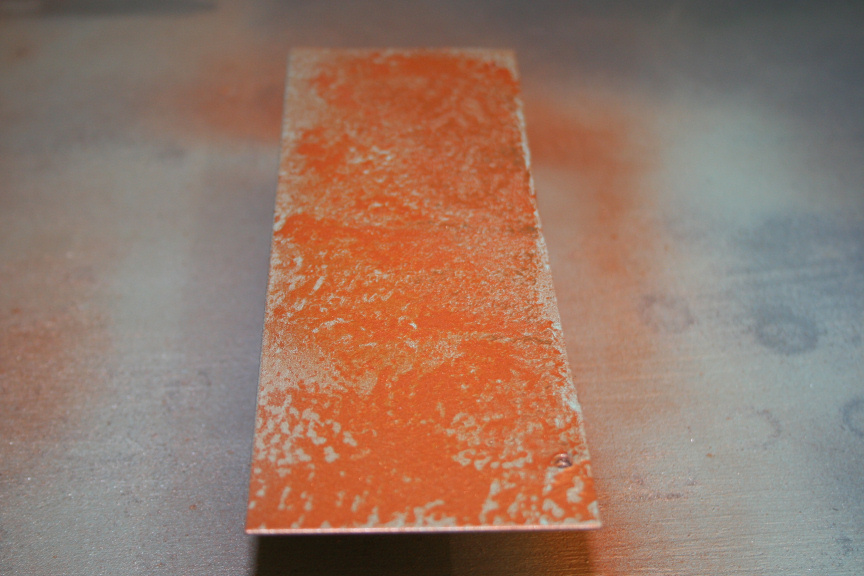
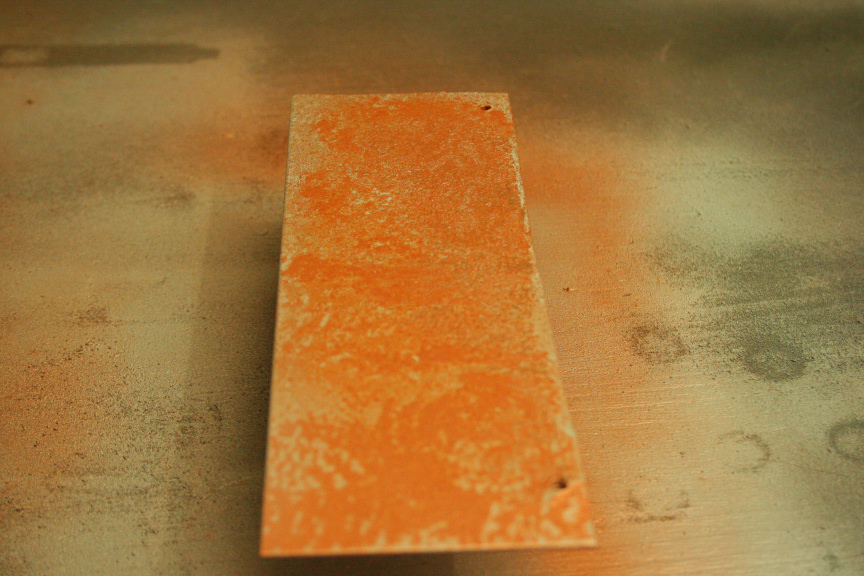
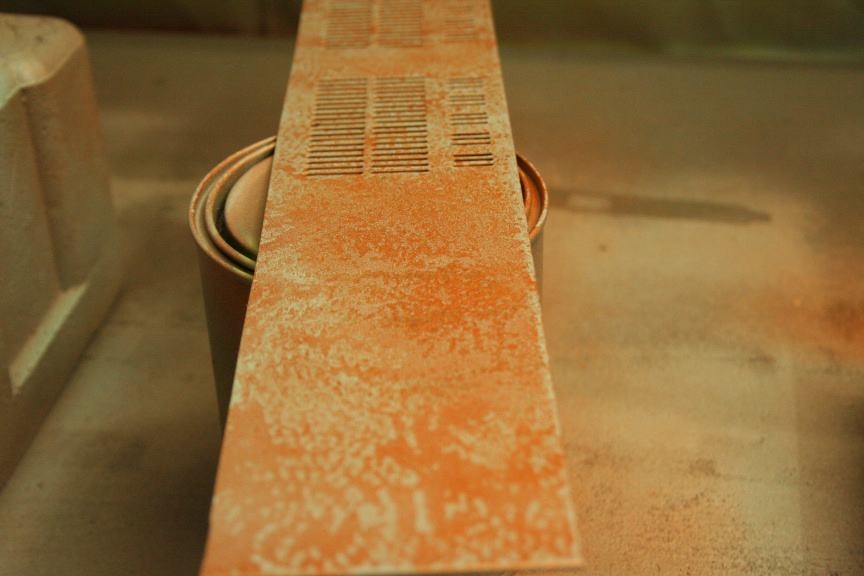
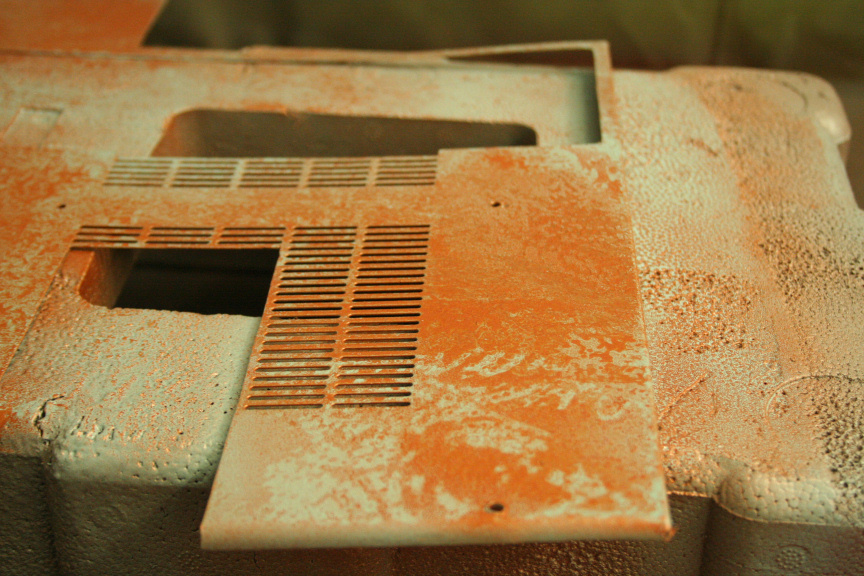
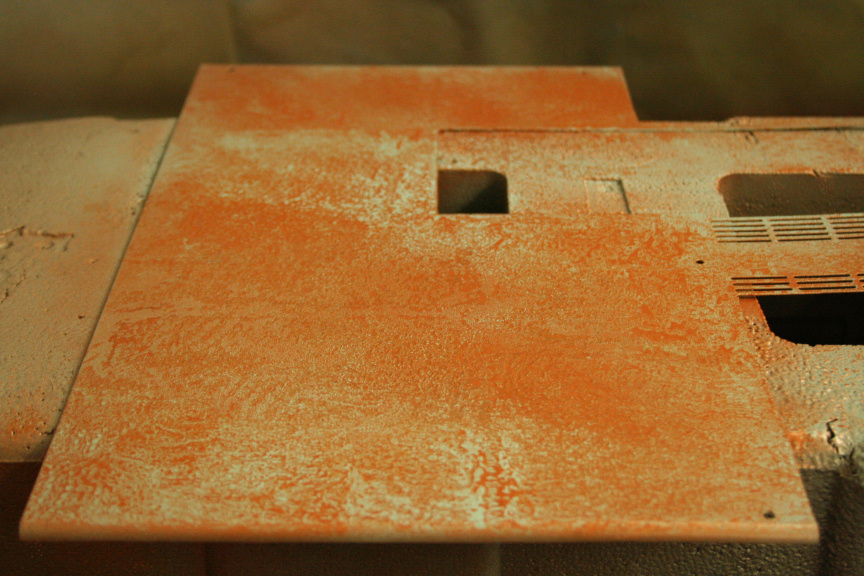
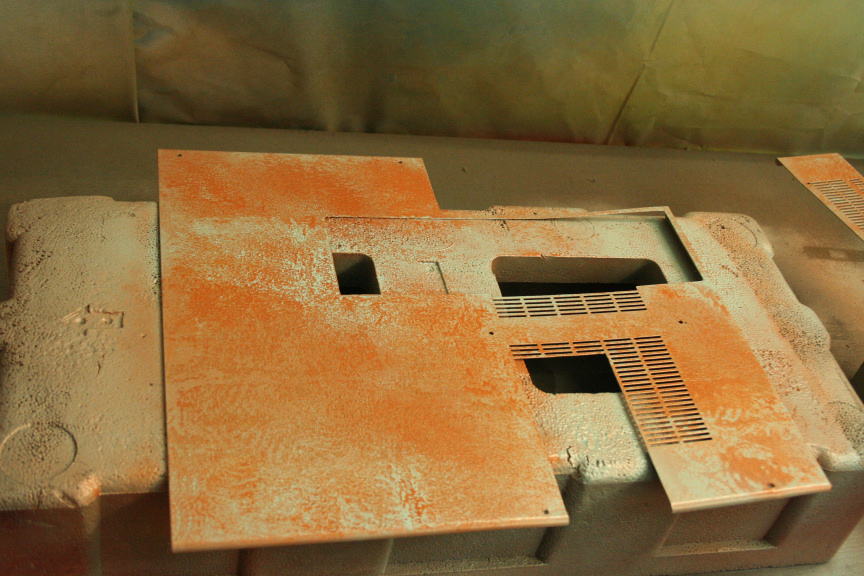
Aniway, the rust effect is finished, I aplied the ageing technique and several tones of copper to give it a more realistic look. The turquoise is very mild and I can´t quite catch it on camera, I took some pictures outside in the sun, hopefully that helps.
You´ll also notice I decided to add some extra effects and I´ve made it look as if the case had been partially submerged from the bottom left corner upwards.
This has without a doubt been the hardest and most time consuming effect I´ve ever done, the whole copper rust thing.
Hope you like it.
-
Lol I know, but thanks for reminding me again, freaking out here hahahaha
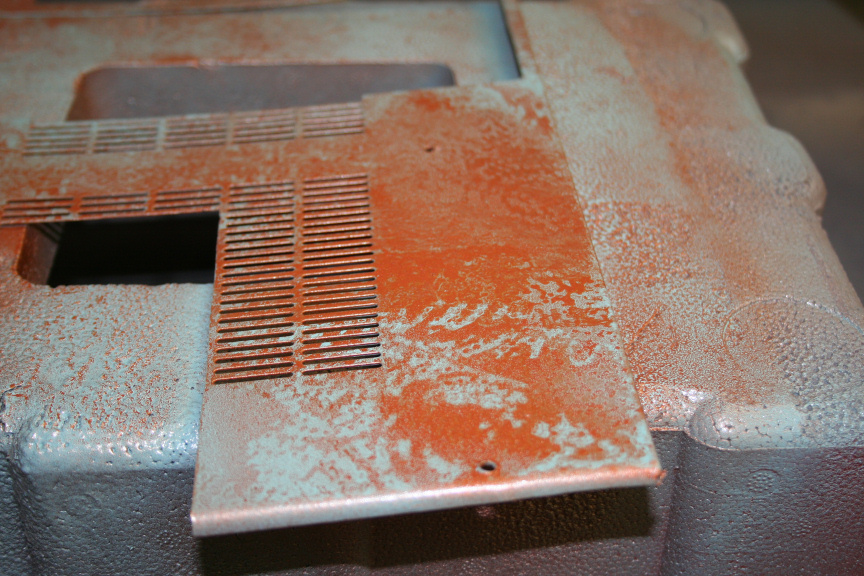
Today I will hopefully finish the paint on these parts, and do the last of the mounts on the main chasis for the 2x 360 rads and start the paint. The liquid cooling equipment arrives tomorroe evening, I will finish the paint on the chasis part then, mount the equipment and on thursday go to the plumbing shop and get the piping done and mounted, then do a loop test run till friday to make sure its all go, mount the whole PC, and were done.
Except of course the lamptron switches and FC10 for the front, which have not arrived yet and do not if theyll arrive in time.
Worst case scenario ill paint a dvd drive to fill in the slot so it looks finished.
-
-
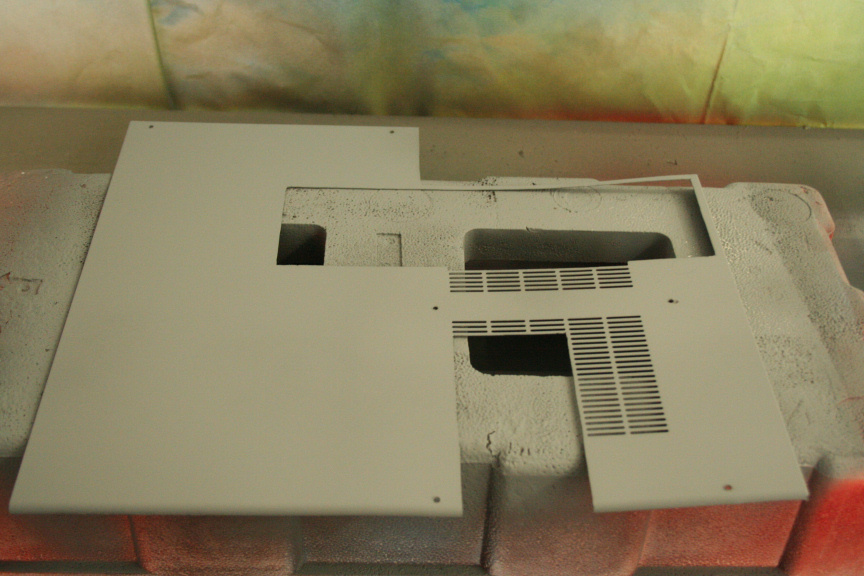
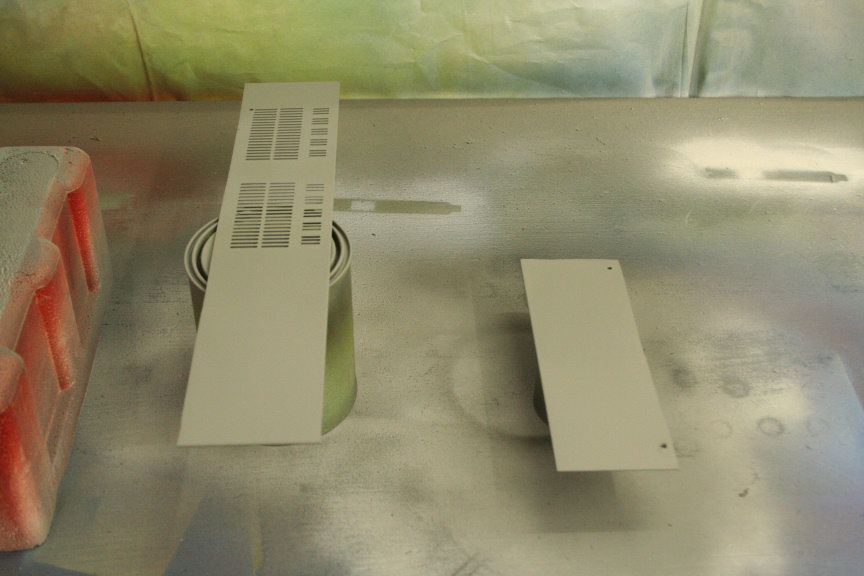
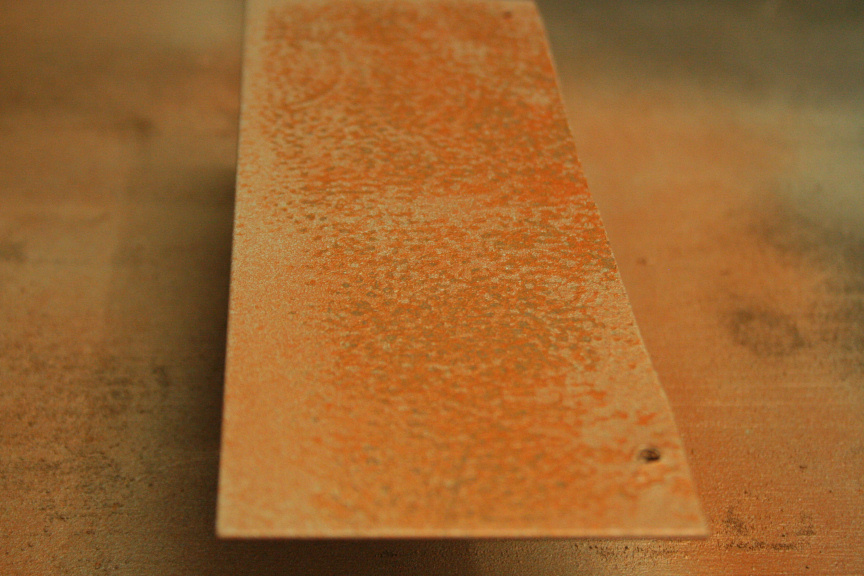
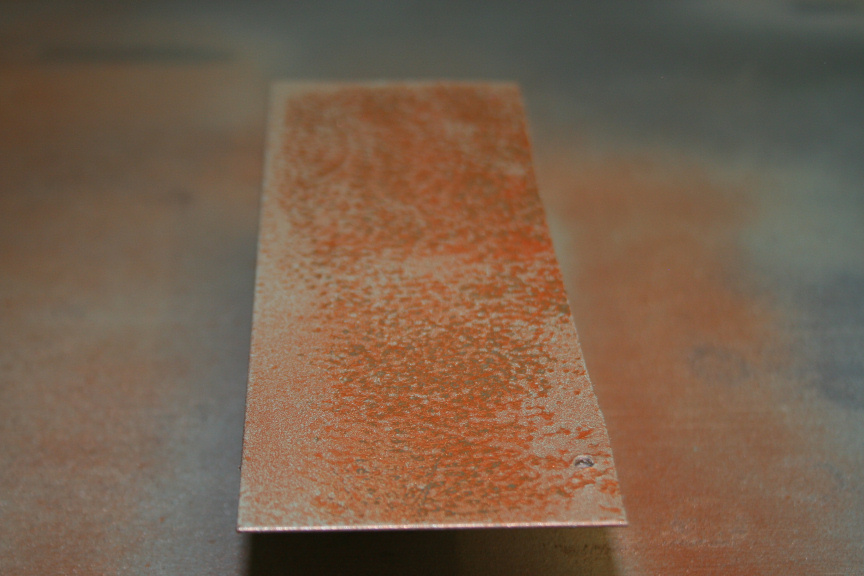
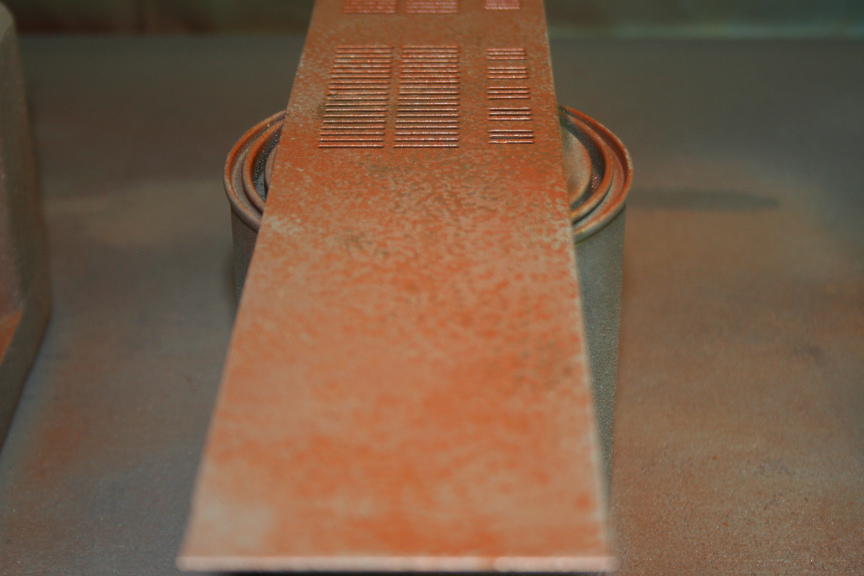
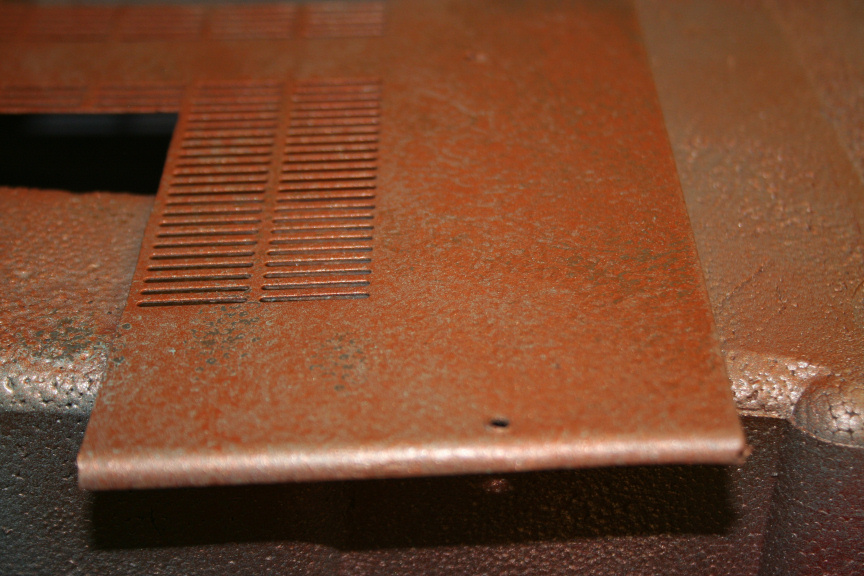
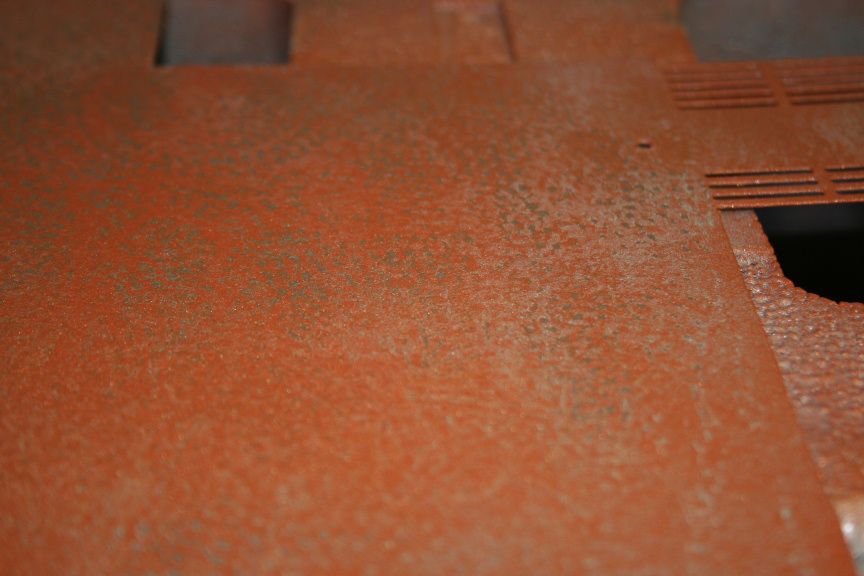
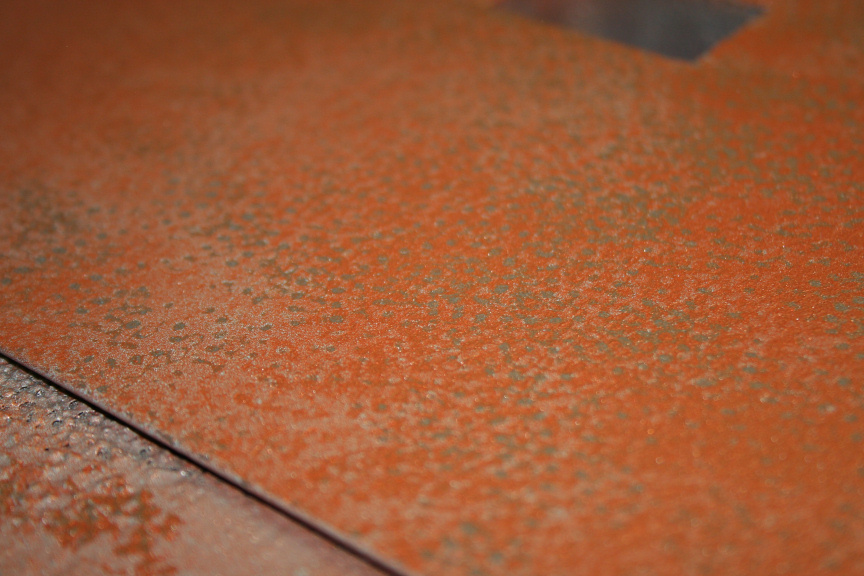
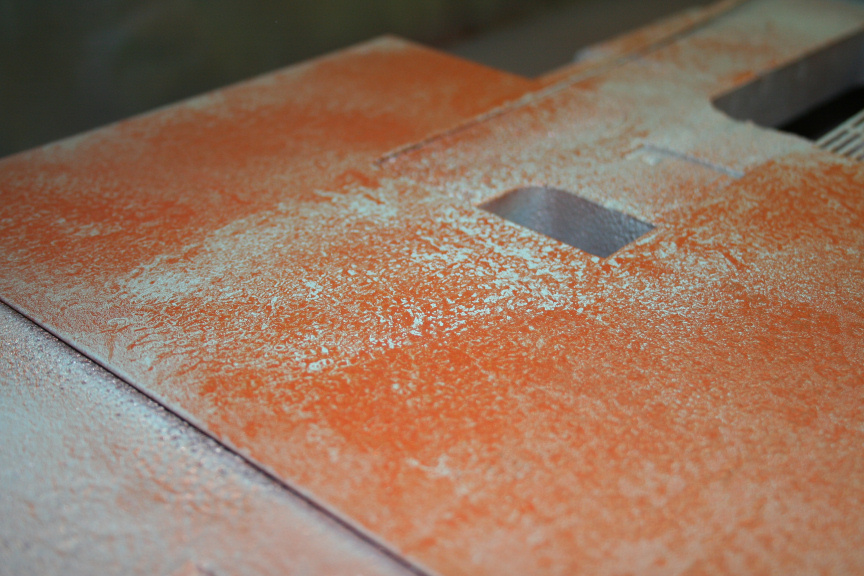
Todays Update.
I´ve started with the paint. Basically everything that´s not wood, is copper, but adding the post-apocalyptic flavour in there. This technique I´ve been developing for a while and it´s the first time I implement it in to a mod.
By the end of this update you will not see the final product, you will see what it looks like before the ageing process, i.e. the copper goes in most places a lot darker, like real copper, the reason for the extra light copper color is to be able to have highlights once it´s ben aged. The turquoise is the opposite, it is very pale here, and it will have aged highlights once finished. The reason I can´t do this today is due to the fact that to get to this point requires quite a few coats and it needs a lot more time to dry, which it needs to be completely for me to aply the ageing process to this.
Without further wait, the process pictures.
First, the primer.
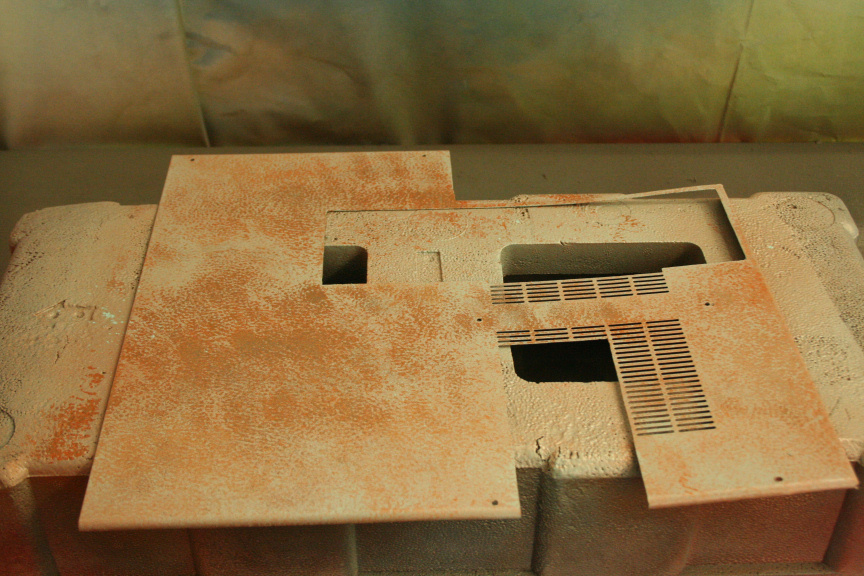
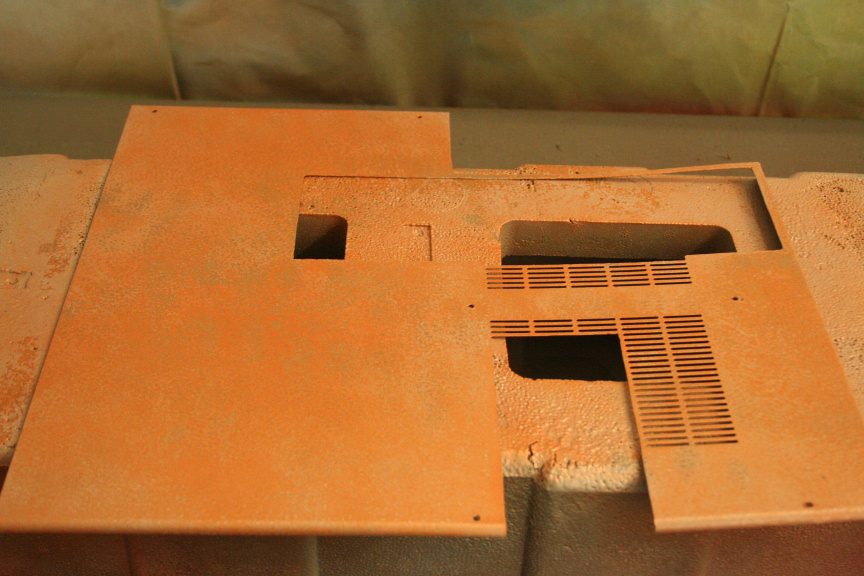
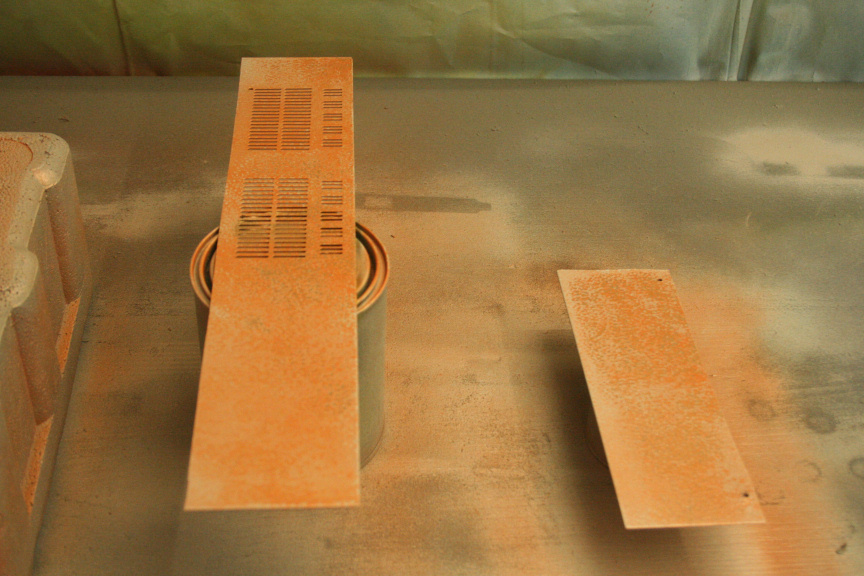
To continue, a solid coat of the orange-y copper and before it dries, a light coat of turquoise. Once aplied, using absorbant paper I go all over the fresh paint creating a non solid surface or color which will be the base.
Once dried, I aply a almost solid coat of the copper orange from further away than the usual, as you can see the dried paint uneven surface is doing it´s job by not allowing the fresh coat to reach every corner. I also further the paper usage to create a more uneven surface for the next coats.
This goes on for 2 more coats alternating both colours.
To finish off, I give a completely solid coat of turquoise and very quickly another of the copper. The wet coats and the surface react with eachother giving me the final look before the ageing process.
Here´s a variety of pictures of it with and without flash.
The final rusted copper look coming tomorrow.
-
Thanks ArgOs!!! Believe me it´s been hectic, I´ve been working on it for every spare minute that I have, the problem now isn´t so much time as I´m used to doing fast modding, it´s parts delivery, water cooling kit not arriving till wednesday and god knows if the Lamptron package will arrive in time (switches and FC10)
-
In deed my friend, Ive seen some mods joining this comp that have left me like omg... I aint winning this one hahaha, but it´s all good fun, for me its just for the sake of joining and exposing my work, but if anyone who´s mod I like like yours wins, then I´m happy! : )
-
-
Hey mate, excelent work, I´m glad that we´re both doing Steampunk based projects for this competition but that they are completely different from one another. Best of luck and excelent work!
-
Right, final small update of the day.
I am officially knakered, I need a shower, badly (lol), a bit of dinner, a movie, and bed, can´t believe the weekend is already over and work tomorrow :S
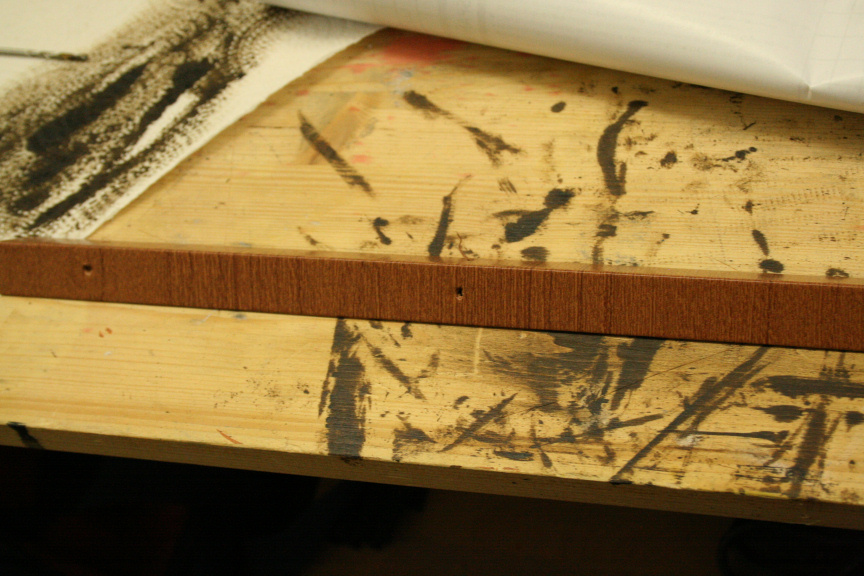
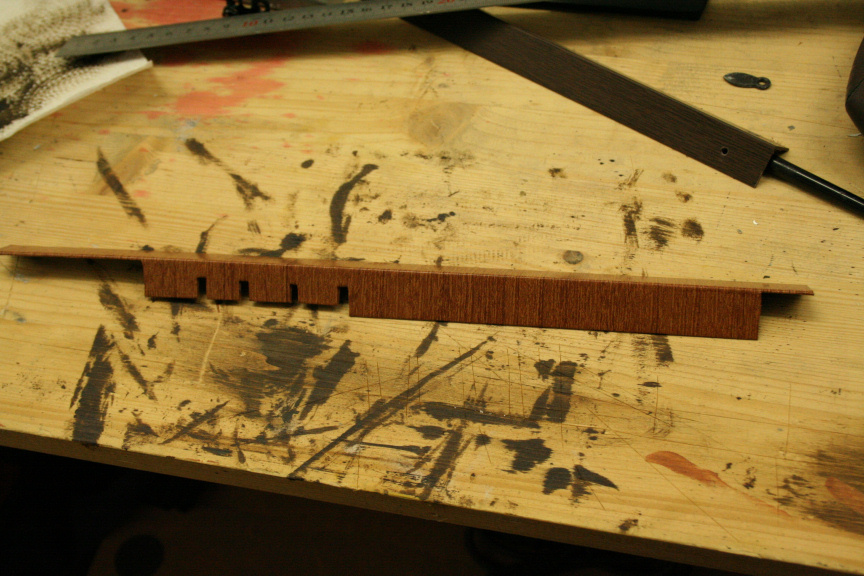
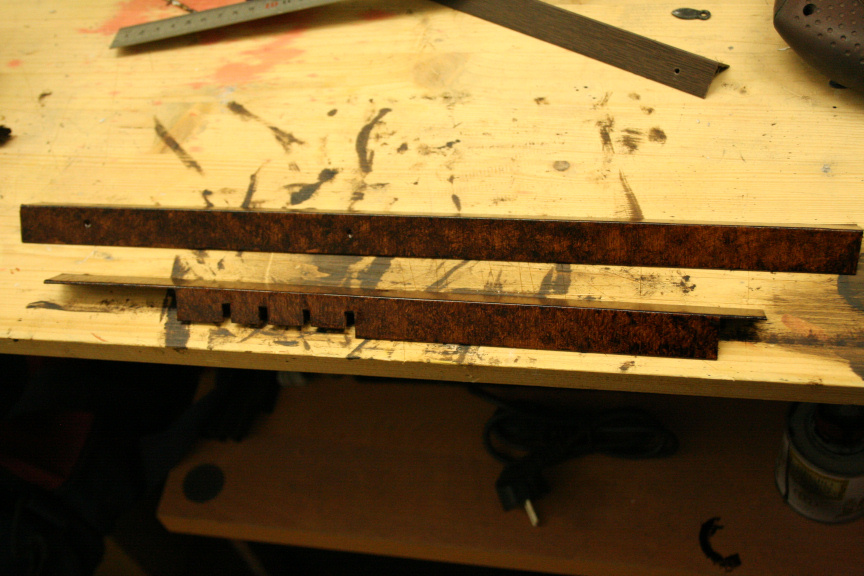
Aniway, I finished preparing two of the borders.
Vinyl:
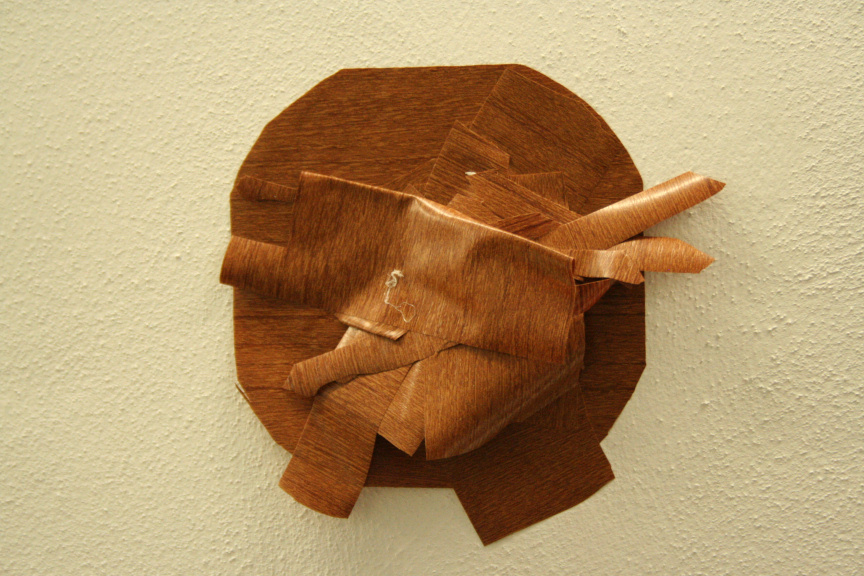
Leftovers on the wall, yep.
And the ageing proccess aplied, i.e. final result:
And with this we reach 99 pictures on the project! I hope you all have a pleaseant evening and again, thanks for reading.
More tomorrow.
-
thanks a bunch tom1, I´m freaking out to finish in time for the 15th, water cooling stuff doesnt arrive till wednesday and who knows if the lamptron packet with the switches and FC10 will arrive in time : ( do you know if we can use the extra couple of days to "upload" the finished pictures, to continue working on it?
-
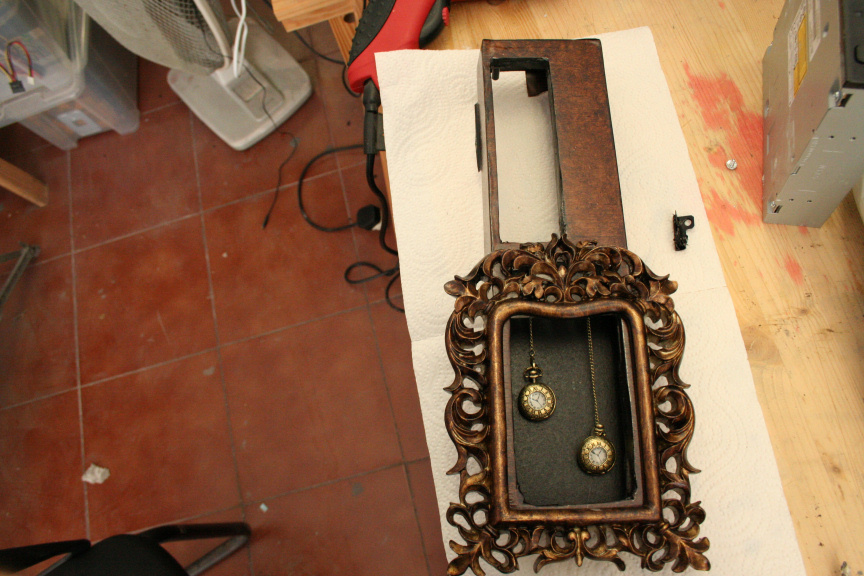
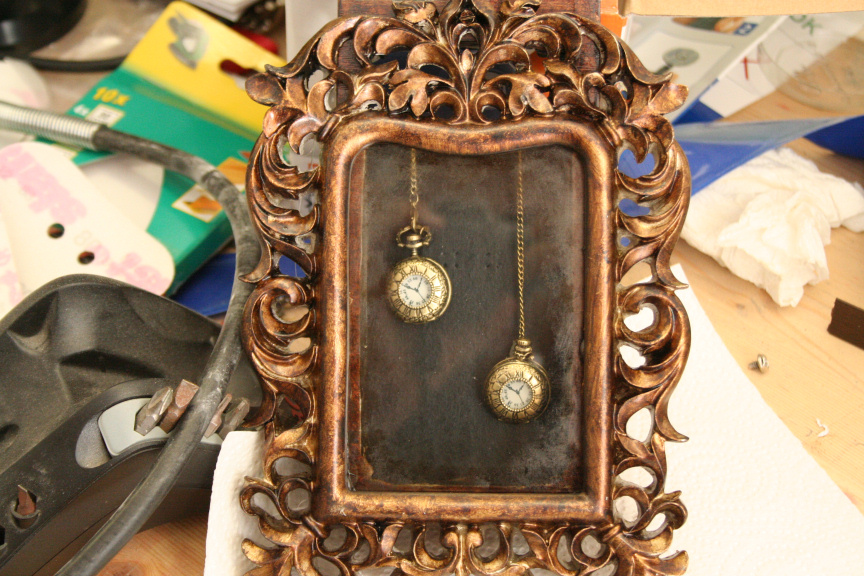
thanks!! ^^ I was going to do something different and the the missus had that idea!, but since there´s no space for the clock itself, I though, if I can find small enough pocket watches, the pendulums themselves can be the clock, and I found them!
-
thanks tom1! : )
-
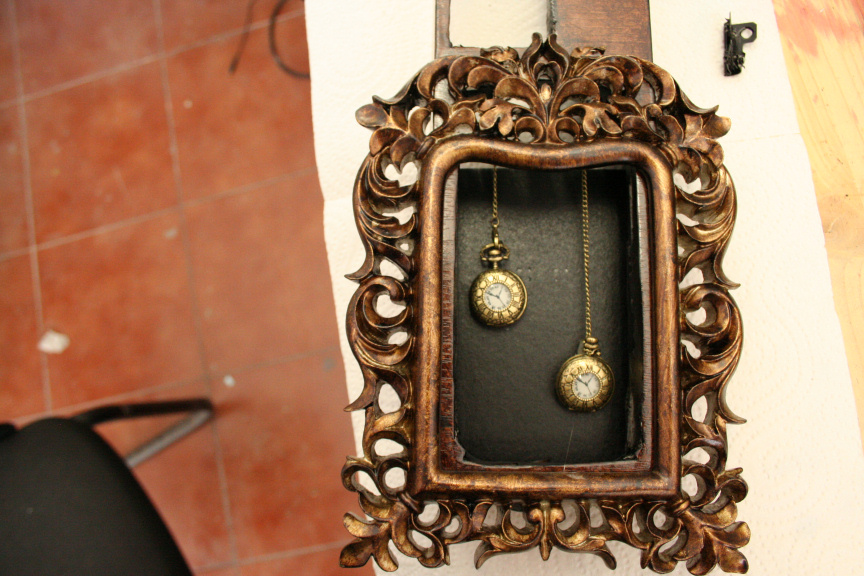
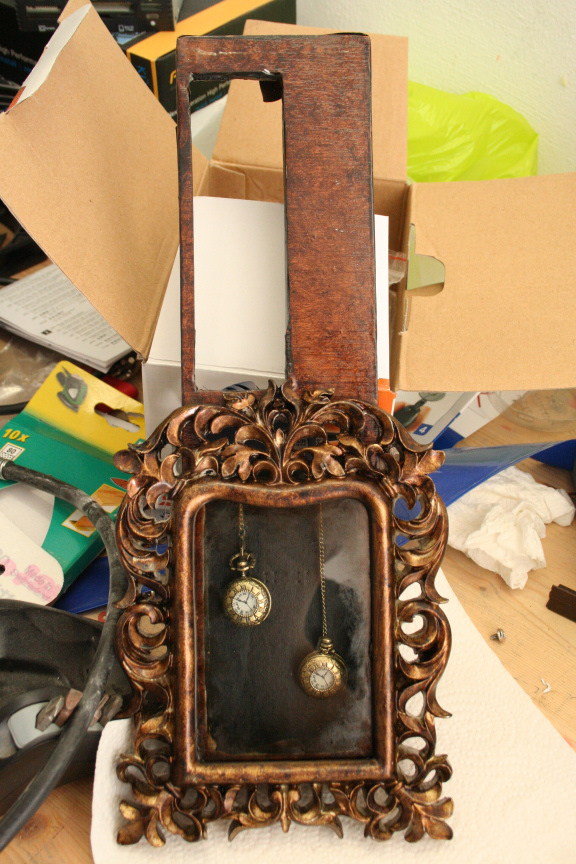
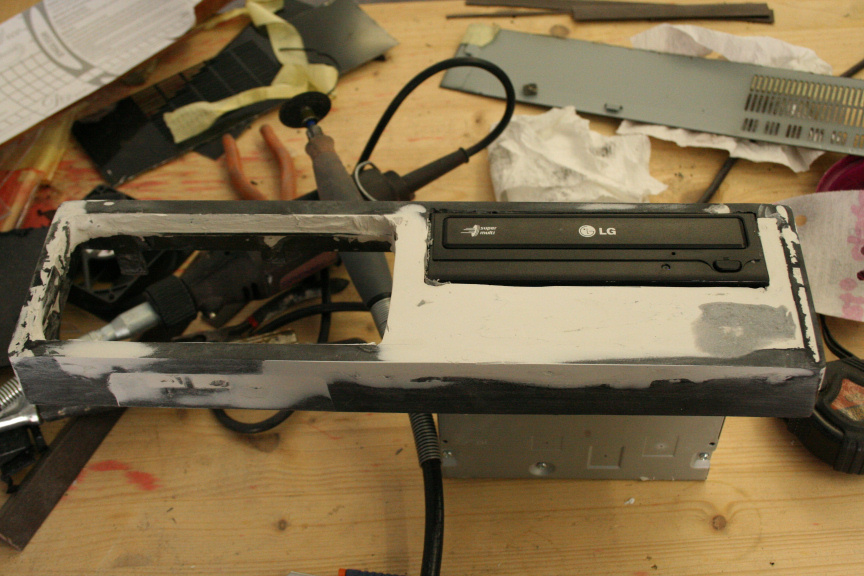
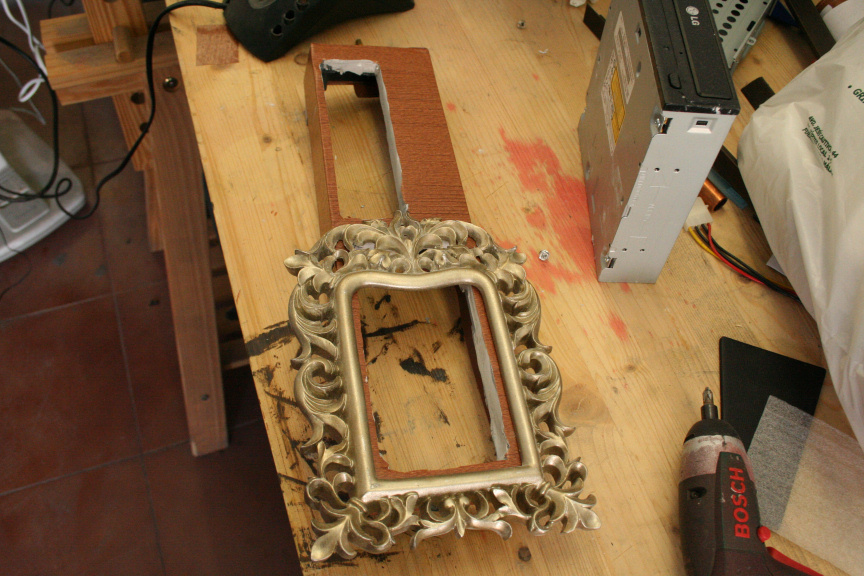
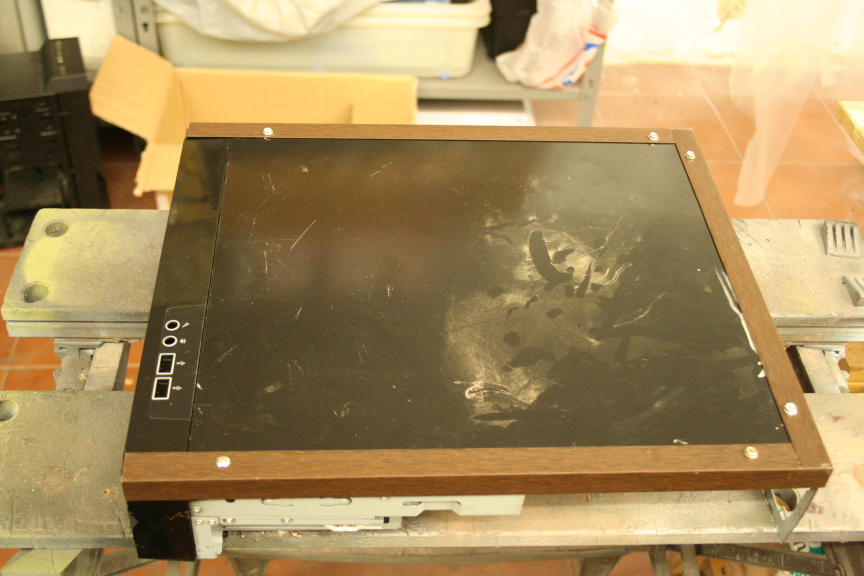
I know I said only one more update today... but I´ve just finished the front of the case, or at least until the package from Lamptron arrives, fingers crossed it arrives before friday or I wont meet my deadline.
Point is, I´m in love with how it turned out so I wanted to come upstairs and post it so you guys can see it.
So what I did is, using the back of the back plastic of the frame, I sanded it down and throw some matt black paint on it. I cut it down to size and fit it in the opening. I then added two screws on the back of the middle of the frontal of the case to hang the 2 mini-pocket-watches from. I then stack them to the back plate using a bit of hot glue.
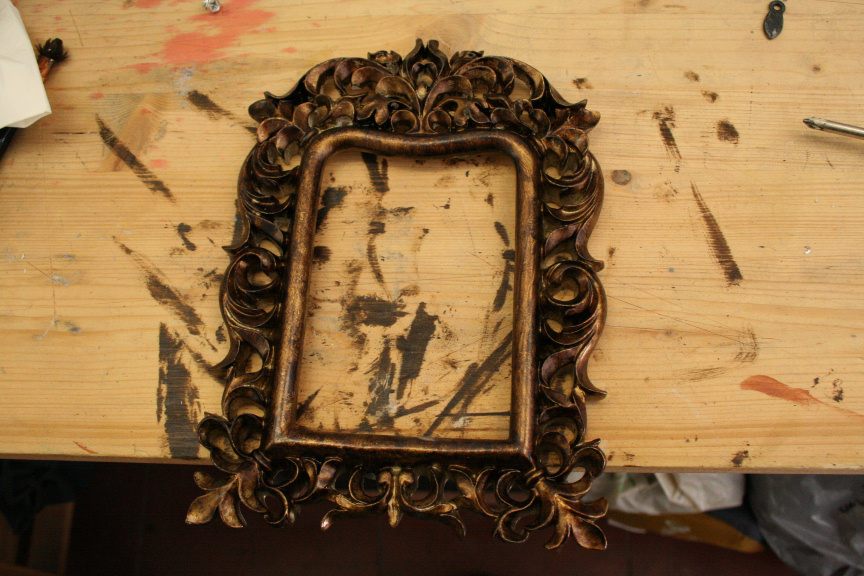
Mounted the frame on the case to make sure it all looked ok before I screwed the frame in (with it´s glass).
All good, then I put the glass in and screwed the frame on to the frontal and aplied the same paint effect to the screws so they would not be visible. I also added the same effect to the borders of the glass to make it look old and stained.
And the result...
3rd and last update for today later on.
-
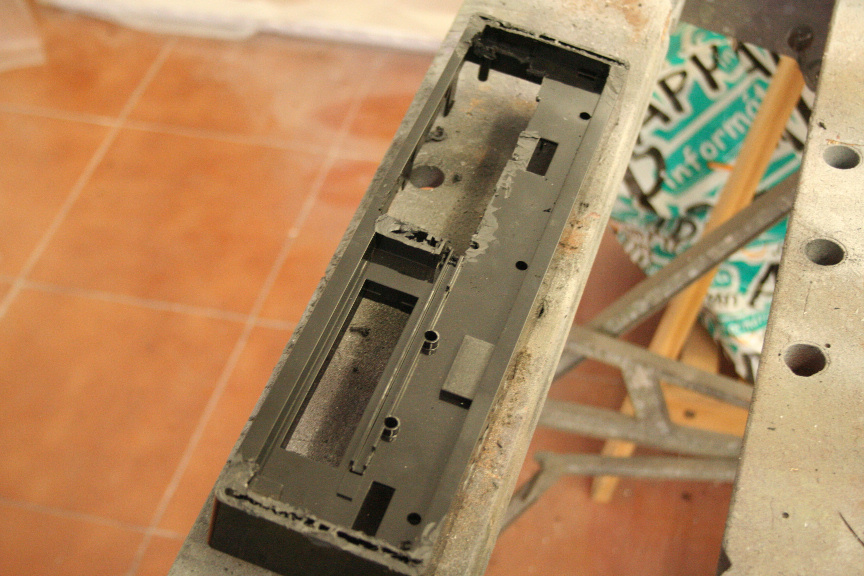
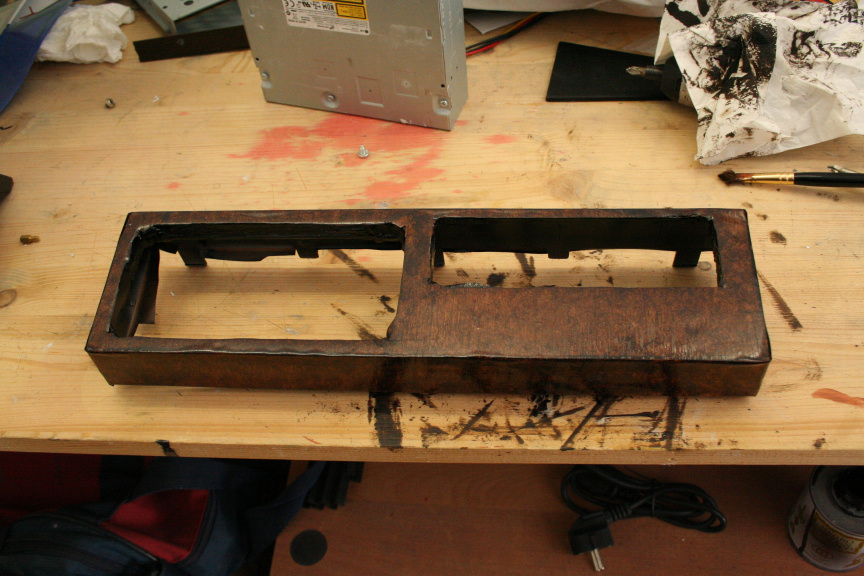
First update of the day...
To freshen up your memory, this is what the front looked like once I had cut out everything I didnt need out of it, remember that originally it had 2 doors and all sorts of things.
So I cut a further section to incorporate a new idea I had for the front (which you will partially see by the end of this update but not completely by a long shot till, with a bit of luck, the second and final update of today (i.e. tonight).
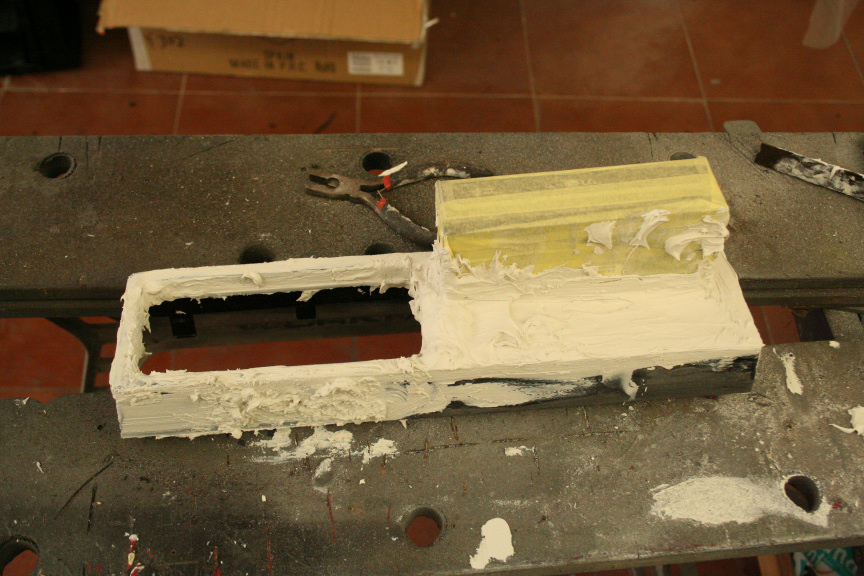
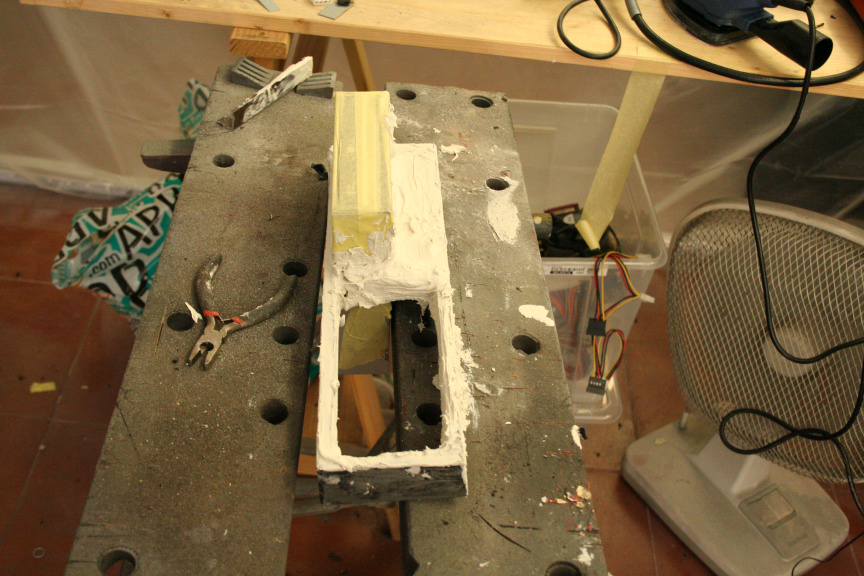
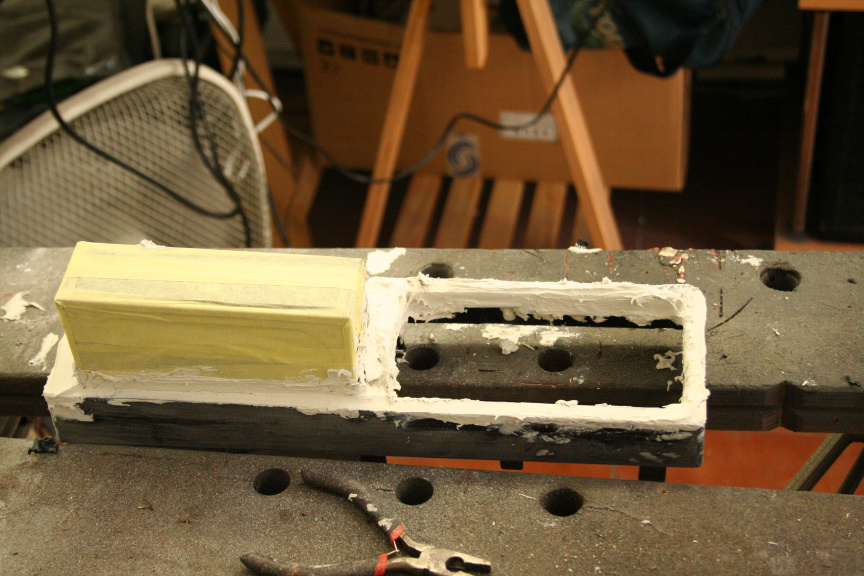
I then filled it all up with epoxy filler.
Once it was dry I started with what will become a couple of hours of sanding.
That´s how it looked yesterday before I called it a day and went out for a drink as I needed to disconnect badly.
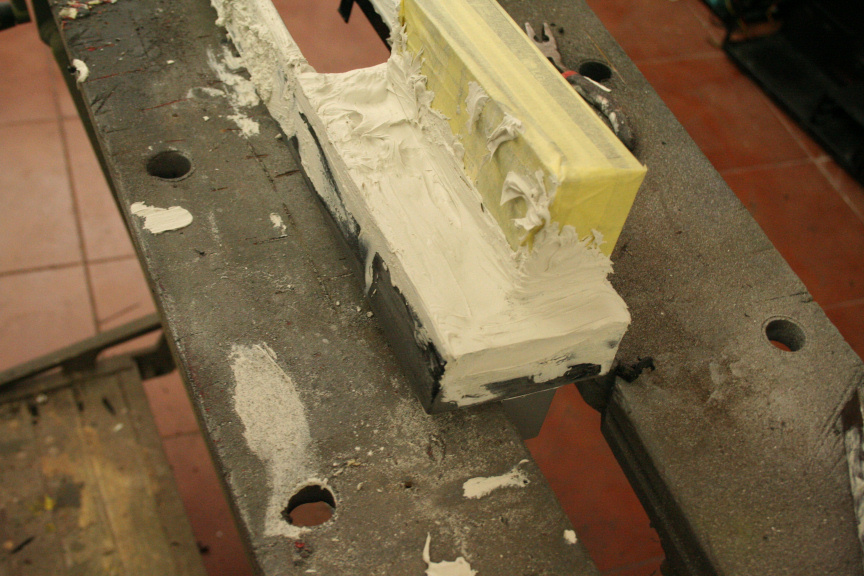
Today, I started fresh this morning at around 10am and continued sanding until it was ready.
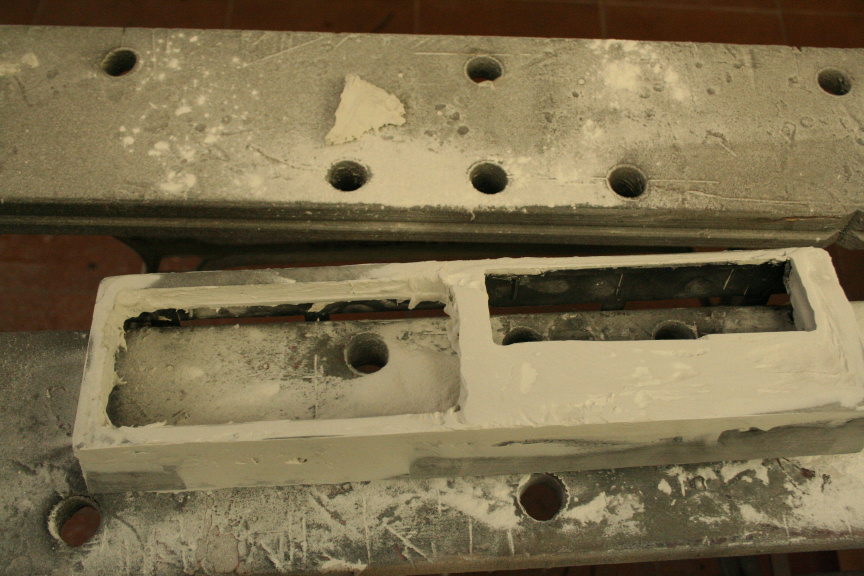
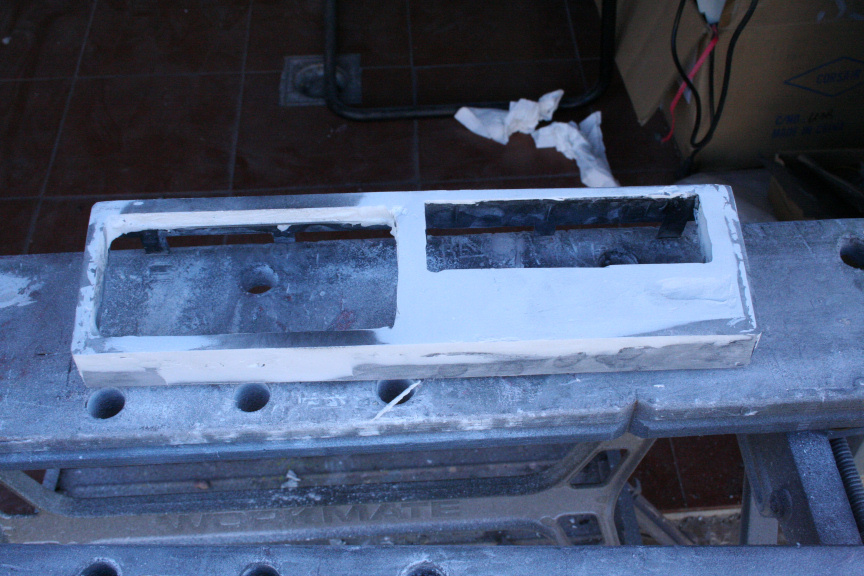
Next I used a bit of filler for the places where it had created air bubbles and ended up empty and continued sanding until it was as ready as it was ever going to be with the limited timeframe I have left (I no longer feel my hands lol).
Next I cleaned it up and aplied the vinyl (yes the front will be going in that wood look, the same as the PSU).
I thend modified the picture frame I had bought so it will simply slide in and "hug" the bottom and sides of the frontal.
.Lastly and more importantly, I aplied all the ageing effects to both the vinyl and the frame and put them togueter.
.....Later today I will be triming the leftovers and keep on working on the rest of the design of the frontal.
Until then.
-
so what happened with this mod?
-
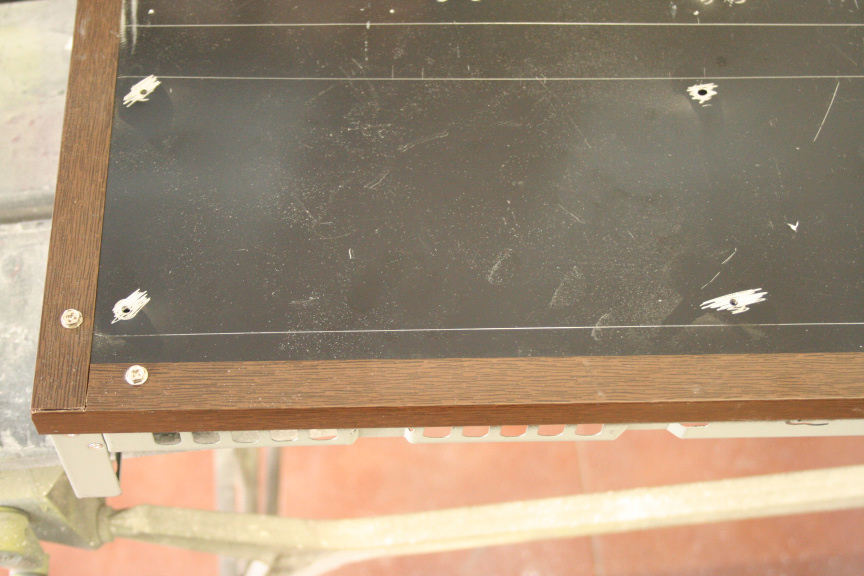
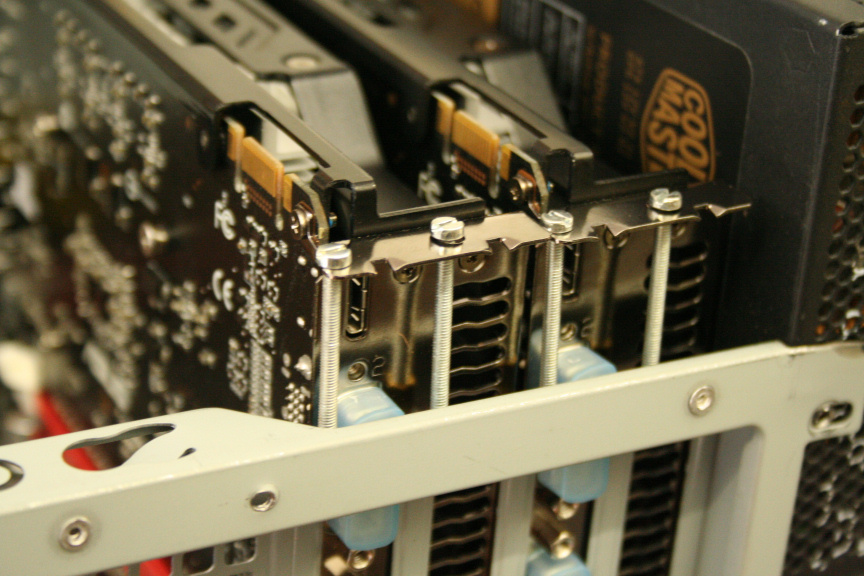
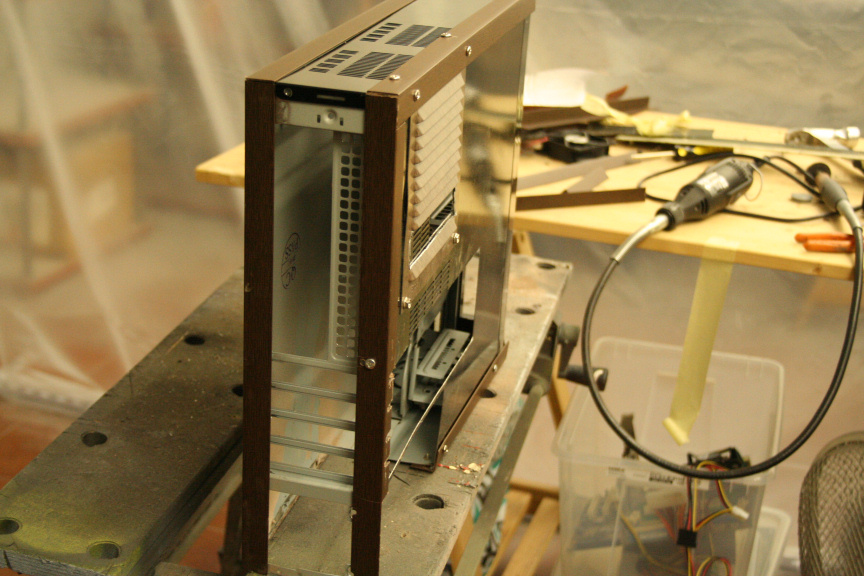
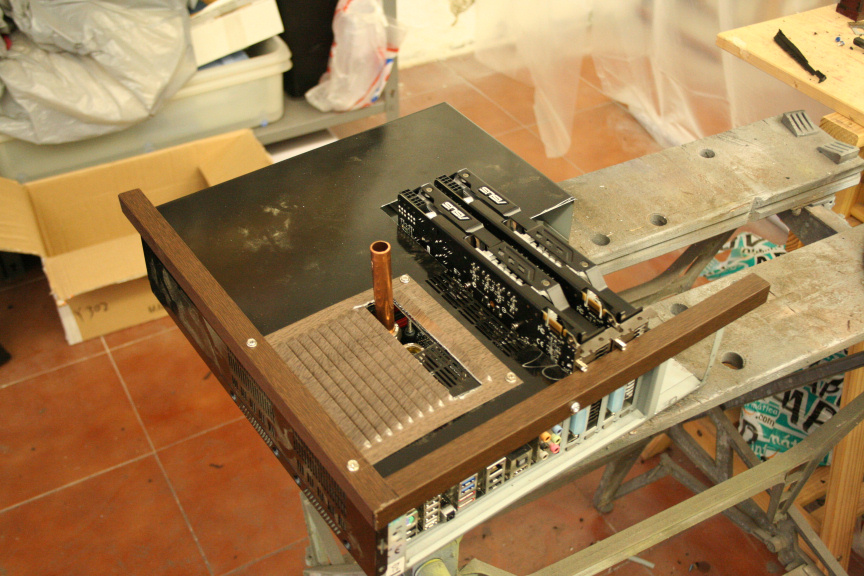
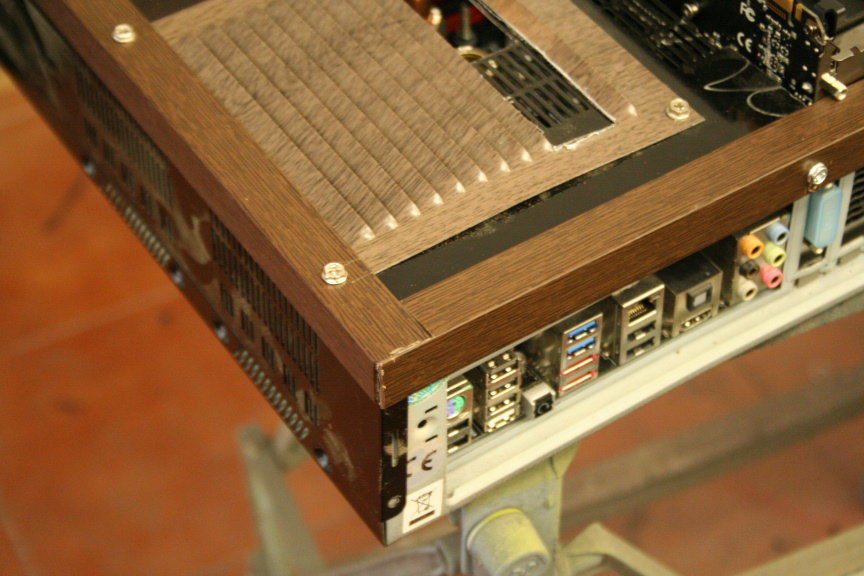
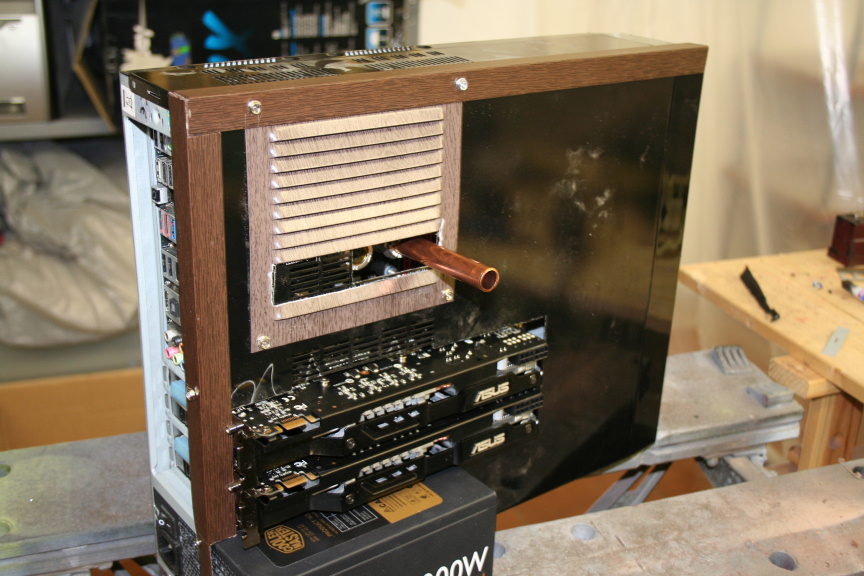
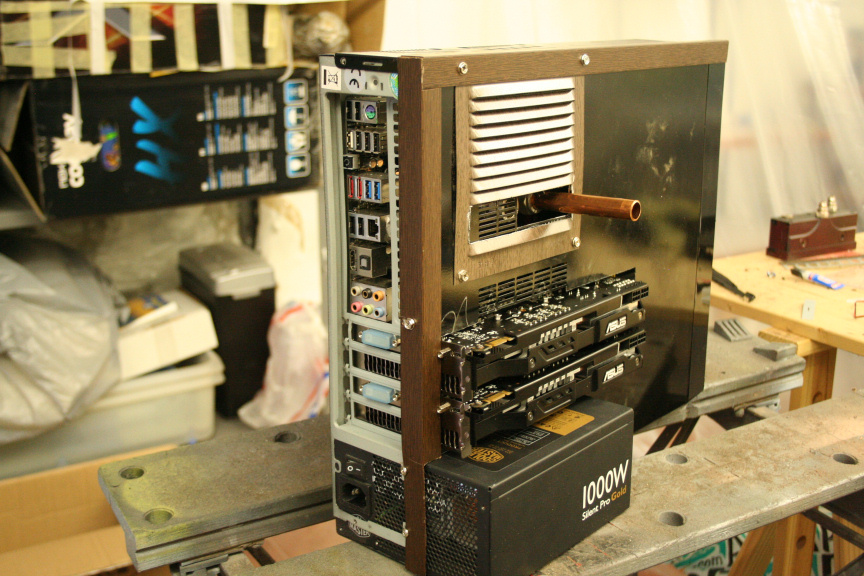
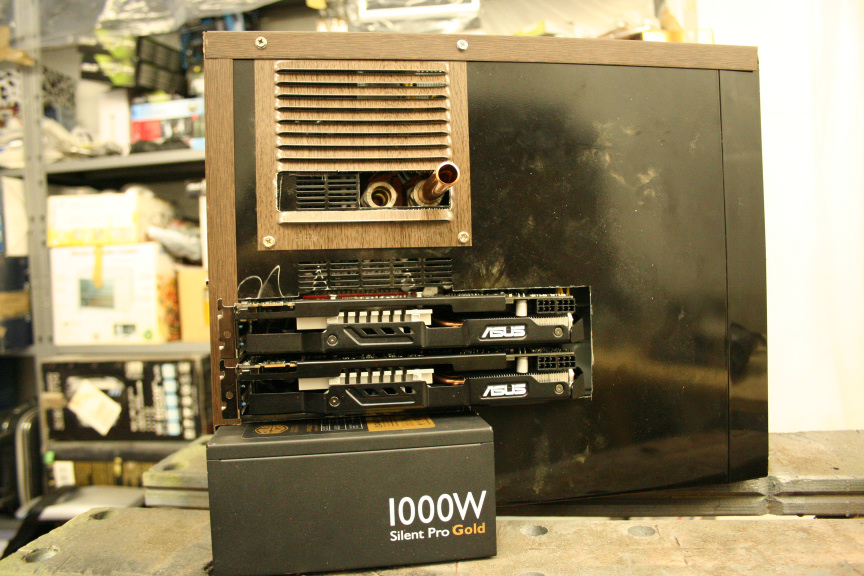
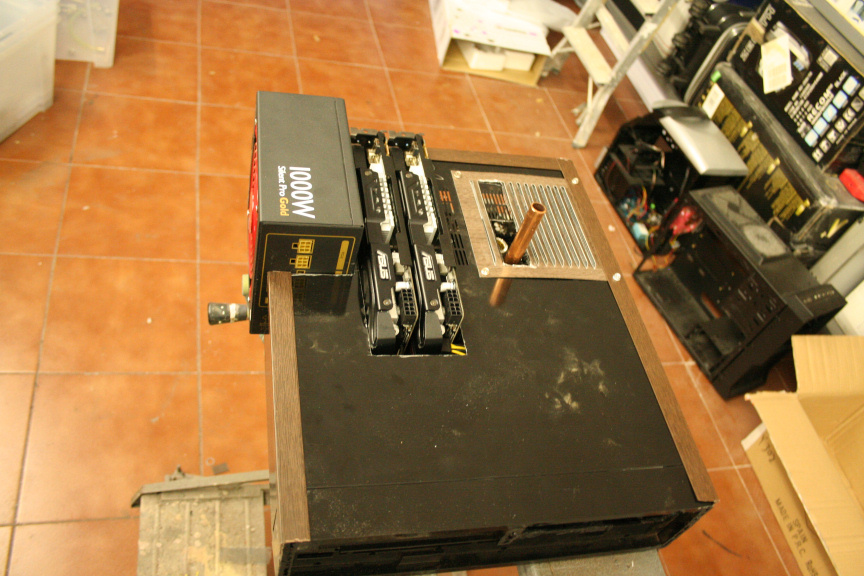
Quick Update.
It doesn´t seem like much but it took me all the time I had to spare today to do this, the steel on this case is really stubborn (specially on the back where it´s thicker)!
Aniway, the screws I ordered (yes I had to order them, it seems no one locally had 3mm x 50mm screws) arrived and I they did the job perfectly, now the GPUs are properly secured.
And all the borders have been cut to size and test mounted. Some trimming left to do on them and adjusting for a perfect fit, but it´s really starting to take shape now.
Aniway, more tomorrow hopefully.
-
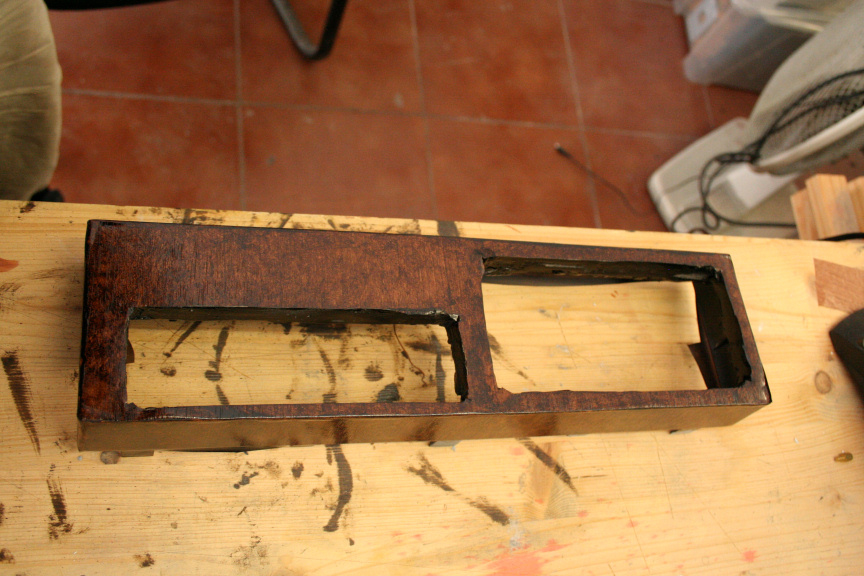
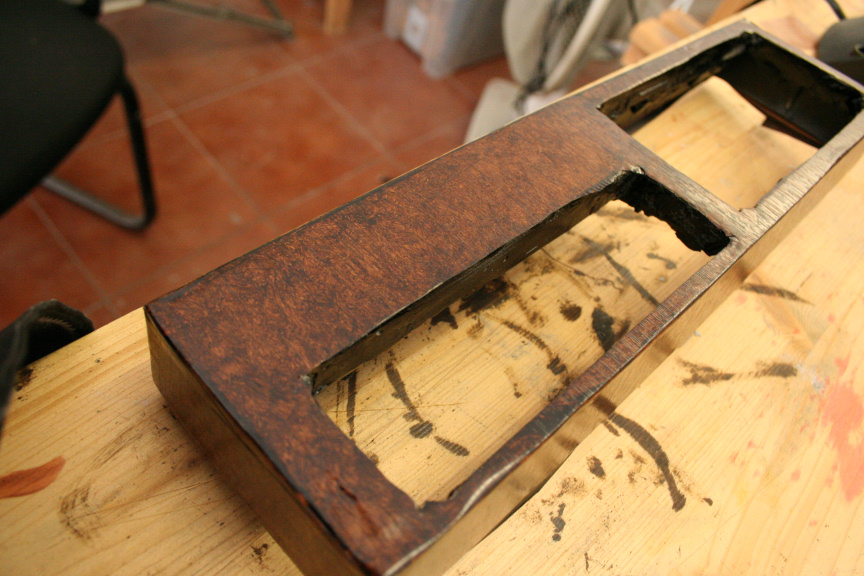
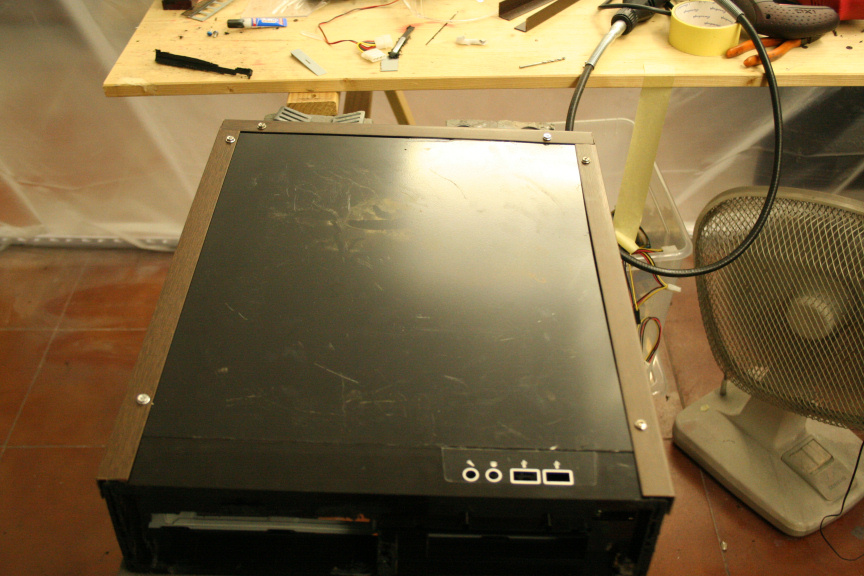
Update.
Today I´ve started to cut and test mount the side covers. While they look like wood, they are plastic and they are not the final look, they simply come like that from the store, I will be using vinyl and ageing process so they match the PSU. The same treatment will be done on both sides of the case.
Originally I was going to use rubber covers for the cuts so they don´t look sharp, however in order to add more "wood" to the design, I will be using the same parts cut in half as on the side, this should increase the wood/copper ratio of the final look.
I´ve also ordered all the liquid cooling stuff I need, and it will hopefully arrive on Friday so I have the weekend to mount everything and start and finish the front of the case so on Monday I can go to the plumbing suplies shop and cut, test mount and buy all remaining fittings and copper tubing to complete the loop.
If the parts don´t come by friday I´ll have to delay the plumbing details till tuesday or wednesday which will only give me a 2 day painting window to finish the project, so it´d definately cutting it short, but I feel confident at this point.
Aniway, photos!
Hopefully more tomorrow.


 .
. .
. .
. .
. .
. .
.

Mod'n Roll 2012: APASF ("A Post-Apocalyptic Steampunk Future")
in Modding
Posted
cheers!