[Scratch] Project: Crimson Server Desk Module
-
nice i follow this project
-
hey guys, just like to clarify that this is not a NAS but a server, the NAS concept came from Tom1´s idea of using FreeNAS as the OS

-
Yes, sorry Luciel. Mine also will be a sort of server. I think I'll put use a Linux distribution and put Owncloud running on it to backup large amount of data from remote, as additional cloud space to the too small dropbox. I plan to put it near the television and to install the XMBC player.
Ok I'll stop to be Off Topic now!

-
Actually sounds like a very interestin config!
-
nice start , but he never considered the plywood a good wood for modding IMHO

-
Welcome back, James!
Thank you for sharing with us your excellent mods!
-
Thanks guys, oh I completely agree with mdf not being the ideal material for mods but as I said in the first post I didn´t want to risk buying good wood and wasting it if things didn´t work out being my first scratch mod and wood mod.
-
Alright
-
Little update today
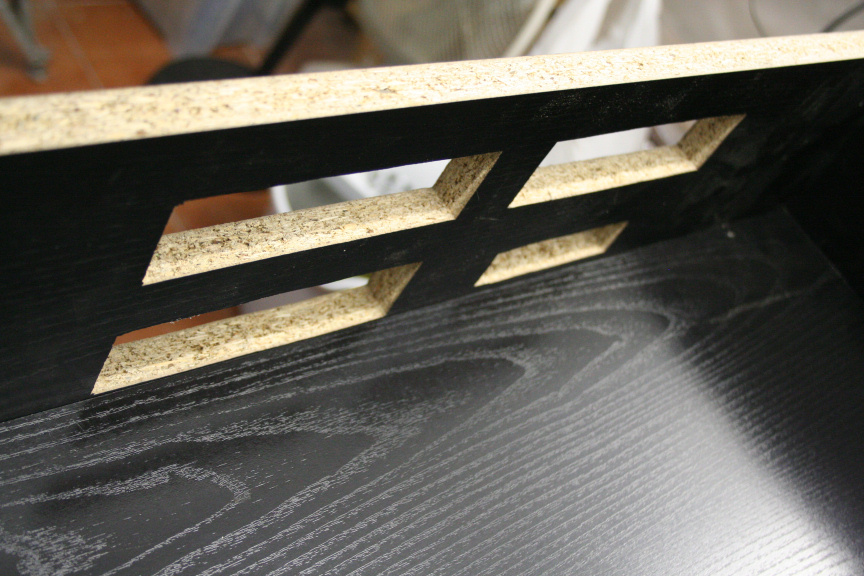
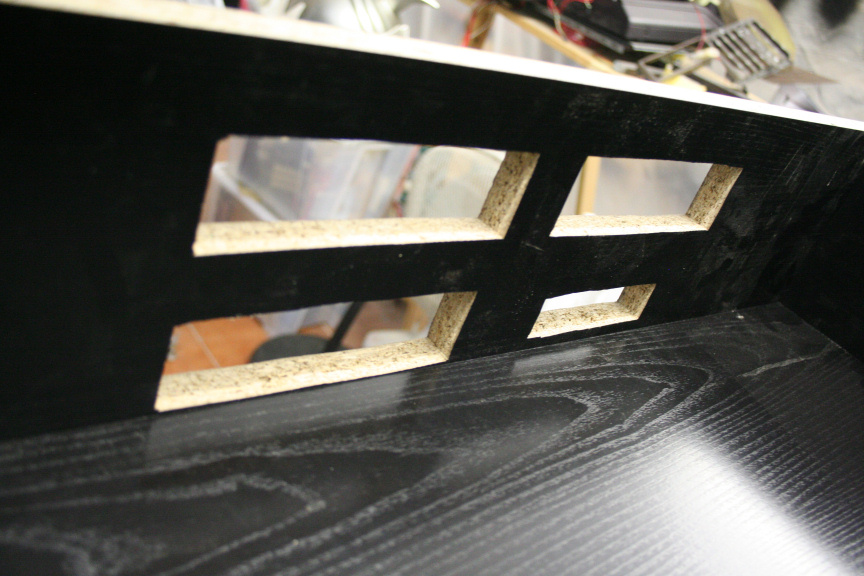
This morning I finished the plexy and I have to say, it couldn´t fit any better or tighter. Originally I was debating wether I should screw it or glue it down or simply leave it alone but, considering how tight it fits, it´s not going to vibrate or go anywhere so, it´s perfect, hell it wasn´t easy taking it out again (as I will be painting the wood).
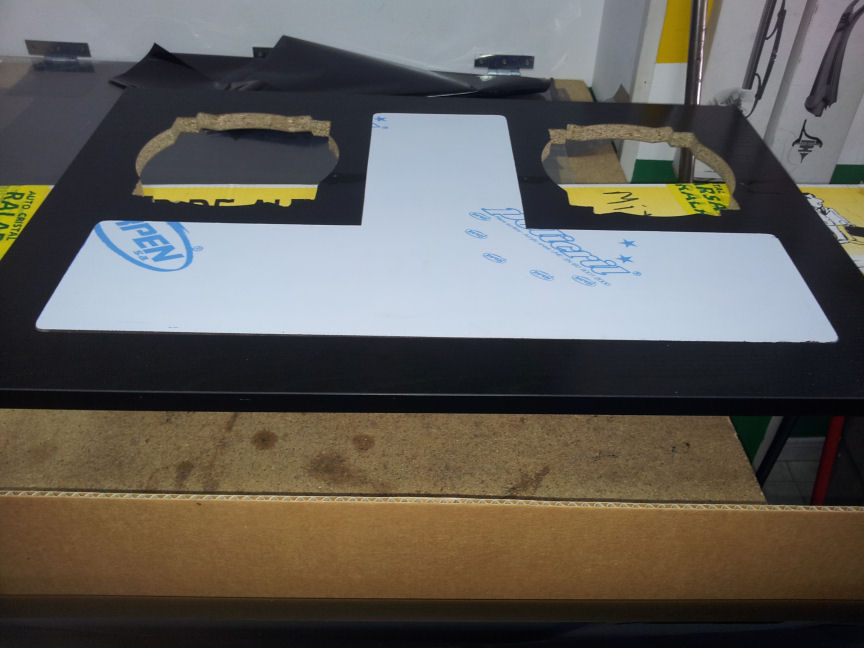
And just so you can see how it could look like minus the paint and filters.
Hopefully I can play around with the VIA mobo this evening and do the calculations I needed to do as yesterday it was pretty much instant K.O, needed to catch up with sleep!
PS: I also aplied the slight smoked tint vynil to the 5mm plexy on the underside (so it´s between both pieces). The guy from the vynil shop did say that I may encounter issues since plastic contracts and expands with heat and then cold (on/off server) but I may get lucky since the temps aren´t that much and it´s between two pieces. I took the risk as it wasn´t expensive and worst comes to worst, I´ll take the vynil off and aply some smoked lacquer instead. Unfortunately I took no pictures and you don´t see it because the plexy´s top layer protection is still on, no sense taking that off until the end to prevent it from getting dirty.
-
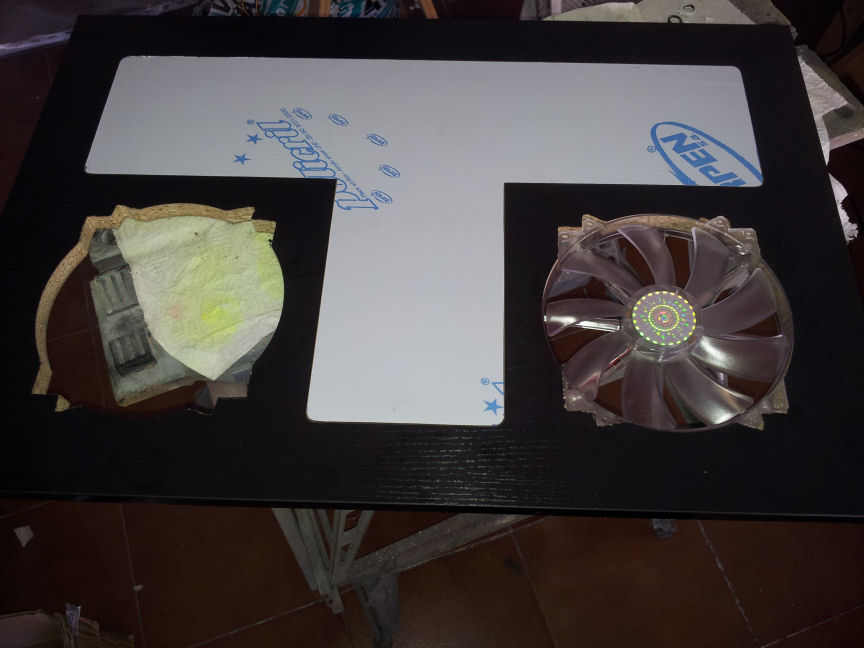
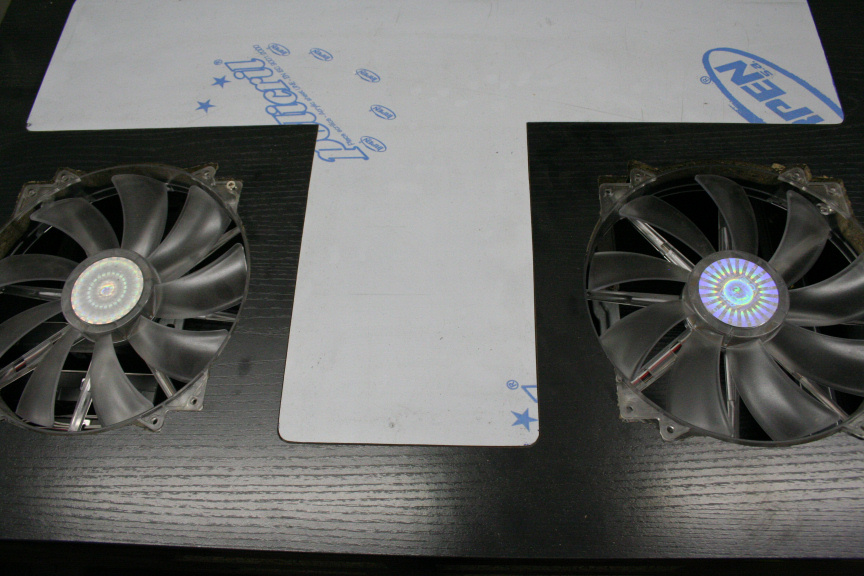
Perfect fans Integration
-
In deed, I was really aiming for that
-

-
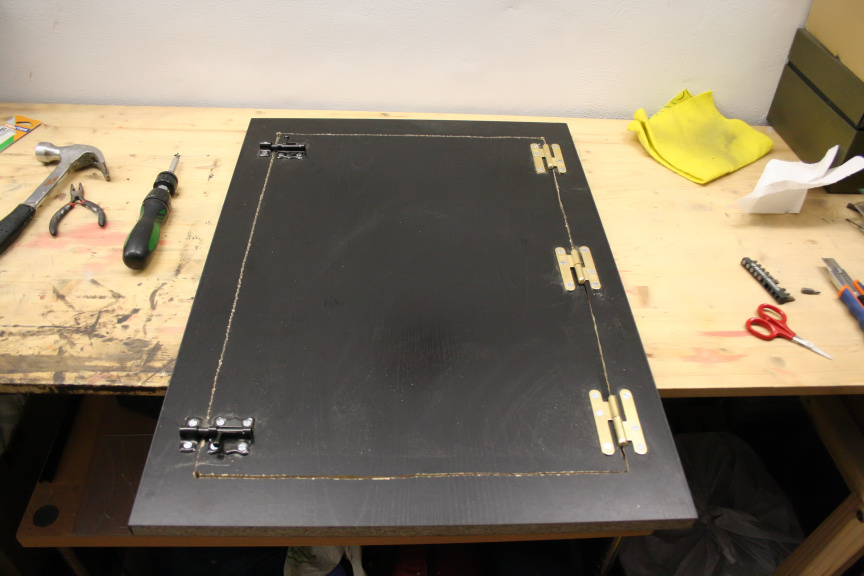
So it´s been a full year since my last update, other modding projects, work and life in general got in the way, but I´ve now resumed work on this project. So, did the cut out on the base of the desk for the trapdoor. Remember the desk has 2 floors in order to hide cables between them and the trap door is to be able to access these cables without making a mess or taking stuff apart. I then added the hinges and the locks. It´s unfortunately painfully obvious it´s my first time working with wood (rather than making other materials look like wood), but this won´t be seen unless you go under the desk so it´s one of those "it´ll do" cases I think. Have in mind that the "exposed" wood will be painted so as not to stand out from the rest of the desk (black).

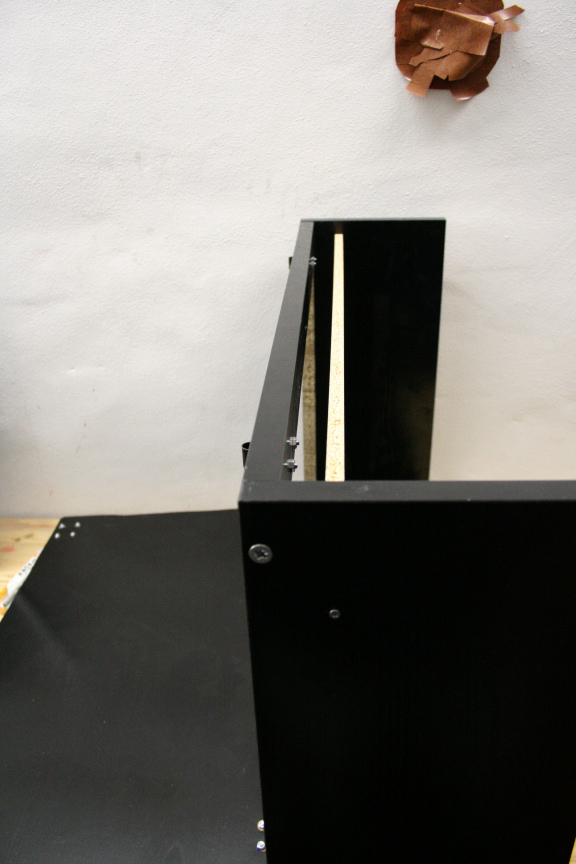
Started assembly of the sides. The back will have to come out again in order to make the cutout for the I/O of the 2 boards inside but I need it to be in for now for the sake of measurements for the other parts.

Started to put the "fake floor" in to place and tested the trap door, all seems well.
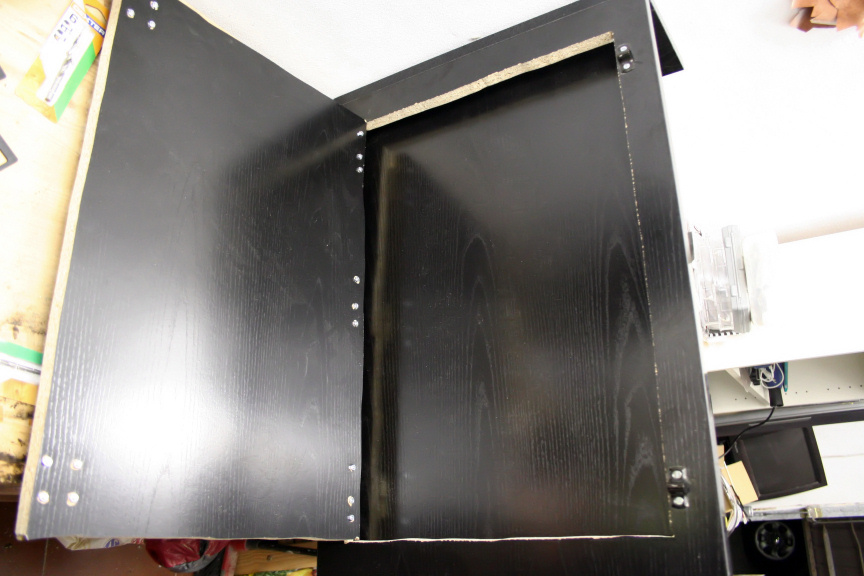
In order to match the other desk in the room where it´ll be (as I explained in the opening post, this is an "extension"), I can only do the desk so high and so deep, which after measurement, taking the thickness of the wood in to account (even though the fake floor is 1cm thick as oposed to the rest which are 2cm) it only leaves me with 2cm high open space to hide the cables, it´s going to be tight. but the trap door helps a lot for this very reason and will keep the end result nice and tidy.
On a side note, I´ve also decided to move away from the VIA board, and acquired a Gigabyte GA-C1037UN-EU which still has a very low power footprint (which is the whole point of the second board which gets left on 24h) and comes with an integrated 1.8 dual core celeron which should work much better in hash checking than the VIA 1Ghz single core cpu (plus it was quite cheap, 64€).
Aniway that´s all for today, should be able to work more on it tomorrow.
As always, thanks for reading!
-
hey Luciel, welcome back
-
Cheers Tom1, feels good to finally be able to dedicate some time to this again
-
Luciel ha scritto:
Cheers Tom1, feels good to finally be able to dedicate some time to this again
I hope

-
Hello! I hope to see it finished soon!!
-
i want to see it finished
-
It may take a while guys but thanks
Hi Everyone,
Small update in terms of work, but, it was very fullfilling.
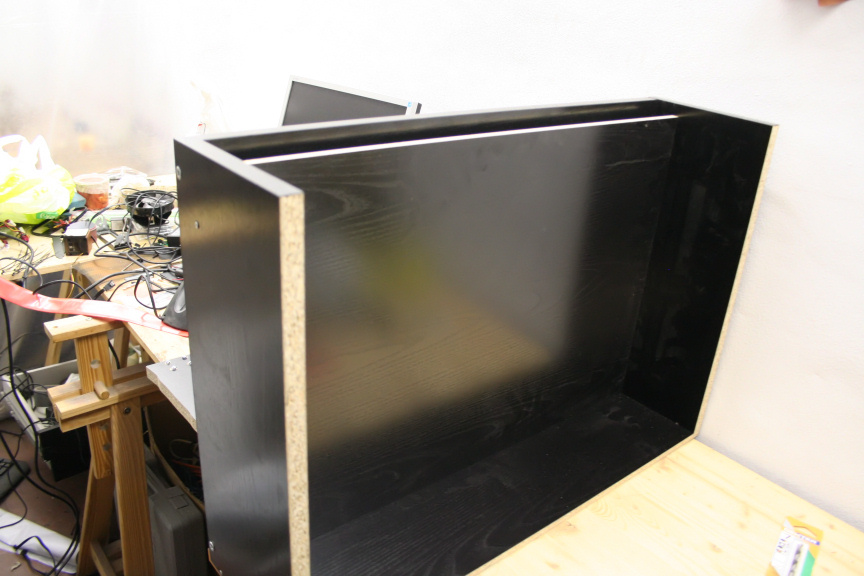
I finished mounting the "fake floor" and I think it came out great, I´m so glad I had the idea for it, as it´s going to make my life so much easier keeping things tidy and clean..
Yes, it´s filthy, bare with me, no point cleaning it while I´m still working on it
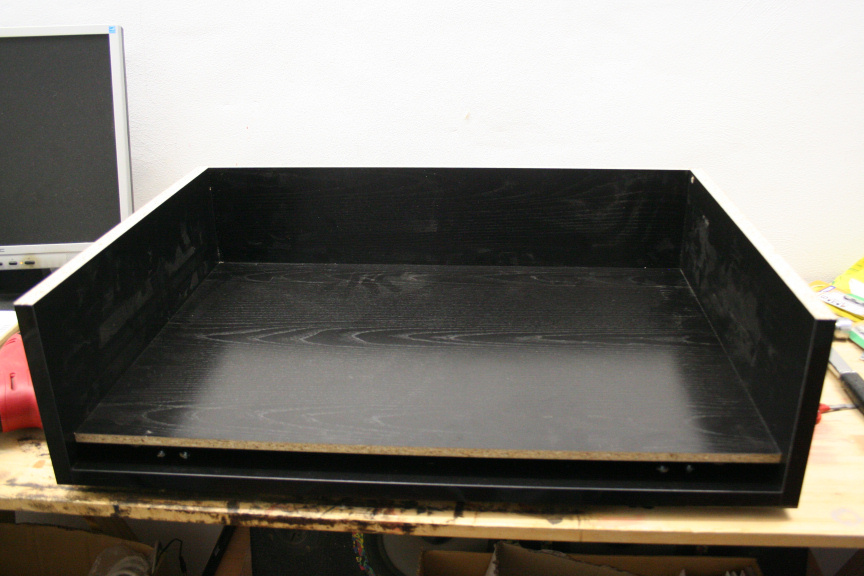
 I added the front part (though didn´t mount it as there´s no need for it till much later in the build process) to see if all fits nicely, and it does!
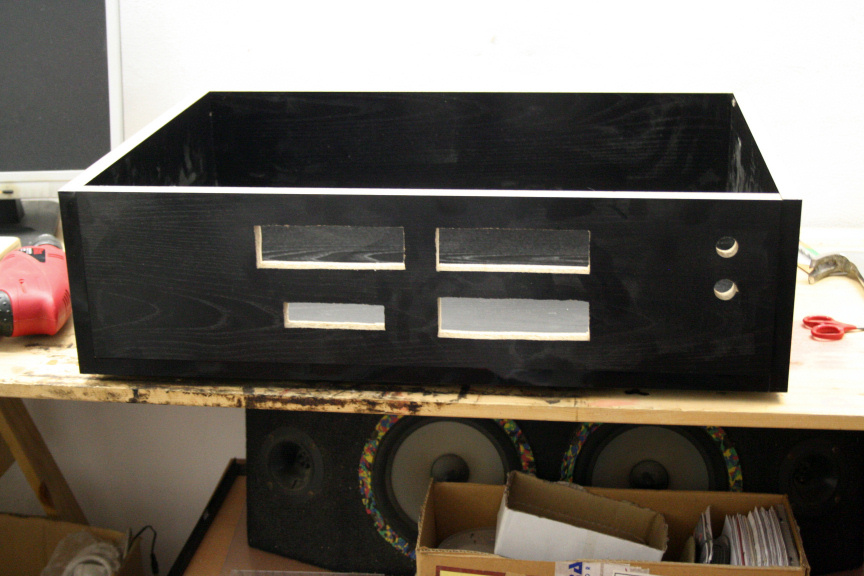
thankfully, measurements where correct and the fake floor goes up as much as it can, leaving 2cm playroom between it and the real base (with trapdoor). But yeah, very close!
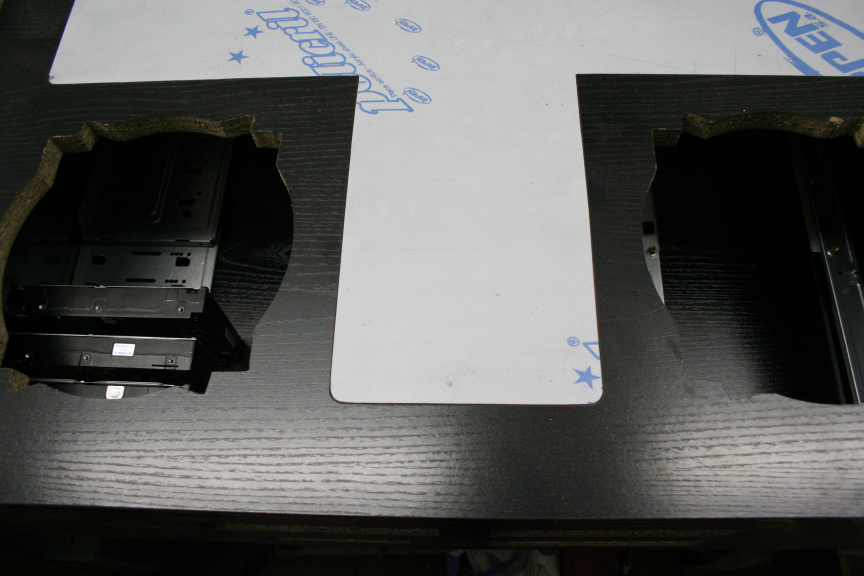
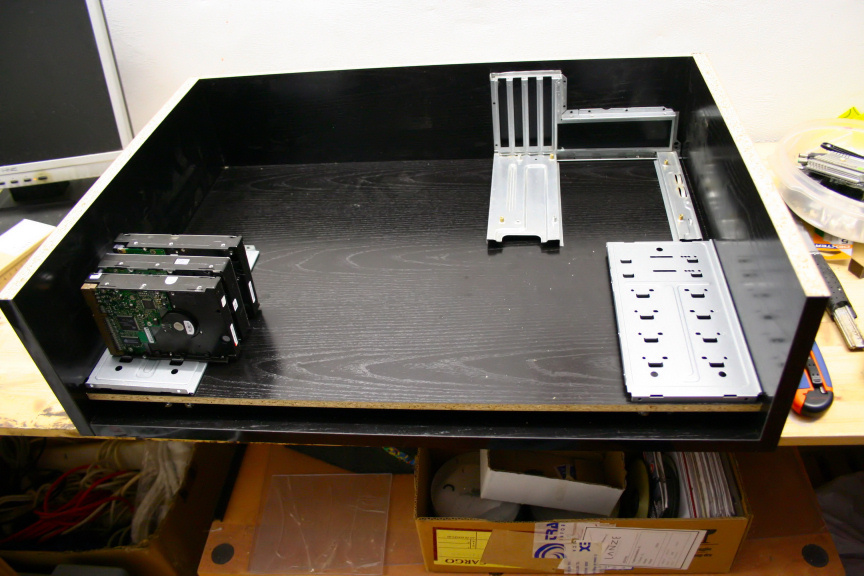
It goes without saying, as mentioned in previous updates that all "exposed" wood will be painted in a matching black colour once I´m done. So, I took apart a really old case (from a prefab´d ACER), and cut out what I needed and piled the rest (I keep a couple of old cases always at hand for recycling and scrap metal bits):
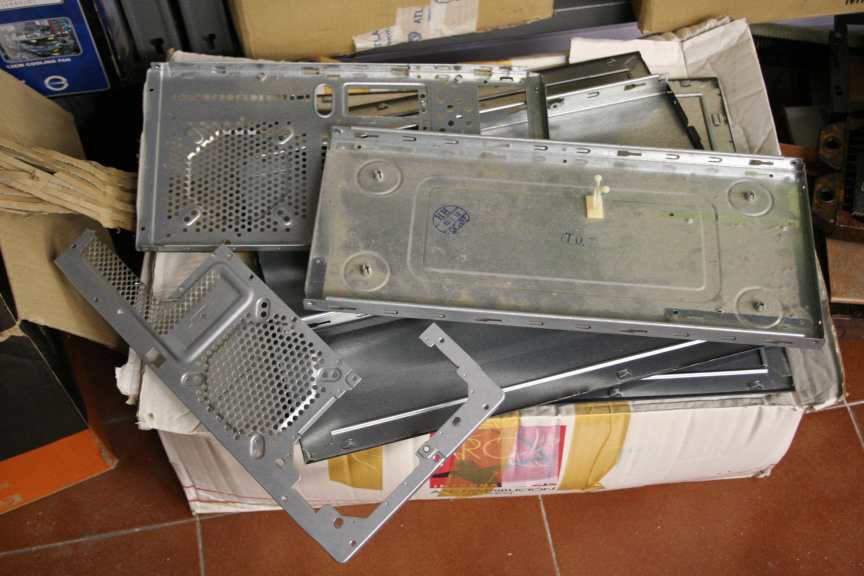
And this is what I needed.
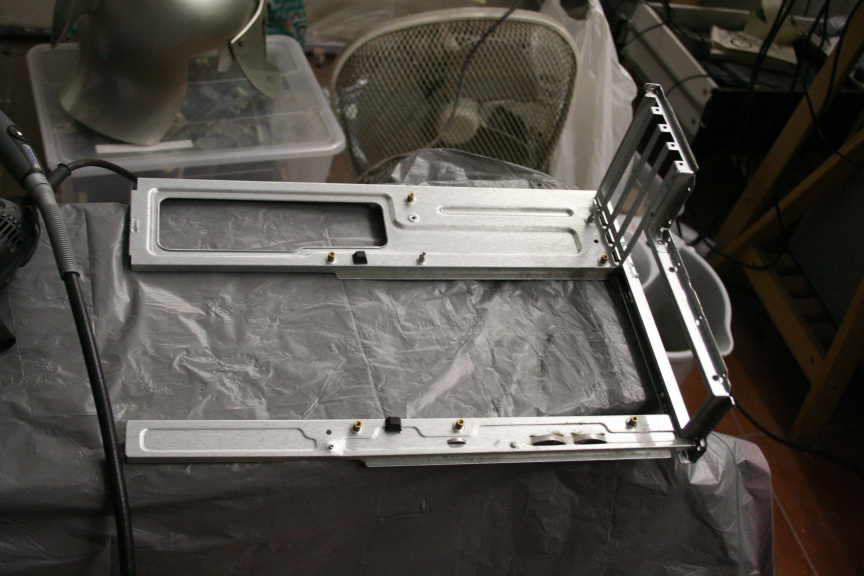
Of course, this and all other parts will be painted, some of the hardware will be aswell as it is usual of my projects.
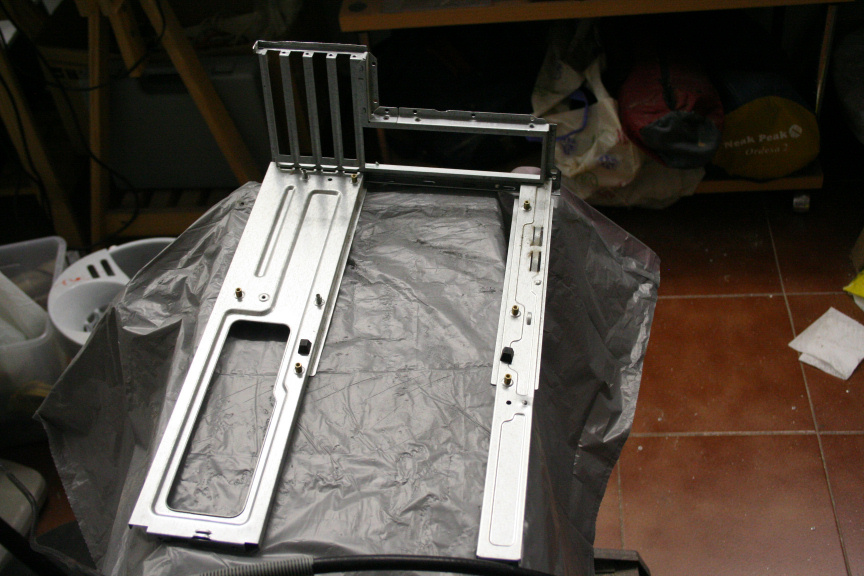
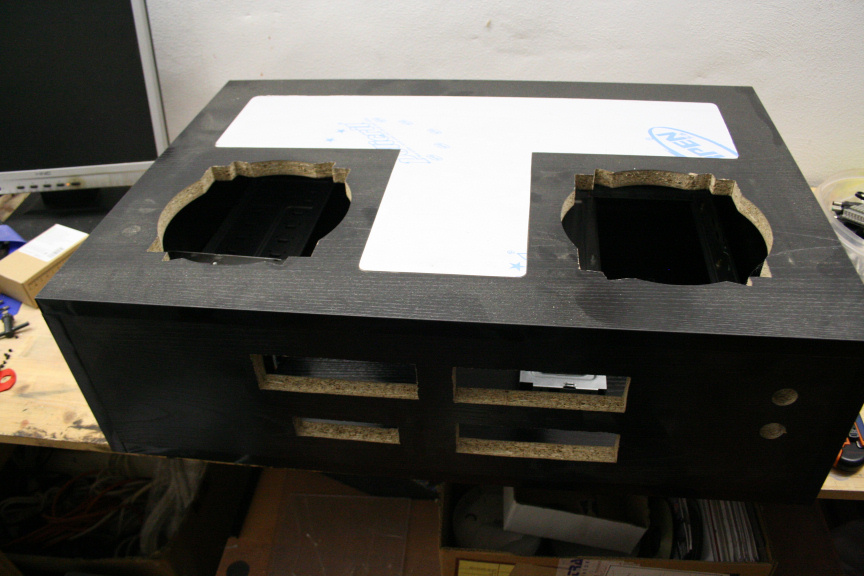
Quick test. Tomorrow (if I have time) I´ll be cutting it down to the exact size of the M-ATX motherboard I´m using, but for now...
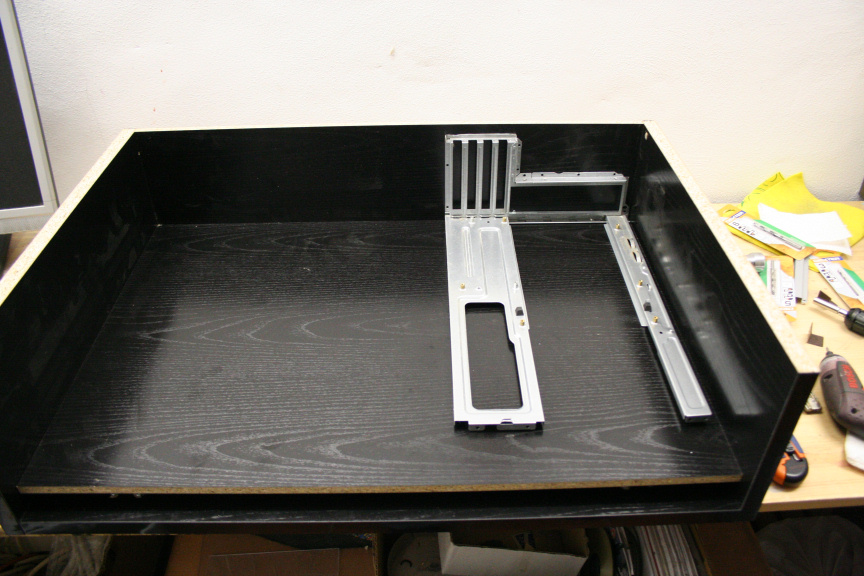
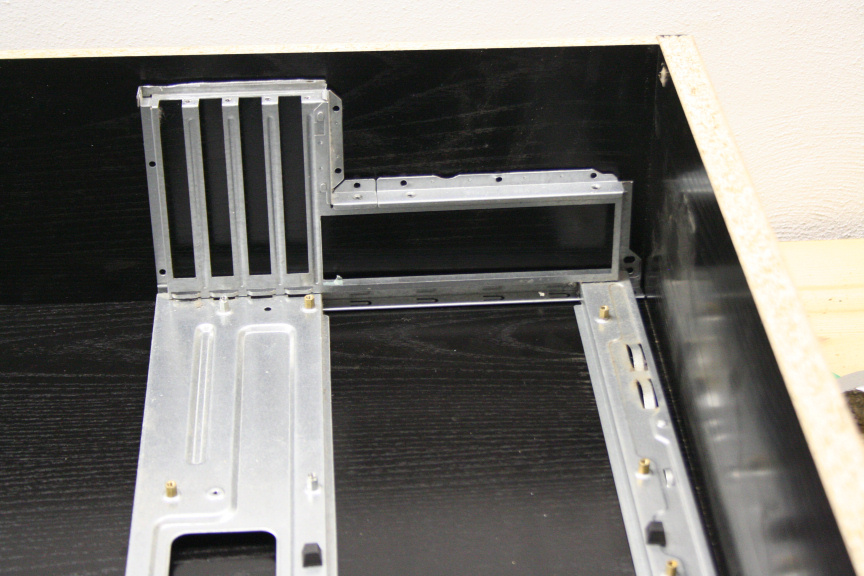
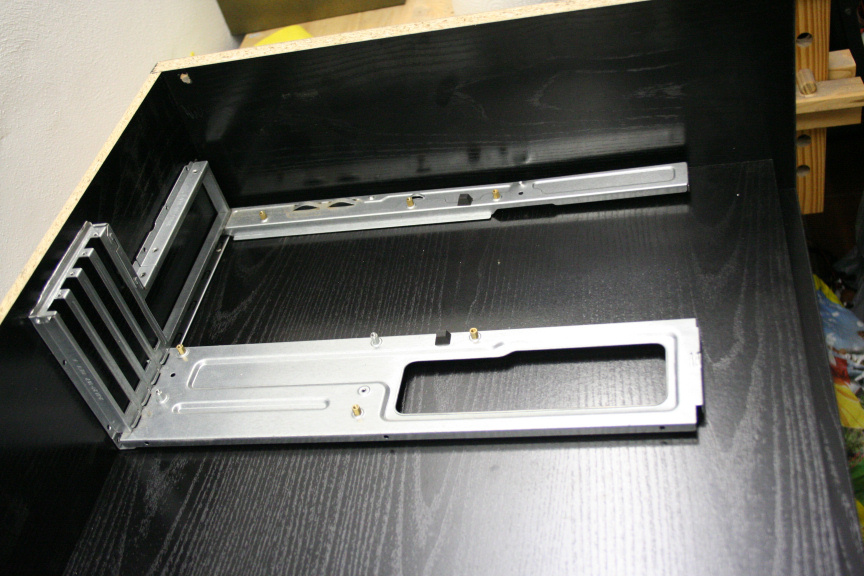
Next up, I still haven´t decided what possition to put all the drives in (you´d think I would´ve decided that before starting the project but it was pointless as I had a very specific set of measurements to work with, for better or worse due to where this desk module has to go), have in mind it´ll be around 10-14 drives in total. So, I came up with a couple of options. First of, on the left lower side,
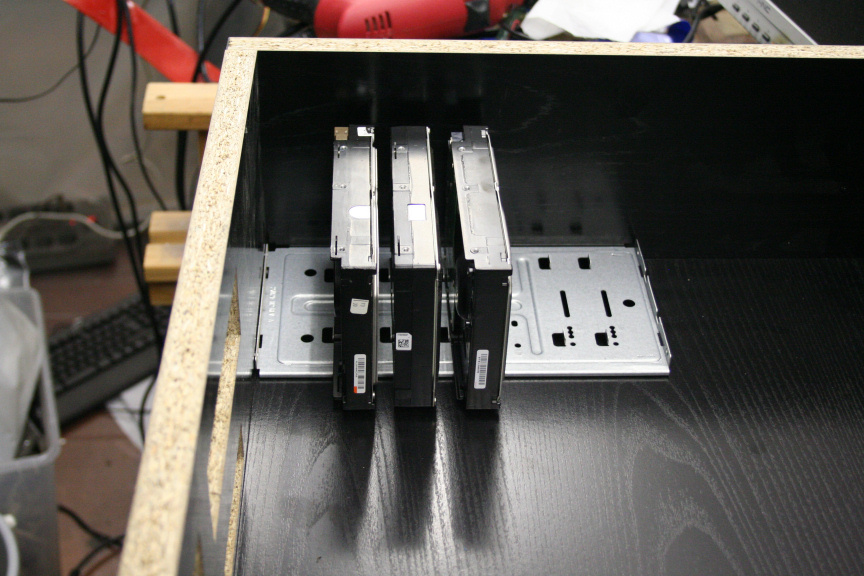
I am however worried about vibration since they are only held from one side. I like the concept because since the mounting will be painted black, it could give the impresion the hard drives are "floating" but I am worried about vibration, so an alternative would be:
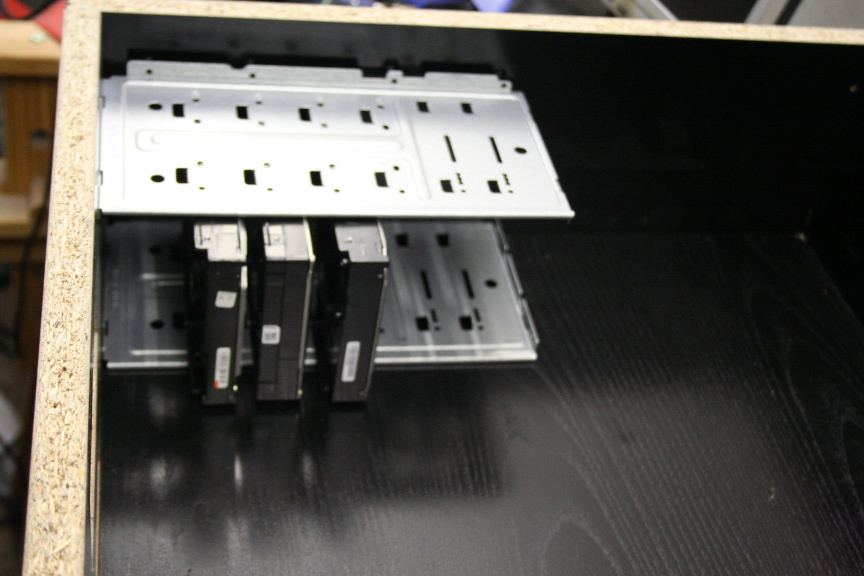
Nowhere near as nice but it wouldn´t vibrate this way. Anyhow, regardless of if they are attached on both sides or not, there´s 2 options in terms of where the other 5-6 drives go, first is on opposite sides (yes I know it´s on top of the mainboard mounting plate but have in mind this will be cut down to size and I´m 100% sure there is space for this:
The other option is simply use the whole left side for the drives, I checked and it still leaves enough space for the second mobo (ITX).
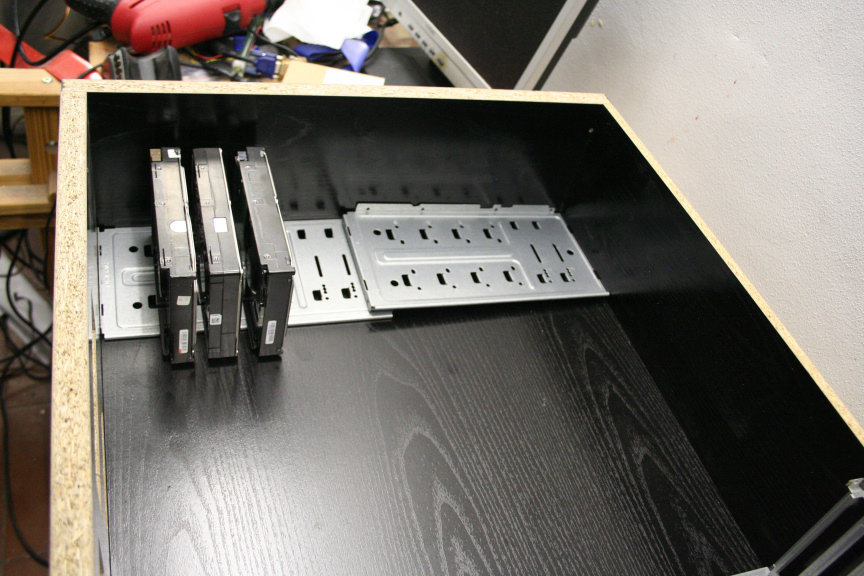
Another thing to take in to consideration is the fact the first option may work better due to ventilation locations, but I´m concerned the hdds under both fans will diminish airflow.
And well, that´s all for today, hopefully some more tomorrow (though I think it´ll be Monday now as not much "free" time tomorrow at all.
As always, thanks for reading!
-
Hi Everyone,
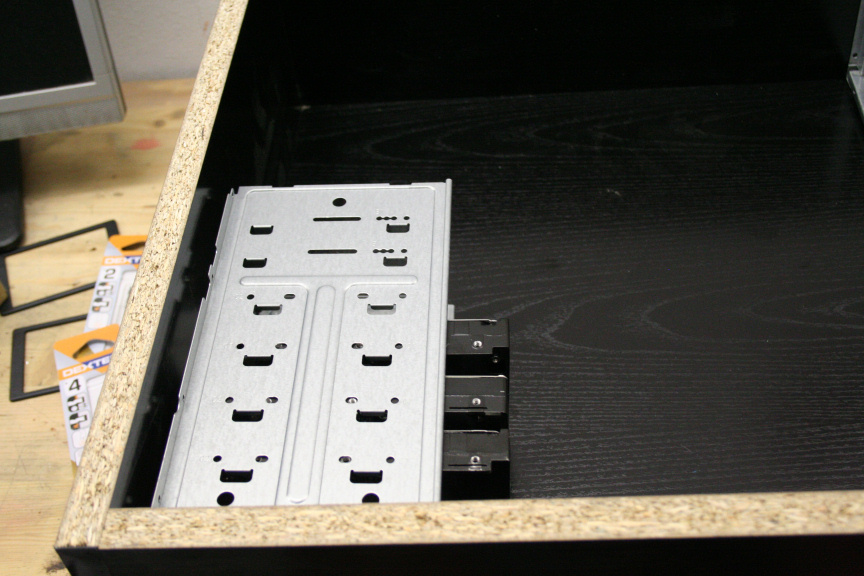
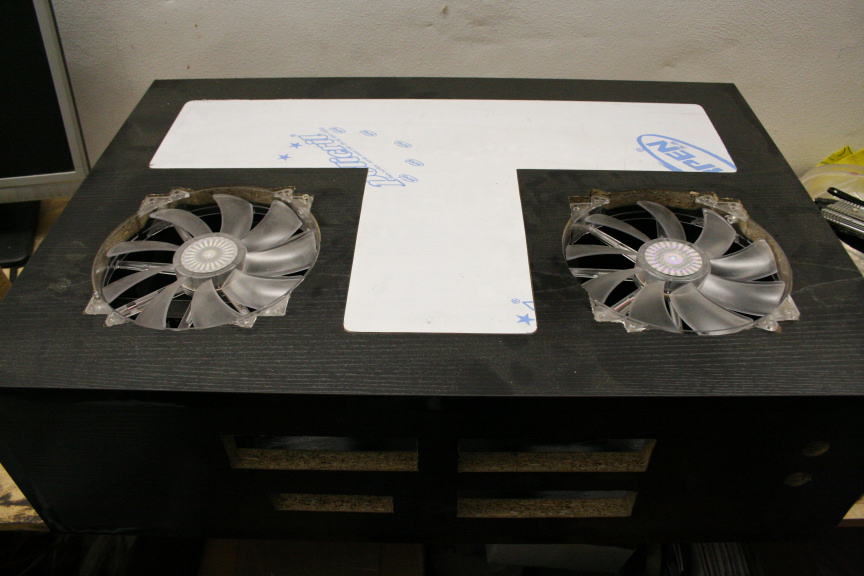
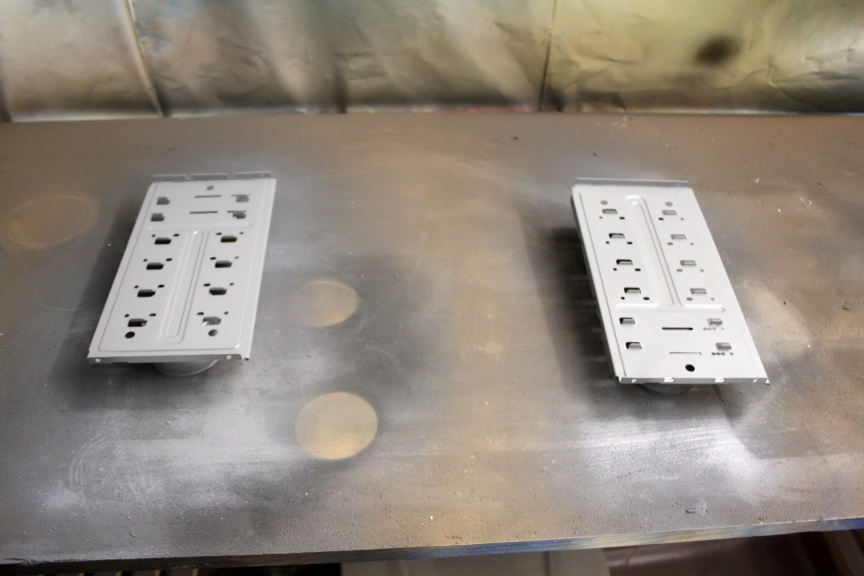
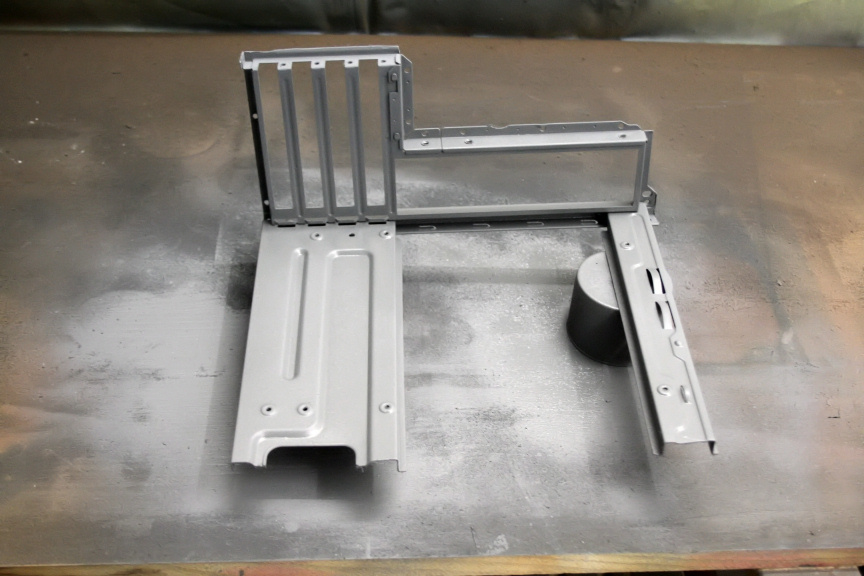
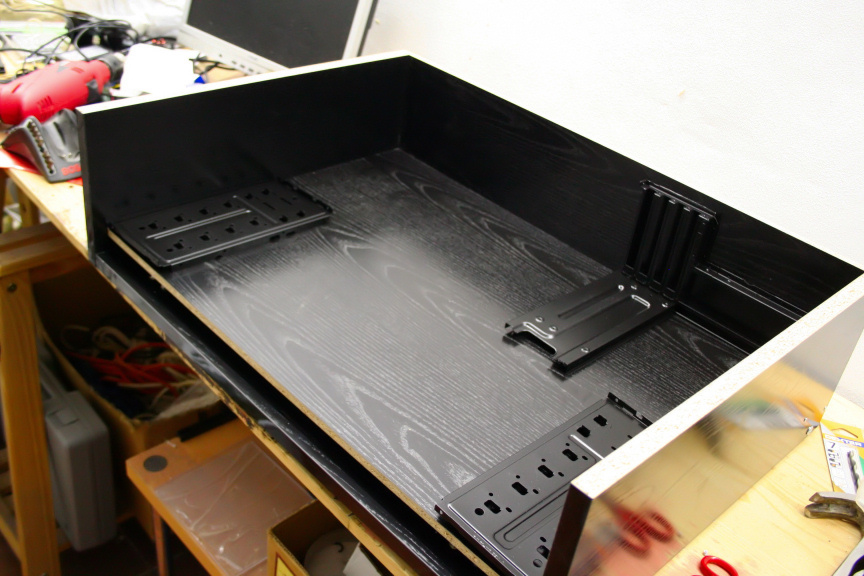
Another "small" update today, simply didn´t have time for more. So I´ve decided I will split the hard drives between both sides. Why? Because I´ve decided to add a fan at the back for intake and the two 200mm fans on top will do the extracting which are located right on top of the hard drives so the heat out of the hdds (which in this case, realistically is the main source of heat) won´t remain inside. This also means that I have enough space to mount the PSU at the back and not have to route the powercable to a female adaptor at the back. I´ve also cut the mobo tray down to the size I require. So this is the final possition of the HDD mounts.

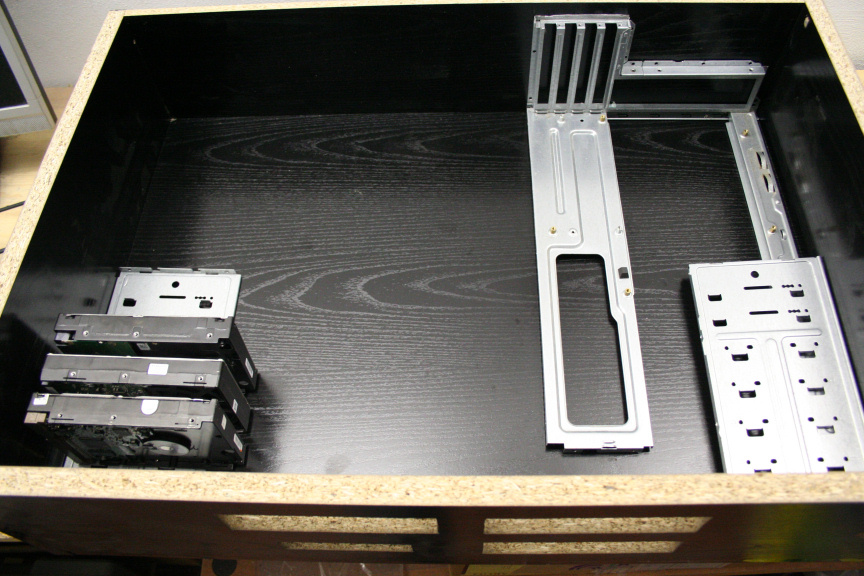
It took me the better part of 2 hours to throughly clean both hdd mounts and the mobo tray, that acer case was at least 7 years old and it came from someone who used it pretty much every day for work and did not mantain it much at all so you can imagine the amount of grit, dust and general dirtyness these parts had. Water was not enough, I had to give it a 15-20 min vinegar bath (just about enough to loosen the grit but not corrode the metal) followed by scrubbing followed by cotton and alcohol, eventually though, I got them as clean as they where ever going to be and prepped for paint.
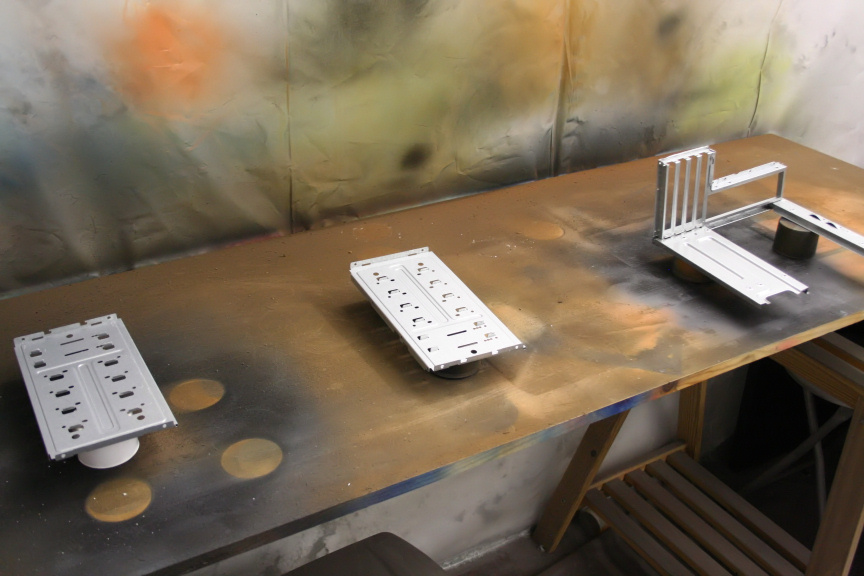
Primer on.
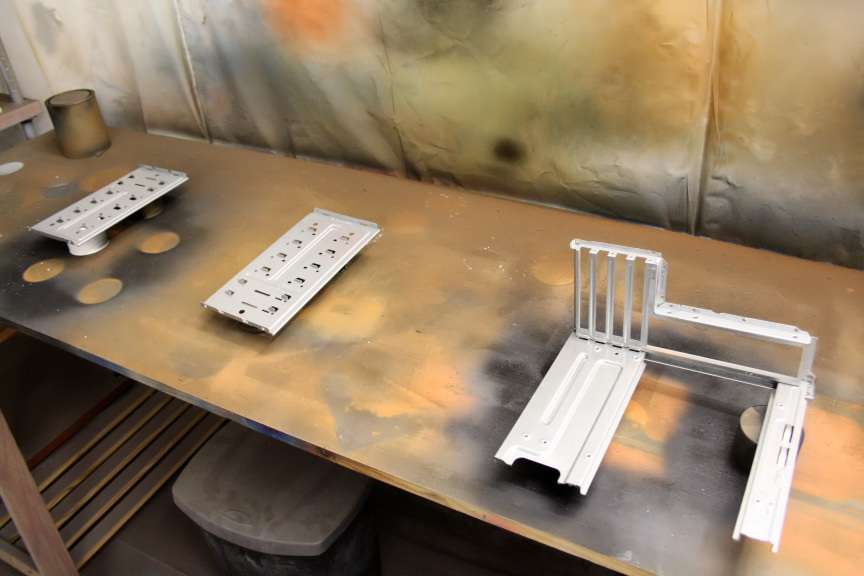
And as silly as it sounds, I´m quite proud of this little trick, I mixed (different ratios) glossy black and matt black, to get a kind of metallic shine but keeping the matt look so I could match the desk color as close as possible and here is the result.

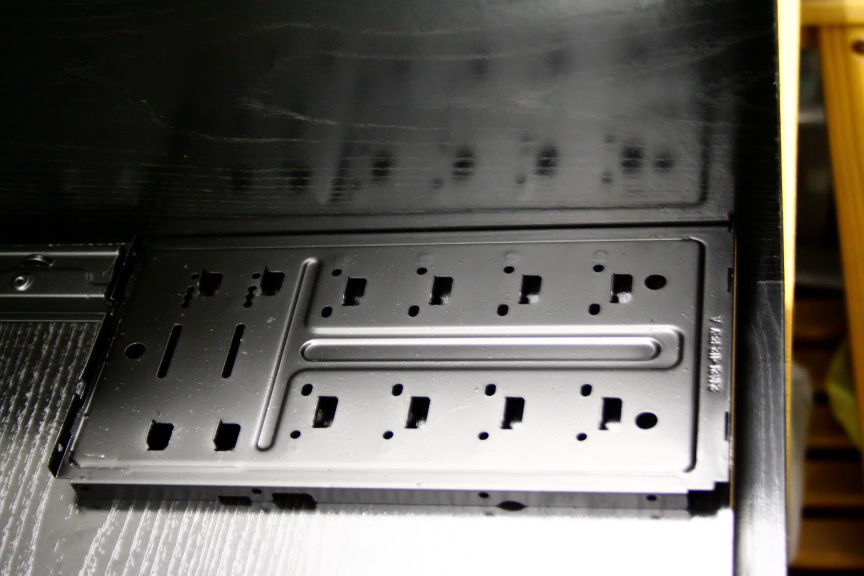
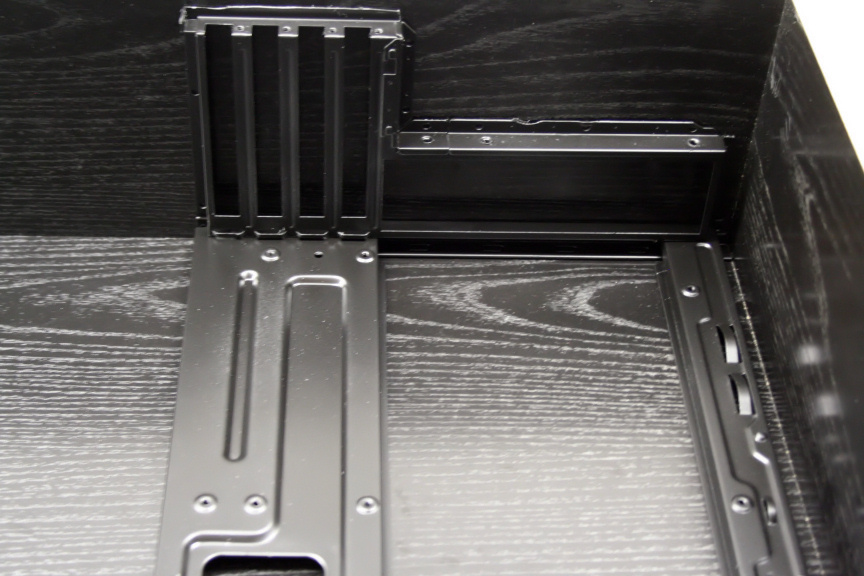
As you can see the colour is quite a good match, unfortunately there was only so much I could do with these old metal parts and it´s most definately not the smoothest paintjob I´ve ever done due to the surface,. if they where smooth surfaces I could´ve just grinded them down but the nature of these parts makes it, not impossible, but not really worth the huge fuss it would take to do so, all in all, I think it looks great (on a side note, the shine and reflection makes it look like it´s not a solid coat, but in fact it has 2 coats and I assure you it´s solid, it´s just the reflections you see in the photos).

That´s it in terms of work done today, it may not look like much but it took quite a while between the cleaning, experimenting with the paint mixture ratios and the coats (plus the final clear lacquer coat).
I´ve been planning the color pattern I´ll be giving the HDDs as well, it´s going to look quite good if I get it right (I´m aware of the risks of painting an HDD, however if you´ve seen any of my other projects you´ll see there´s a way to do it safely so no worries, it´s never caused me any trouble or damaged drives). I´m thinking tomorrow I´ll be cutting the back for the I/O plate and PCI slots for the first mobo, however I´ll have to wait till the ITX mobo gets here (tuesday or wednesday) before I can measure what space I have and depending on that I´ll know where the fan will be located. I´ll also start checking the 20odd drives I have to see which are in perfect condition and decide which to use. Which also means taking apart the current server and adding 2 3tb drives to the VIA ITX to use as server meanwhile, so busy day in deed!
As always, thanks for reading.
Ciao! Sembra che tu sia interessato a questa conversazione, ma non hai ancora un account.
Stanco di dover scorrere gli stessi post a ogni visita? Quando registri un account, tornerai sempre esattamente dove eri rimasto e potrai scegliere di essere avvisato delle nuove risposte (tramite email o notifica push). Potrai anche salvare segnalibri e votare i post per mostrare il tuo apprezzamento agli altri membri della comunità.
Con il tuo contributo, questo post potrebbe essere ancora migliore 💗
Registrati Accedi