Salta al contenuto
  • Categorie
  • Recenti
  • Tag
  • Popolare
  • Utenti
  • Gruppi
Collassa
Logo del marchio
  1. Home
  2. Modding e galleria
  3. Modding
  4. Tutorial Project: Nº2 - How to paint components

Tutorial Project: Nº2 - How to paint components

Pianificato Fissato Bloccato Spostato Modding
22 Post 0 Autori 3.0k Visualizzazioni
  • Da Vecchi a Nuovi
  • Da Nuovi a Vecchi
  • Più Voti
Rispondi
  • Risposta alla discussione
Effettua l'accesso per rispondere
Questa discussione è stata eliminata. Solo gli utenti con diritti di gestione possono vederla.
  • T Non in linea
    T Non in linea
    tom1
    scritto su ultima modifica di
    #12
    O0
    1 Risposta Ultima Risposta
    0
    • L Non in linea
      L Non in linea
      Luciel
      scritto su ultima modifica di
      #13

      For the purpose of this tutorial I will be using a 9800 GTX I normally use as a spare. Please have in mind that, as with most of these, following these steps will void your warrantee.

      1.JPG

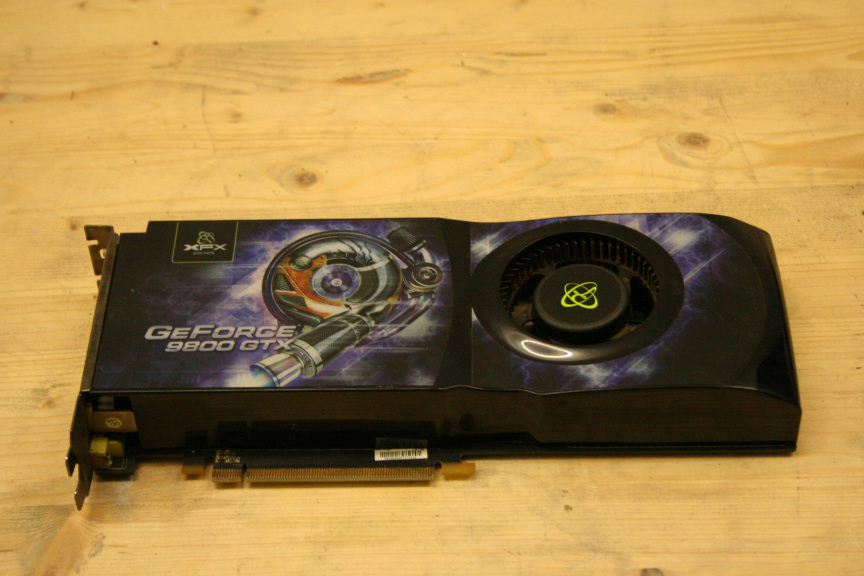
      The first thing is taking the gpu apart, we need to remove all the screws in the back. Have in mind that this may vary depending on the brand of the card, there may be other screws, hooks, cables, etc, so do not force it open if it doesnt easily (although if the card is very old and very dirty it may seem as it´s still hold down by another screw when really it´s just the thermal paste).

      2.JPG

      Once that is done we need to remove all stickers and clean the surface.

      3.JPG

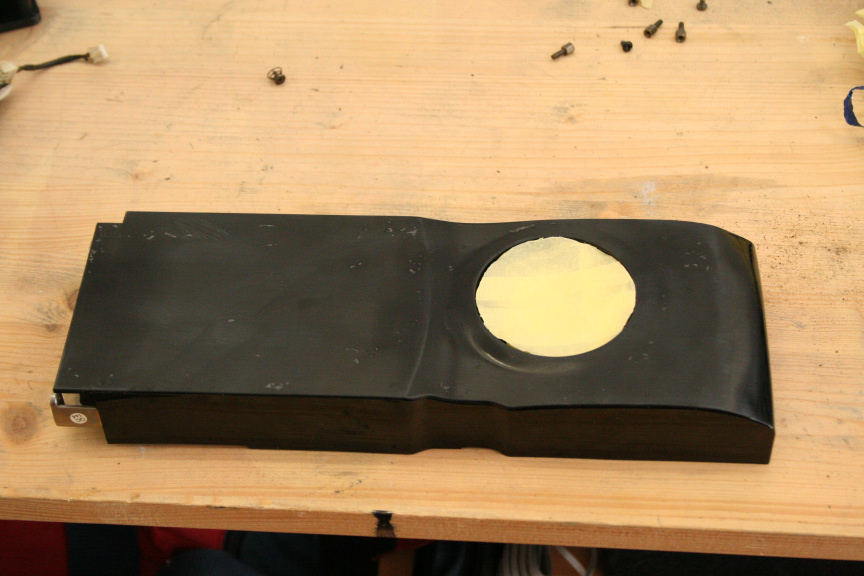
      This really depends on the card itself, sometime you may get lucky, others... well... let´s just say I spent a few hours cleaning and sanding down this one.

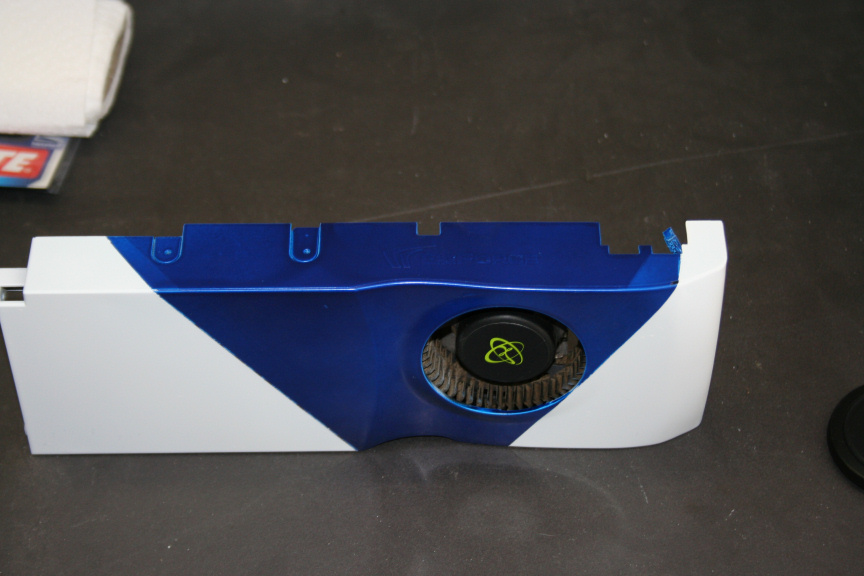
      The next step is to paint it, for paint techniquest, preparation, types and so on, check the first post of this thread which links to the main tutorial thread where all this is explained in detail.

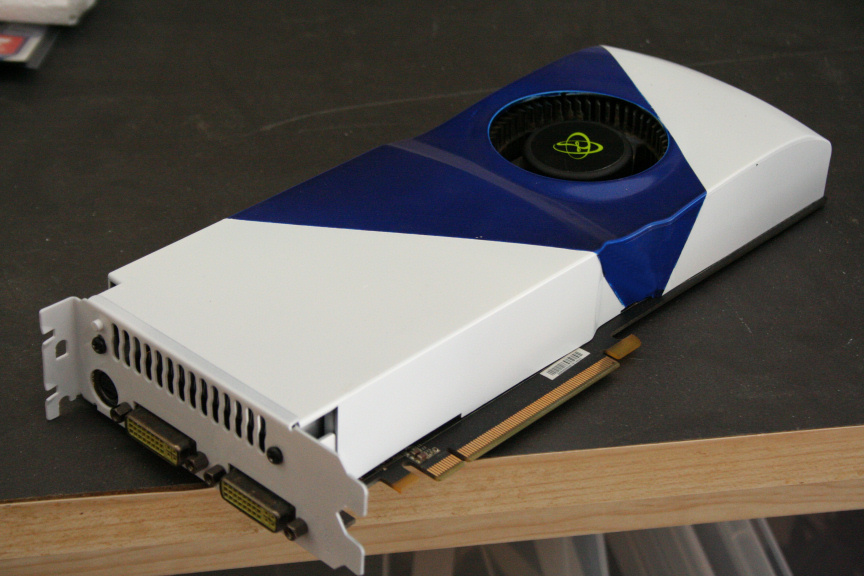
      Once ready, we put it all togueter again. Remember to remove the old thermal paste and aply some new one. About the trim, that´s really up to you if you want to change it. In my case it seemed in decent enough shape so didn´t bother changing it.

      4.JPG

      5.JPG

      Up Next,

      The Antec 620 H2O CPU Cooler

      1 Risposta Ultima Risposta
      0
      • C Non in linea
        C Non in linea
        ciberjack
        scritto su ultima modifica di
        #14

        nice work man! O0

        1 Risposta Ultima Risposta
        0
        • L Non in linea
          L Non in linea
          Luciel
          scritto su ultima modifica di
          #15

          thanks mate! : )

          1 Risposta Ultima Risposta
          0
          • T Non in linea
            T Non in linea
            tom1
            scritto su ultima modifica di
            #16

            well done

            1 Risposta Ultima Risposta
            0
            • L Non in linea
              L Non in linea
              Luciel
              scritto su ultima modifica di
              #17

              It´s time for the Antec 620 H2O CPU Cooler.

              First thing´s first, let´s unpack it as it´s brand new.

              1.JPG

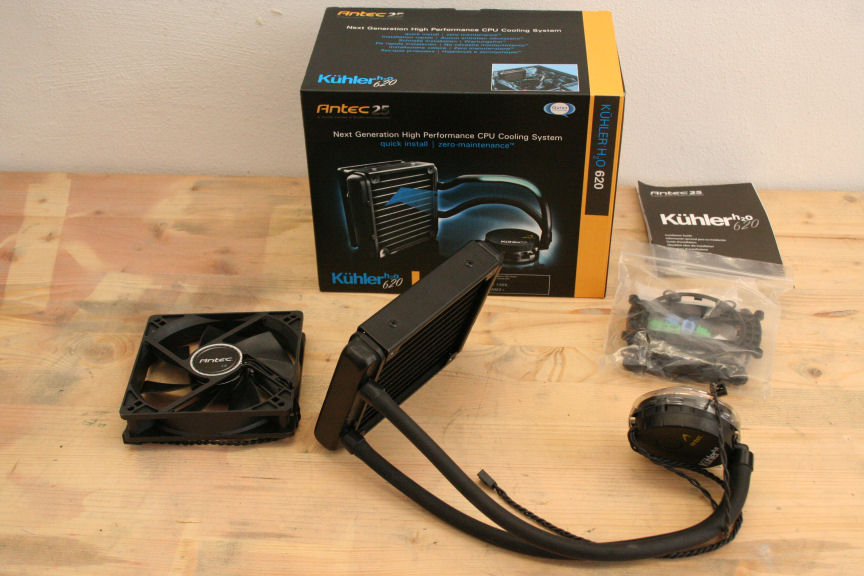
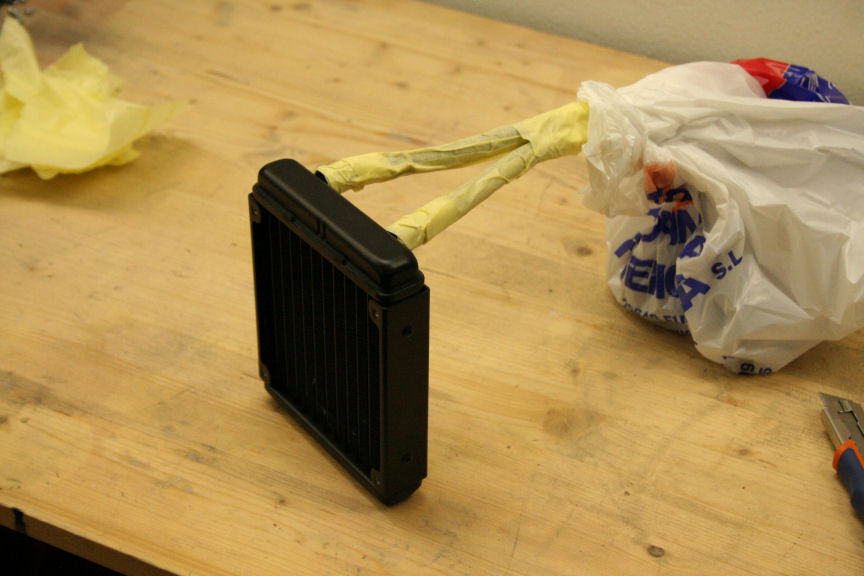
              Right this is provably the most simple part to prep, what I´ve done here is, using masking tape I´ve covered all the piping and instead of covering the cpu cooler itself, I´ve wrapped a plastic bag around. I know it may sound stupid but check the bag hasn´t got any holes!

              2.JPG

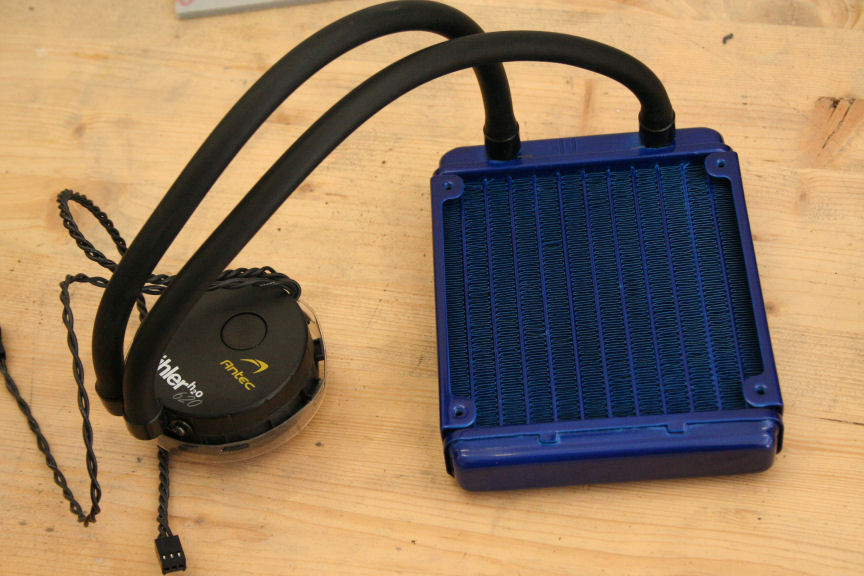
              I´ve cleaned it even though it´s new, we don´t want any dust particles on the surface. For paint types, techniques, waiting times and so on check the first post of this thread which has a link to the main tutorial thread where everything is explained in detail. Do feel free to ask if you still have doubts after that though.

              Once dry, I´ve removed all the taping and done! Ready to go in!

              3.JPG

              Next up, the power suply (at the time of writing I´ve bought a more powerfull PSU as the one I had for this project doesn´t cut it for the gpu, so even though I painted it and it works, I´ll be posting a tutorial with the new PSU so the next post will remain "reserved").

              1 Risposta Ultima Risposta
              0
              • L Non in linea
                L Non in linea
                Luciel
                scritto su ultima modifica di
                #18

                * RESERVED FOR PSU GUIDE TUTORIAL *

                -----------------------------------------

                With this we finalize the how to paint components thread and we go back to the main thread to continue with the build.

                http://www.xtremehardware.com/forum/f51/tutorial_project_n_2_a-31265/index5.html

                1 Risposta Ultima Risposta
                0
                • O Non in linea
                  O Non in linea
                  One1ros
                  scritto su ultima modifica di
                  #19

                  Waiting for the assemblage. ;)

                  1 Risposta Ultima Risposta
                  0
                  • L Non in linea
                    L Non in linea
                    Luciel
                    scritto su ultima modifica di
                    #20

                    it´s actually been done since 3 days ago, just spreading the posts to give it a bit more exposure : D I hope you guys will like it!

                    If all goes well I´ll be starting the new main mod this week coming, running out of time for the mod n roll contest!!!! :S

                    1 Risposta Ultima Risposta
                    0
                    • T Non in linea
                      T Non in linea
                      tom1
                      scritto su ultima modifica di
                      #21

                      congratulatin

                      1 Risposta Ultima Risposta
                      0
                      • L Non in linea
                        L Non in linea
                        Luciel
                        scritto su ultima modifica di
                        #22

                        thanks tom!

                        1 Risposta Ultima Risposta
                        0
                        • T Non in linea
                          T Non in linea
                          tom1
                          scritto su ultima modifica di
                          #23
                          O0
                          1 Risposta Ultima Risposta
                          0

                          Ciao! Sembra che tu sia interessato a questa conversazione, ma non hai ancora un account.

                          Stanco di dover scorrere gli stessi post a ogni visita? Quando registri un account, tornerai sempre esattamente dove eri rimasto e potrai scegliere di essere avvisato delle nuove risposte (tramite email o notifica push). Potrai anche salvare segnalibri e votare i post per mostrare il tuo apprezzamento agli altri membri della comunità.

                          Con il tuo contributo, questo post potrebbe essere ancora migliore 💗

                          Registrati Accedi
                          Rispondi
                          • Risposta alla discussione
                          Effettua l'accesso per rispondere
                          • Da Vecchi a Nuovi
                          • Da Nuovi a Vecchi
                          • Più Voti


                          • Accedi

                          • Non hai un account? Registrati

                          • Accedi o registrati per effettuare la ricerca.
                          Powered by NodeBB Contributors
                          • Primo post
                            Ultimo post
                          0
                          • Categorie
                          • Recenti
                          • Tag
                          • Popolare
                          • Utenti
                          • Gruppi