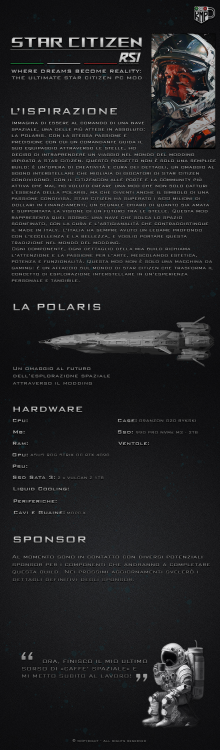
STAR CITIZEN - RSI POLARIS Project
-
-
-
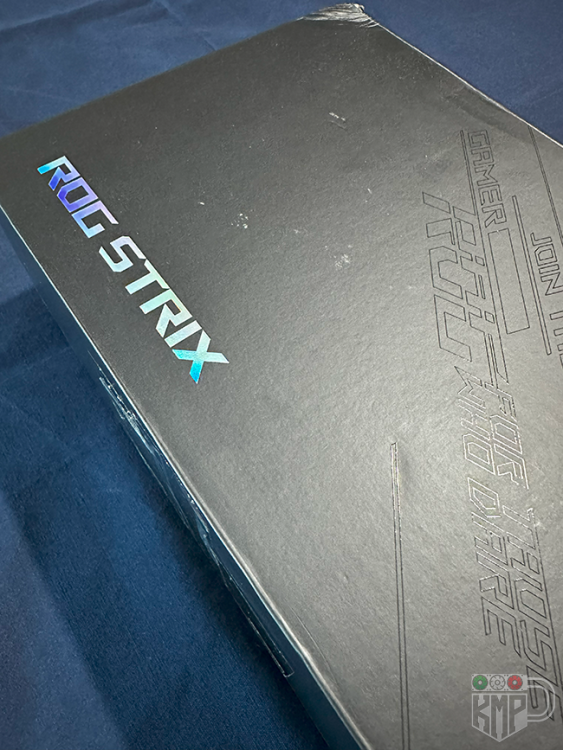
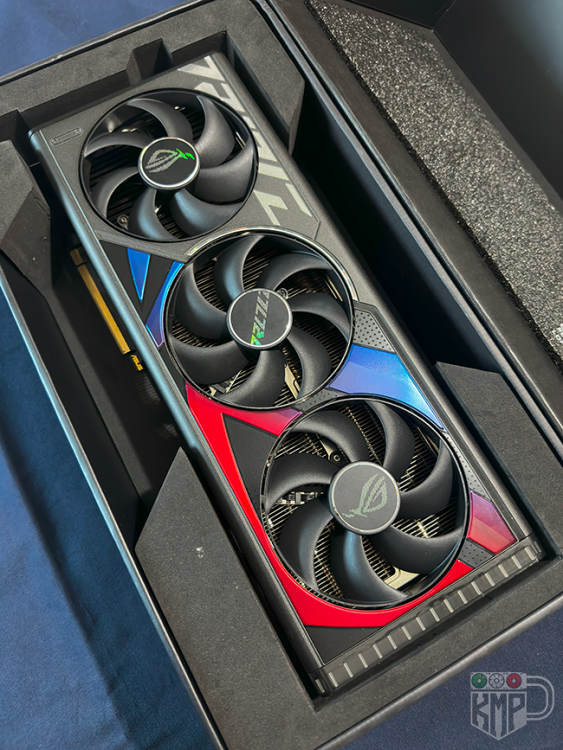
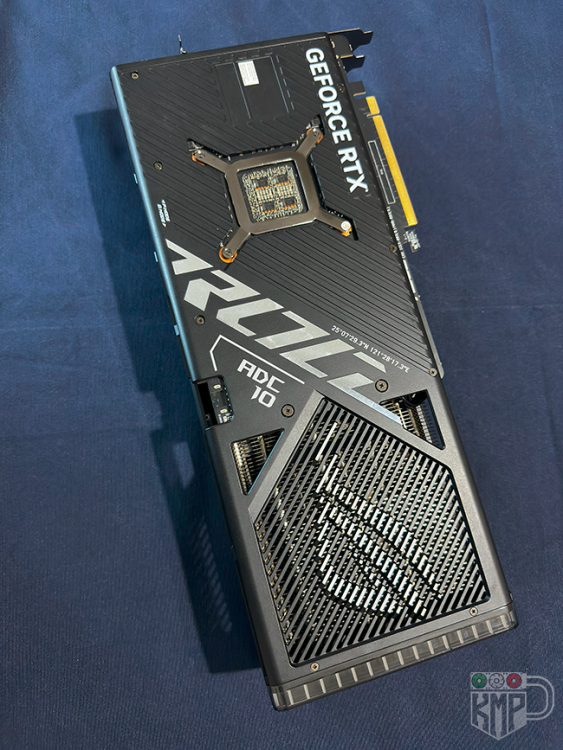
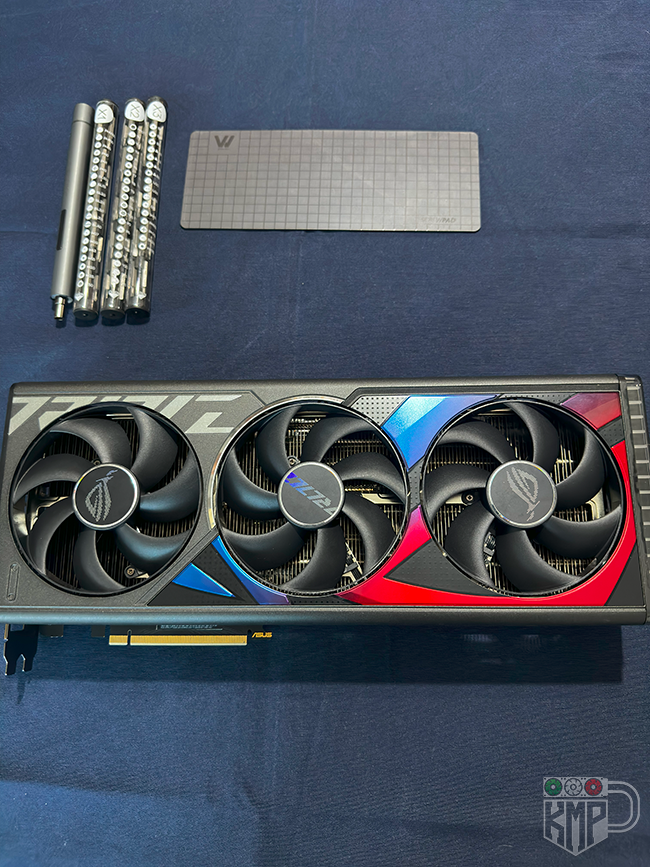
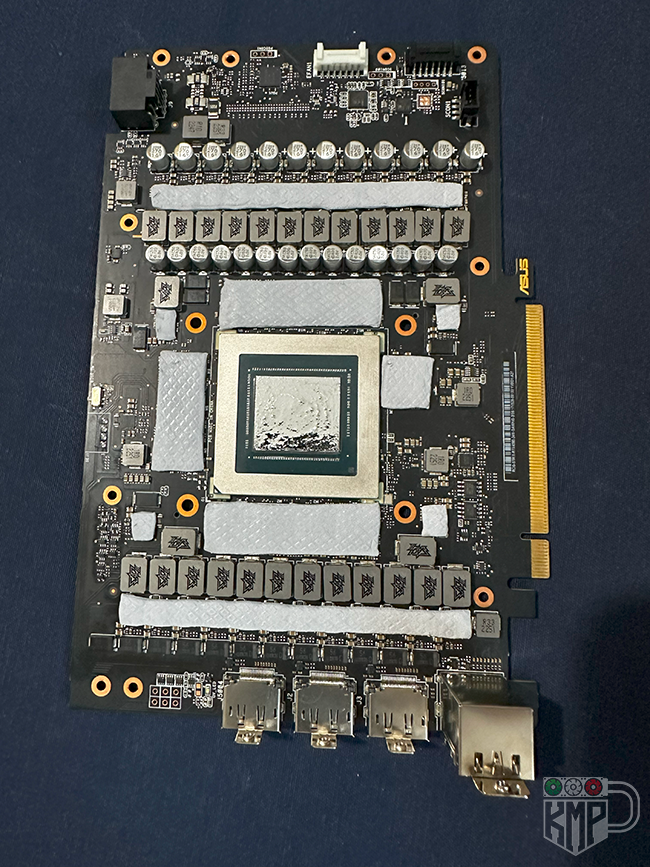
È arrivata finalmente la ASUS STRIX OC 4090 che ho comprato per realizzare questa mod! Sono felice di condividere con voi qualche foto in attesa di iniziare a lavorarci su! Ecco a voi le foto! Presto inizieranno i lavori di personalizzazione!


-
Hi everyone!
I’m thrilled to introduce the latest addition to my Star Citizen-themed modding project: the powerful ASUS RTX 4090 STRIX OC!
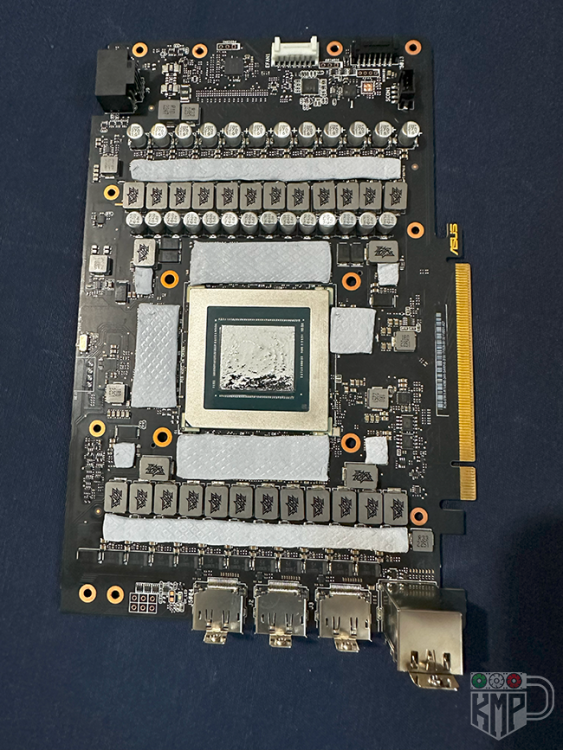
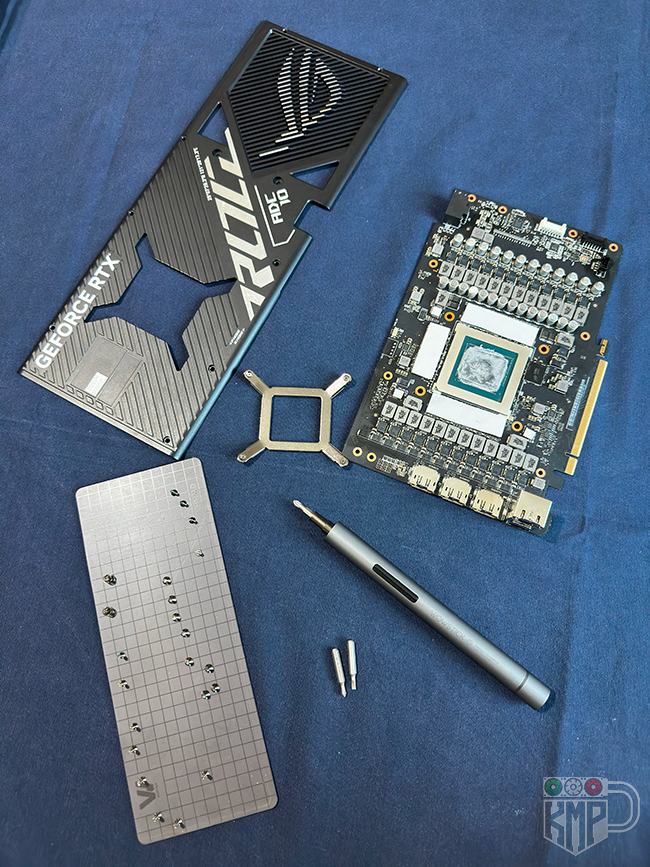
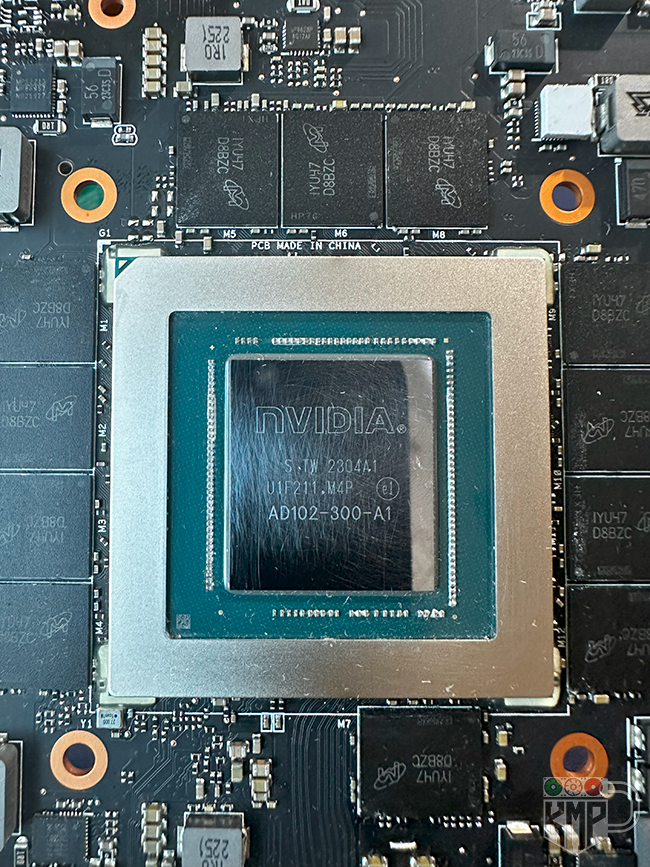
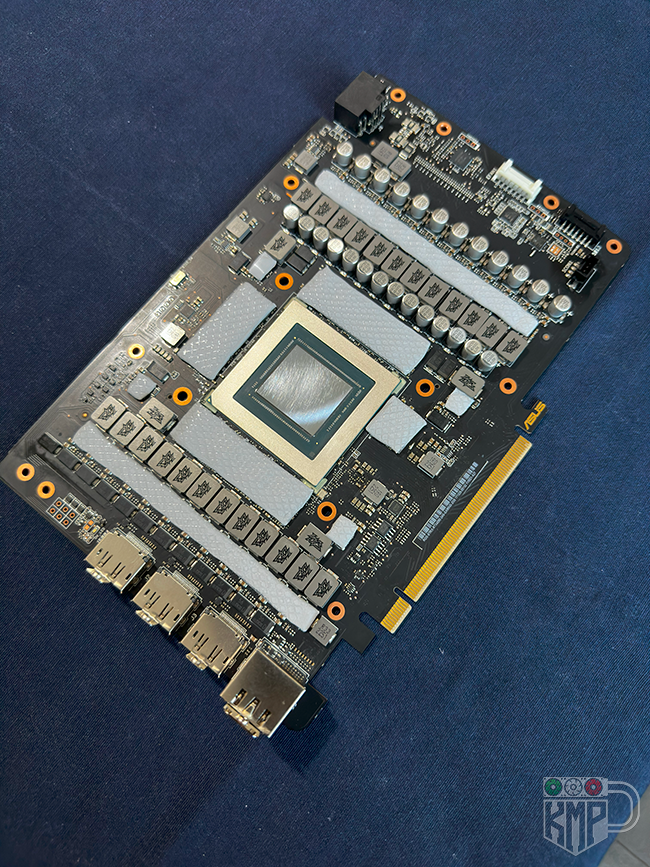
In this stage of the project, I began by disassembling the stock cooler to apply liquid metal, ensuring even better heat dissipation and allowing the card to maintain optimal temperatures under load.
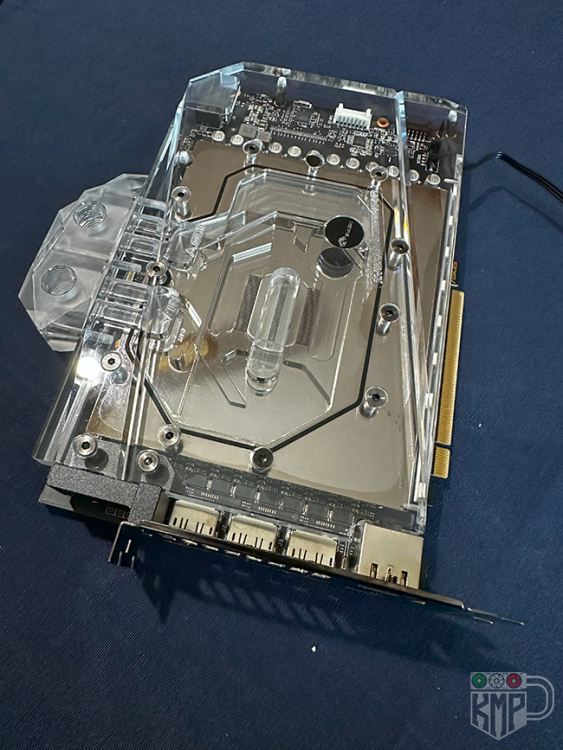
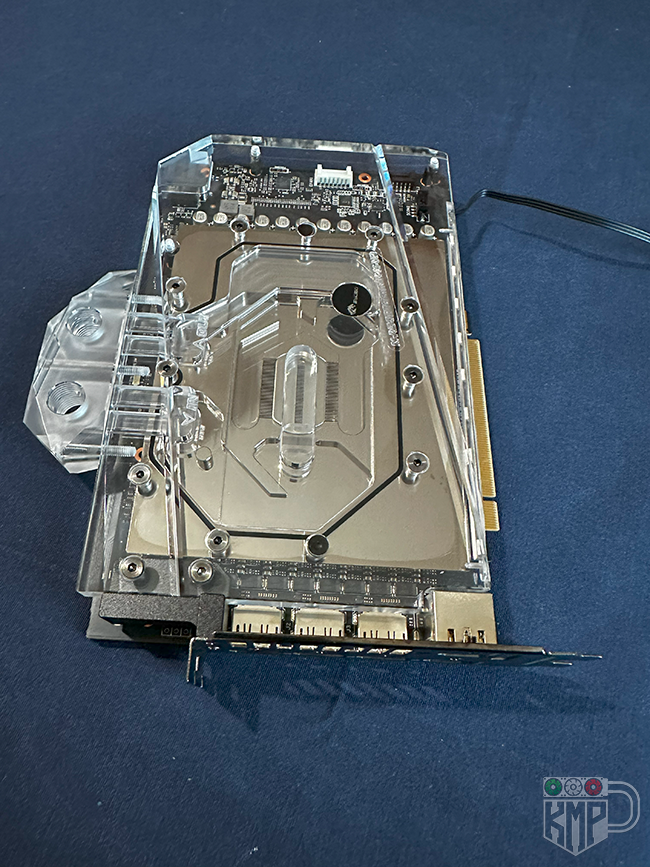
After preparing the card with liquid metal, I installed a BYKSKI water block, integrating it into the PC’s custom loop for silent and highly efficient cooling. This setup lets me push the card to its limits while maintaining the sleek, customized look of the project.
Stay tuned for the next steps, and feel free to share any feedback or suggestions to further enhance the build. Thanks for your support!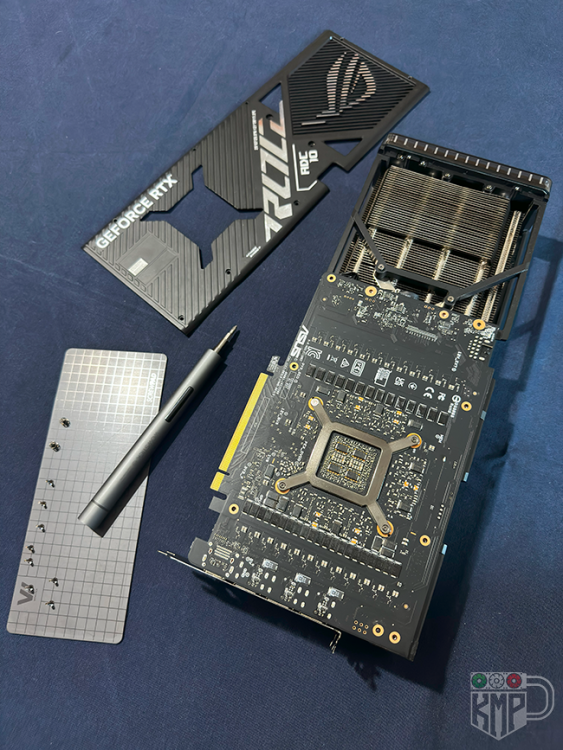


-
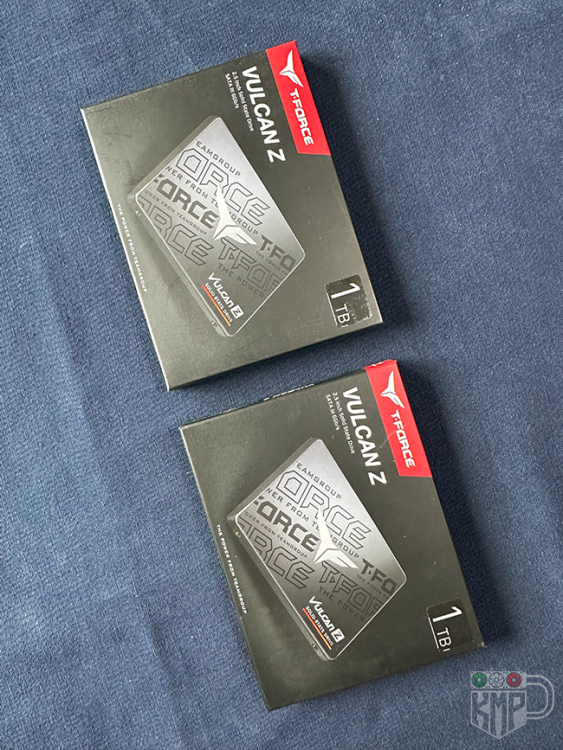
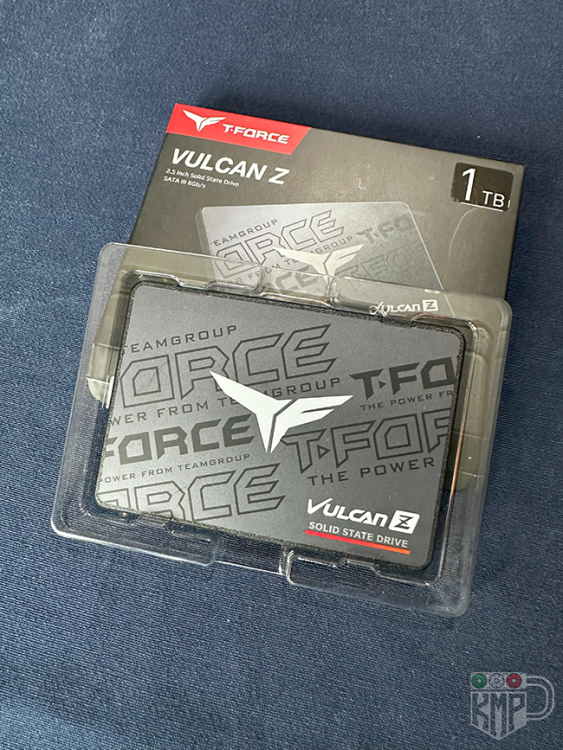
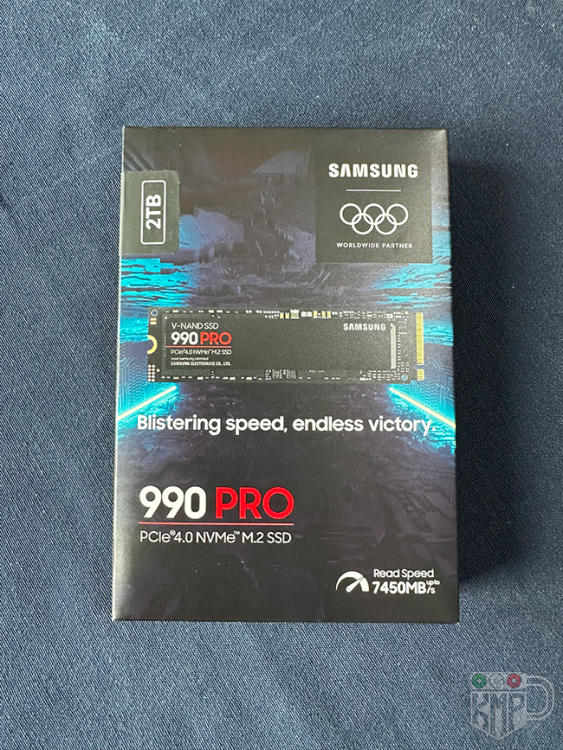
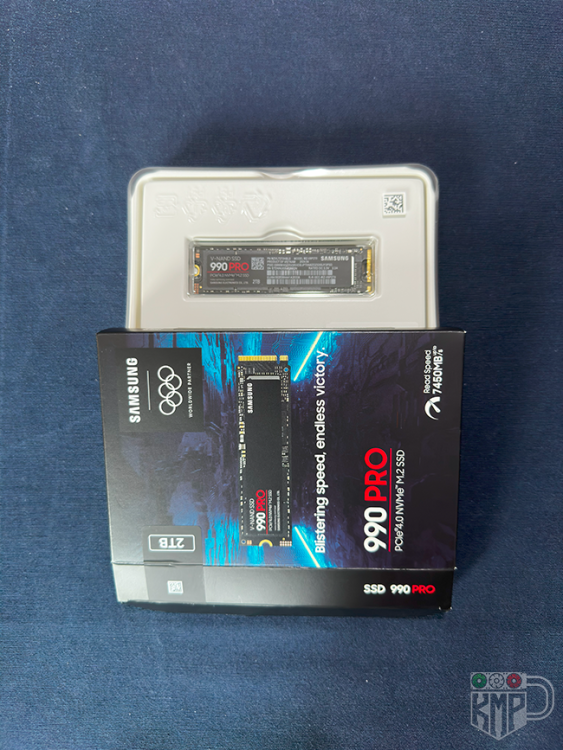
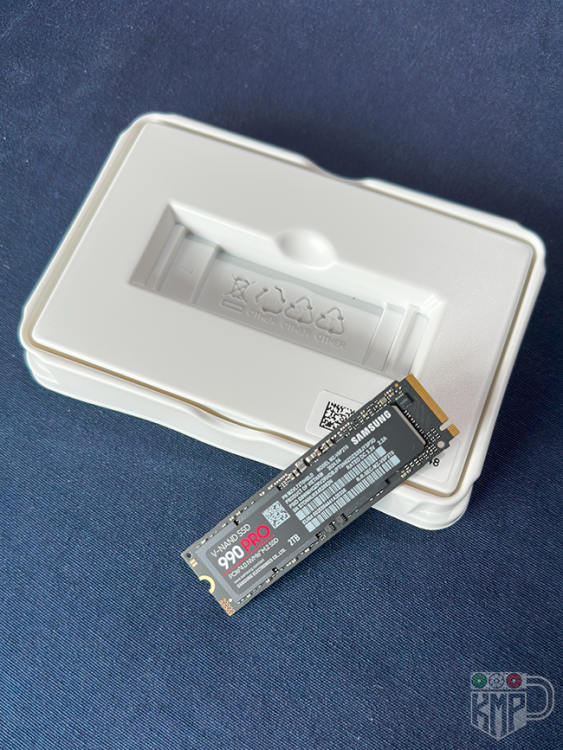
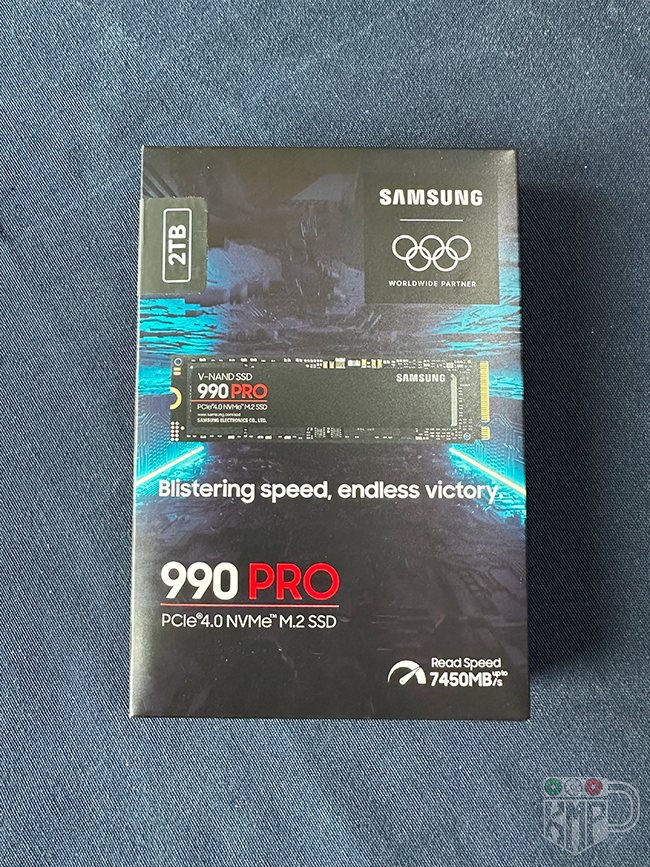
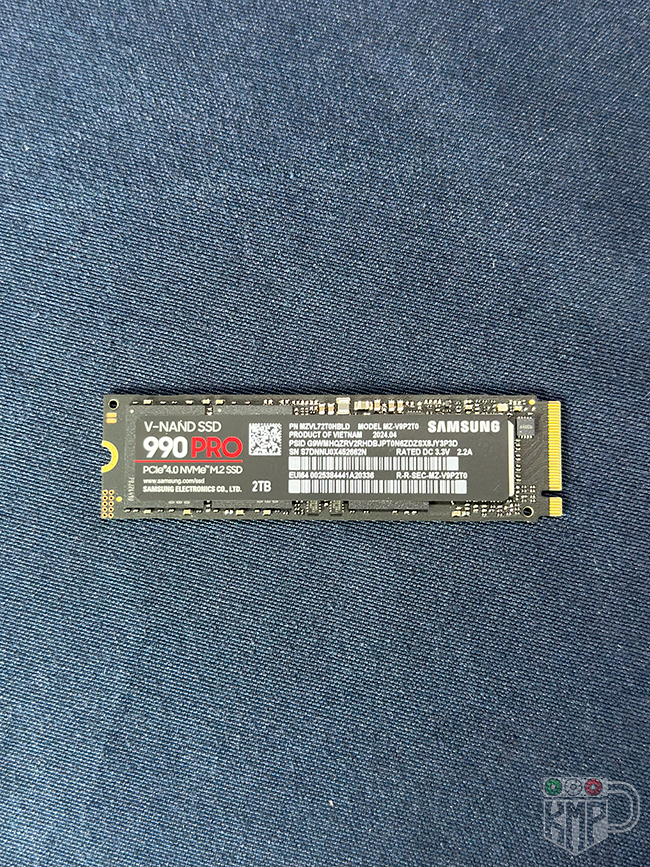
I’m excited to share another major step forward in my Star Citizen-themed mod. Today, I’m introducing the new SSDs that will become an integral part of the project: two T-Force Vulcan Z 1TB, which will be fully customized, and the high-performance Samsung 990 Pro 2TB, which will remain in its original configuration to ensure maximum performance.
T-Force Vulcan Z 1TB
- Interface: SATA III, 2.5" form factor.
-
Transfer Speeds:
- Sequential Read: Up to 550 MB/s.
- Sequential Write: Up to 500 MB/s.
- Capacity: 1 TB per unit.
These two SSDs will undergo a complete aesthetic transformation to fit perfectly into the mod's theme. The minimalistic design of the Vulcan Z provides the perfect foundation for a custom look that echoes the futuristic and technological atmosphere of Star Citizen. The customization will focus on details that combine art and technology while preserving their excellent performance.
Samsung 990 Pro 2TB
- Interface: PCIe 4.0 NVMe, M.2 form factor.
-
Transfer Speeds:
- Sequential Read: Up to 7,450 MB/s.
- Sequential Write: Up to 6,900 MB/s.
- Capacity: 2 TB.
This SSD represents cutting-edge speed and capacity, making it ideal for high-performance applications. It will remain in its original configuration to ensure flawless functionality and support the mod’s most demanding tasks.
The customization of the T-Force Vulcan Z SSDs will go beyond aesthetics, aiming for a seamless integration into the system to ensure that the design and performance work in harmony, providing a superior user experience.
Stay tuned for further updates on the customization process and the evolution of the project. Every component is carefully chosen to elevate the overall quality of the mod, both technically and aesthetically.
I welcome any feedback or suggestions from the community. Your input is invaluable for the ongoing improvement of this project.
#StarCitizenMod #PCModding #CustomSSD #HighPerformanceStorage #TechArtistry

-
Hi everyone,
I’m excited to share an important update about my Star Citizen-themed modding project. I’ve decided to take things to the next level and try something new: airbrushing!
Until now, I’ve always used spray paint cans, but this time I want to push myself further and experiment with more precise and detailed techniques.With the arrival of a Sagud compressor and a set of precision airbrushes, I can finally start working on gradients and details that were hard to achieve before. This is a completely new world for me, so any advice or tips from those of you who have experience with airbrushing would be invaluable!
? Here are some photos of the new setup:
The idea is to create textures and effects that evoke the futuristic universe of Star Citizen, while keeping the style elegant and consistent.
? Have you ever used an airbrush for your projects?
? Any tips or mistakes to avoid?I’m open to any suggestions and can’t wait to connect with others who share this passion. Stay tuned: I’ll soon share my first experiments and updates on the project! ?
-
Hello Citizens!
While I’m deep into the aesthetic details of my Star Citizen mod, I’m pushing the limits of my plotter’s capabilities. Spoiler: I’m trying to create insanely tiny details… it’s a real challenge, but that’s the fun part, right?
Meanwhile, Star Citizen dropped a new video that I couldn’t pass up. It’s all about the RSI Polaris, one of the most iconic and awaited capital ships, unveiled at the recent CitizenCon and now part of the latest patch!
For those unfamiliar, the Polaris is a multi-role ship that blends power, elegance, and versatility. It’s ideal for escort missions, tactical raids, and with its hangar, light fighter support. Truly a beast of the stars! ️
To see it in all its glory, check out this official video:
Now my question to you:
If you were the commander of a Polaris, how would you use it?
Would it be your flagship for galactic exploration or a strategic weapon for epic battles and raids?
Let me know your thoughts in the comments below—I’m curious to hear your take!
-
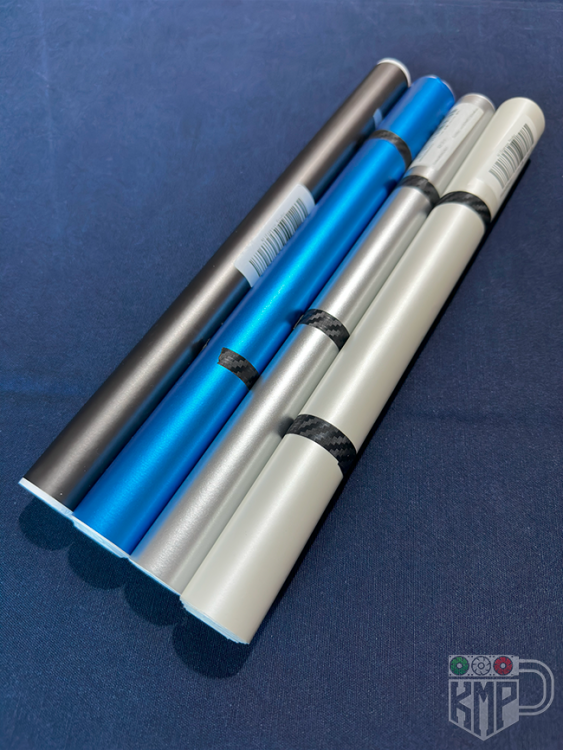
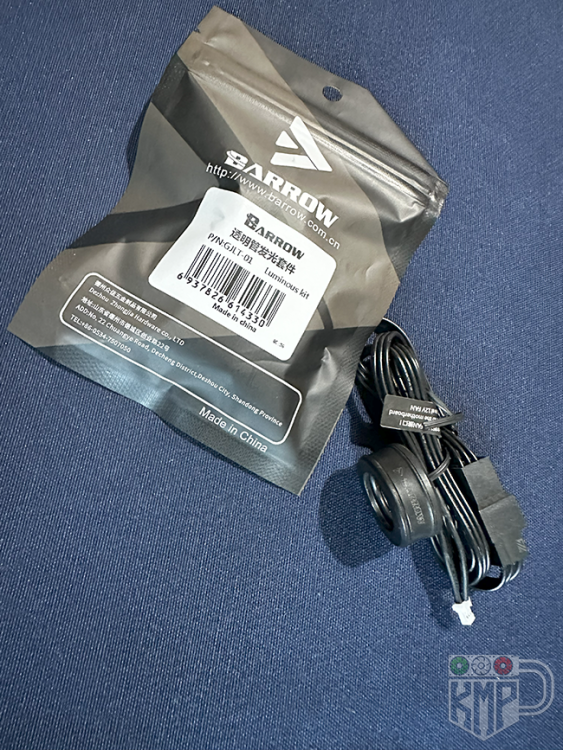
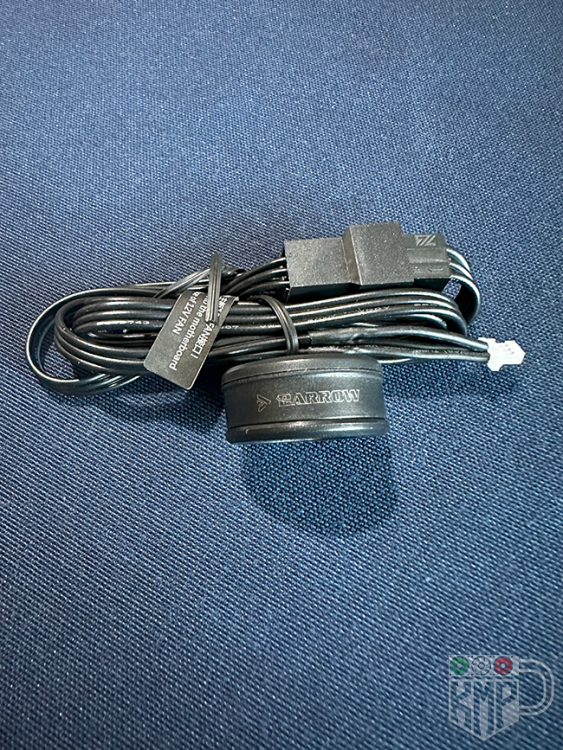
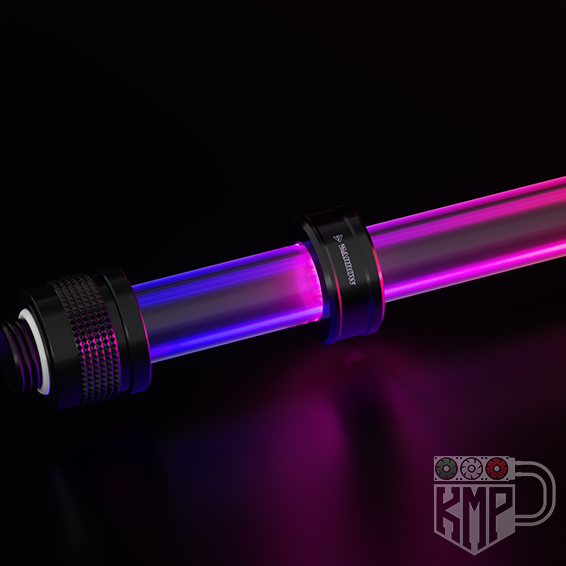
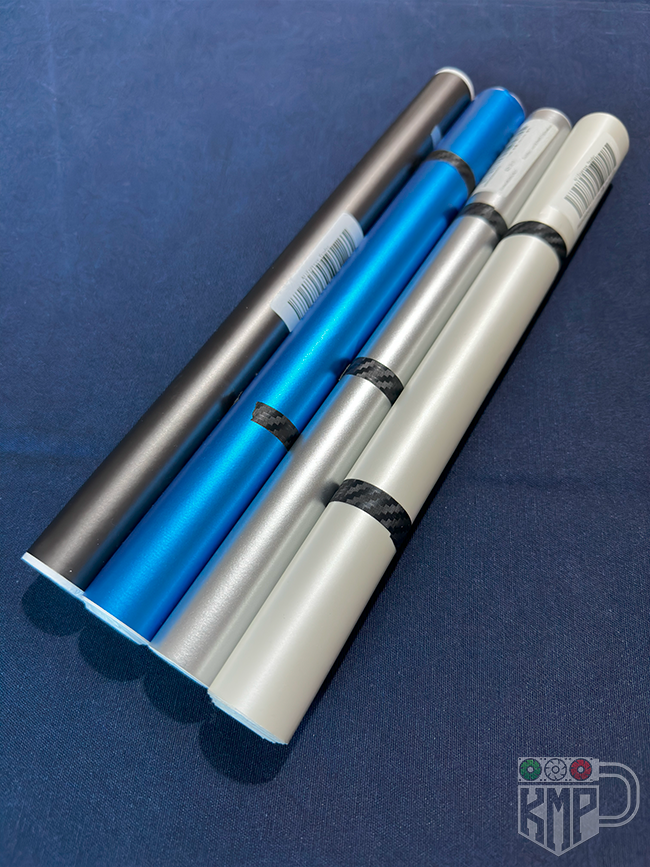
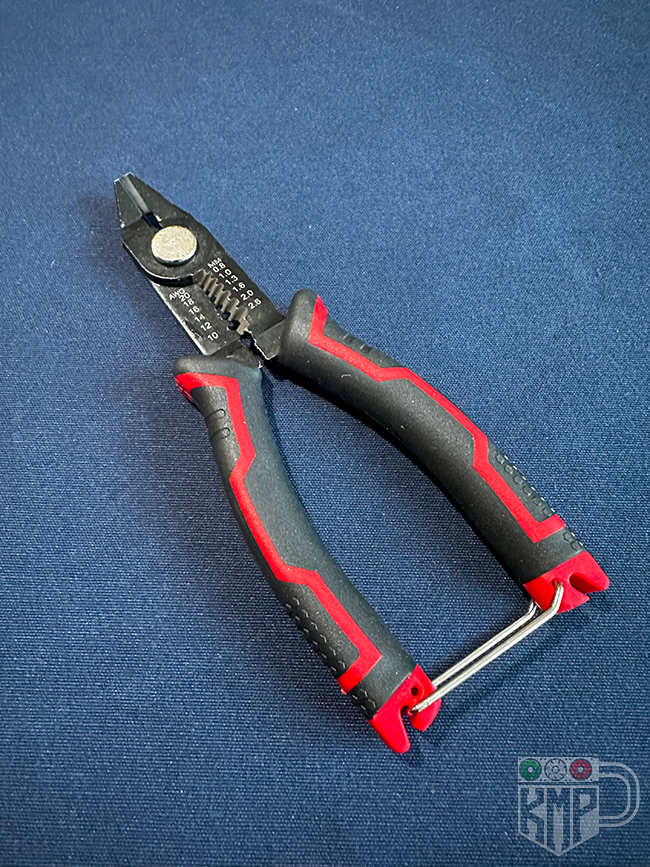
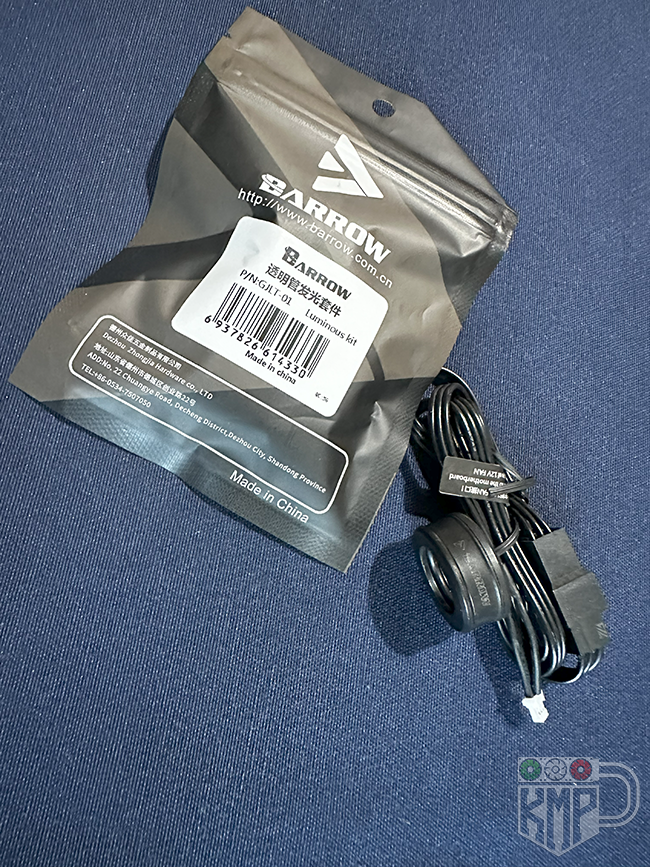
New materials for my Star Citizen mod!
Hey everyone! Today, I got some new materials to continue working on the mod, and I wanted to share the latest arrivals with you:
- Metallic vinyl wrap: I picked four colors – black, blue, silver, and pearl white. I’ll use these to cover some parts of the case and give it a unique touch. The metallic blue and silver are perfect for capturing Star Citizen’s futuristic vibe.
- A new cable tool: Finally! With this tool, I can work on the PSU cables with precision – cutting, stripping, and organizing them. I want the cable management to be spotless and tidy, no messy wires.
- LEDs for the liquid cooling loop: These are awesome. I’ll install them on the tubes to create stunning lighting effects, something that mirrors the spaceship lights in the game.
All of this was bought with my own money (no sponsors yet, but I’m working on it). I’m really excited to see how these details will fit into the final build.
Let me know what you think or if you have any suggestions!


-
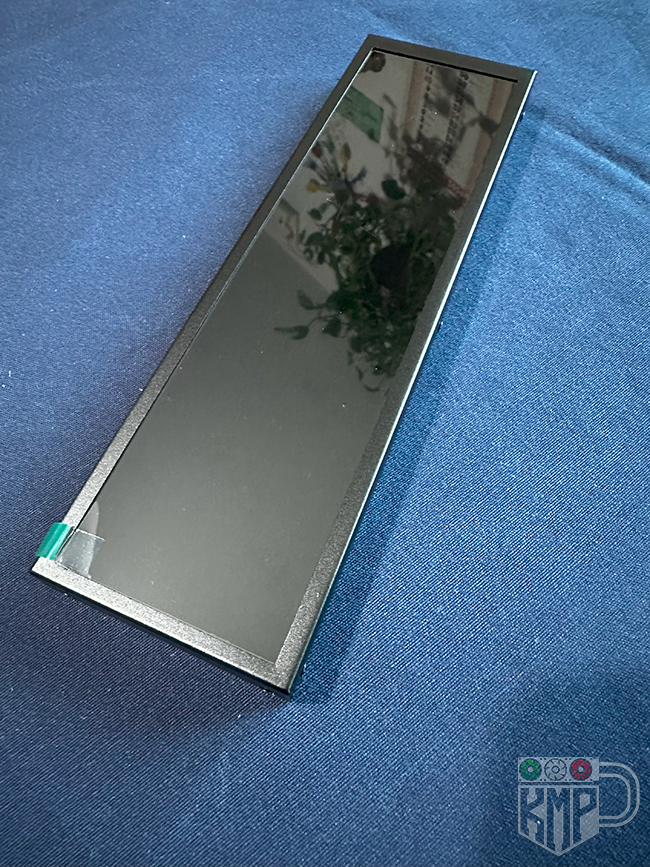
New Materials for My Star Citizen Mod!
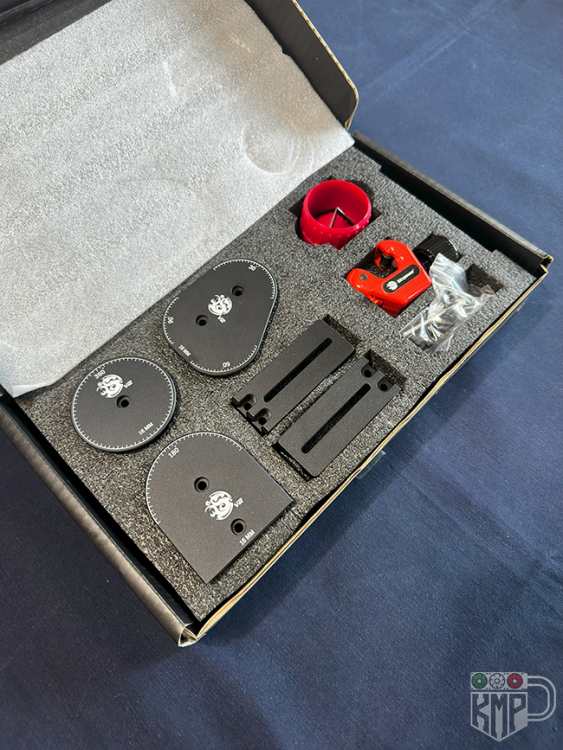
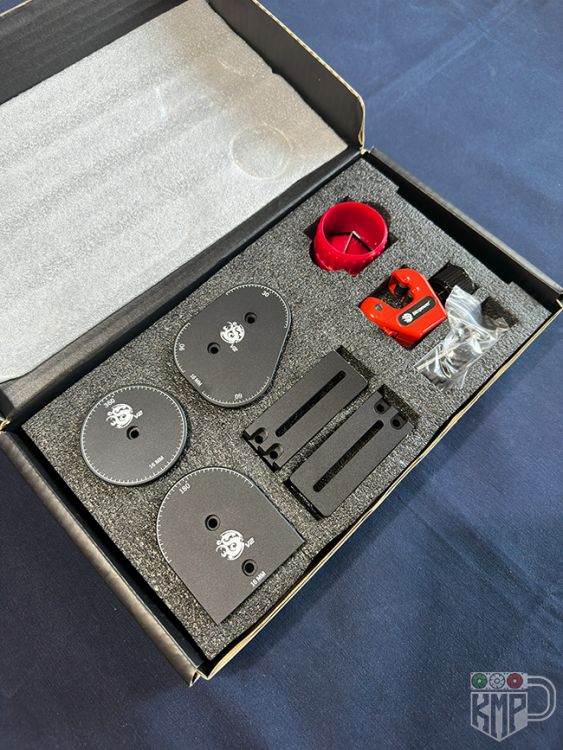
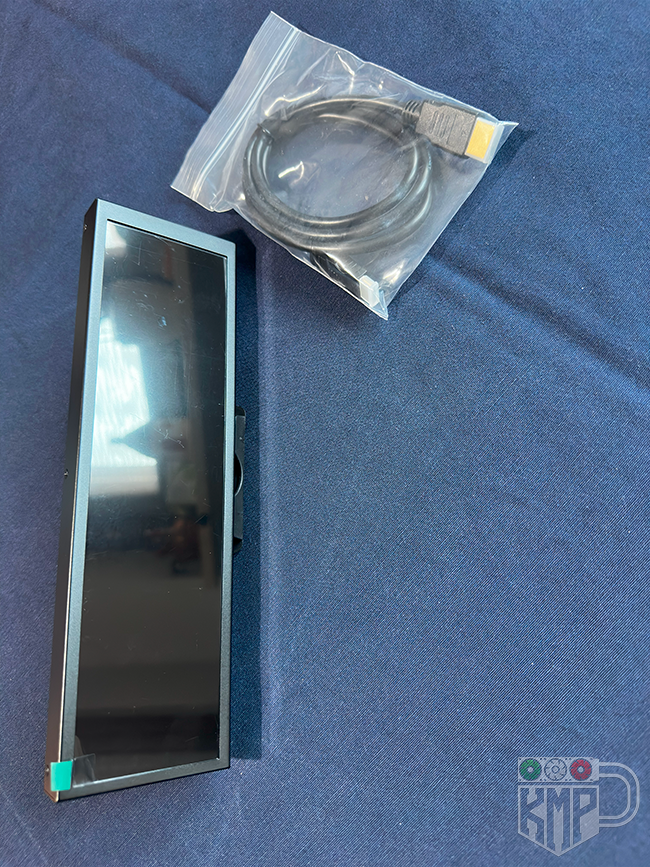
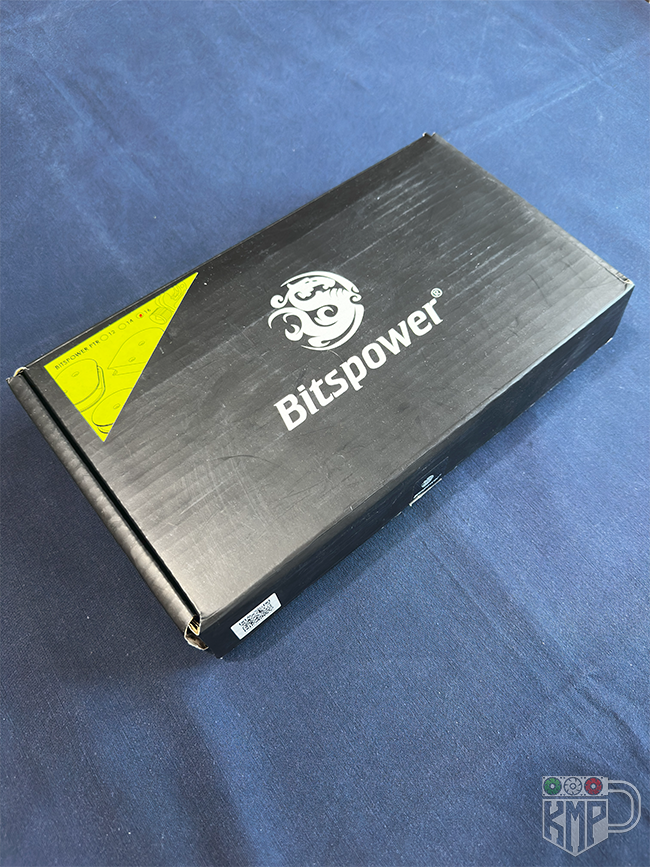
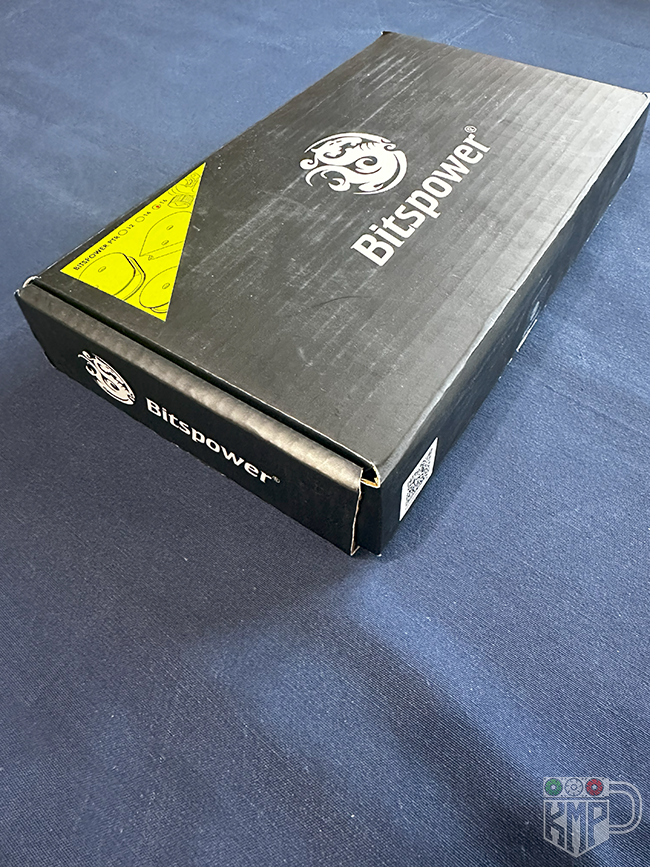
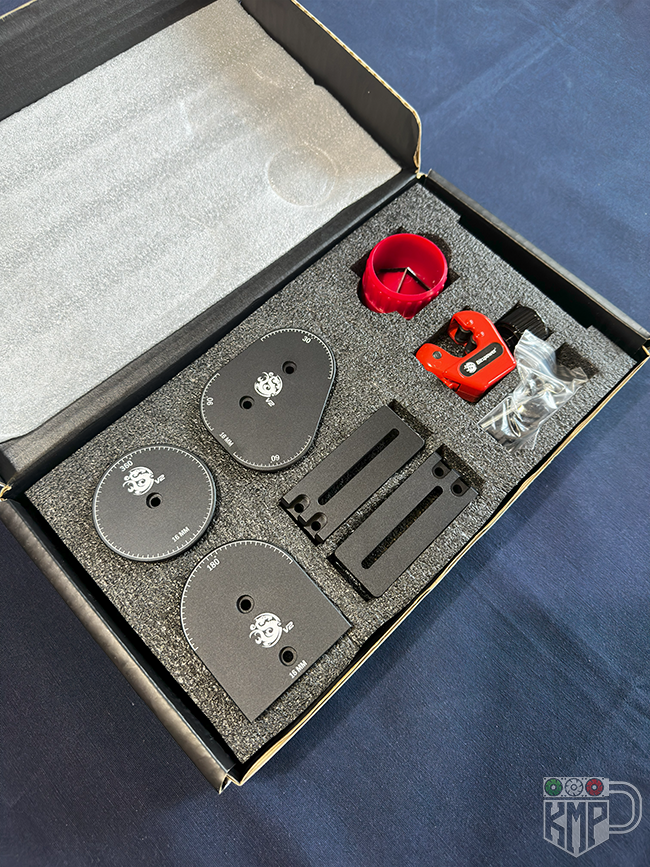
 Hey everyone!I know I’ve been absent for a while, but I’ve been busy with home renovations—extra expenses and various projects taking up my time. In the meantime, some materials I ordered for the mod have finally arrived, and I wanted to share the latest updates with you!Secondary Monitor for Sensor PanelI’ve purchased an ultrawide secondary display, which will be used as a sensor panel inside the case. The goal is to create an HUD-style interface inspired by Star Citizen, displaying real-time system data such as temperatures, GPU/CPU usage, fan speeds, and other metrics. This will be integrated using AIDA64 and Rainmeter, designed to match the game’s futuristic aesthetics.Bitspower Hard Tube Bending KitTo build the custom liquid cooling loop, I’ve invested in a Bitspower tube bending kit. This will allow me to achieve precise and clean bends without relying on less accurate tools. The kit includes:
- Various angle templates (45°, 90°, 180°) for precise bends
- Tube cutter and finishing tools
- Guides to keep the tube stable during bending
Looking forward to getting back to work on the mod soon. Stay tuned!


-
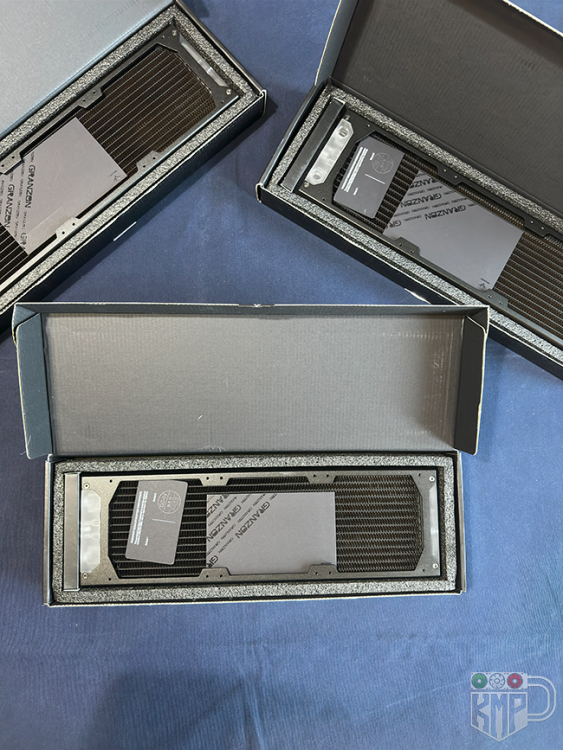
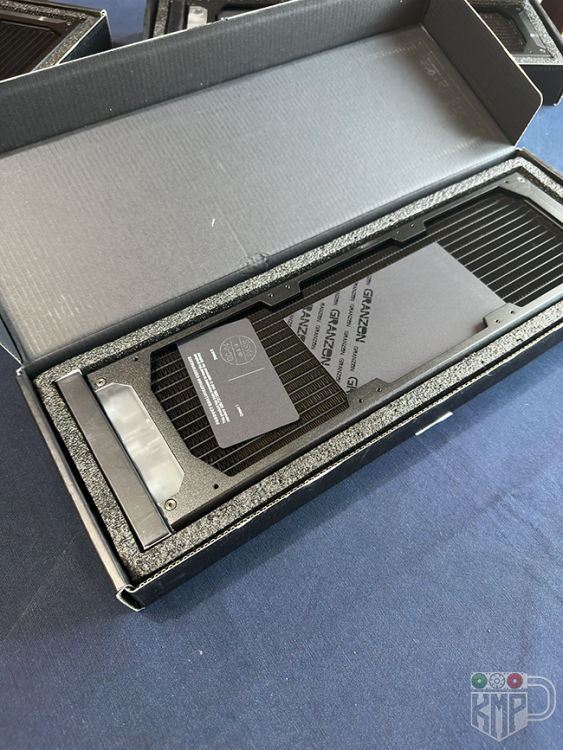
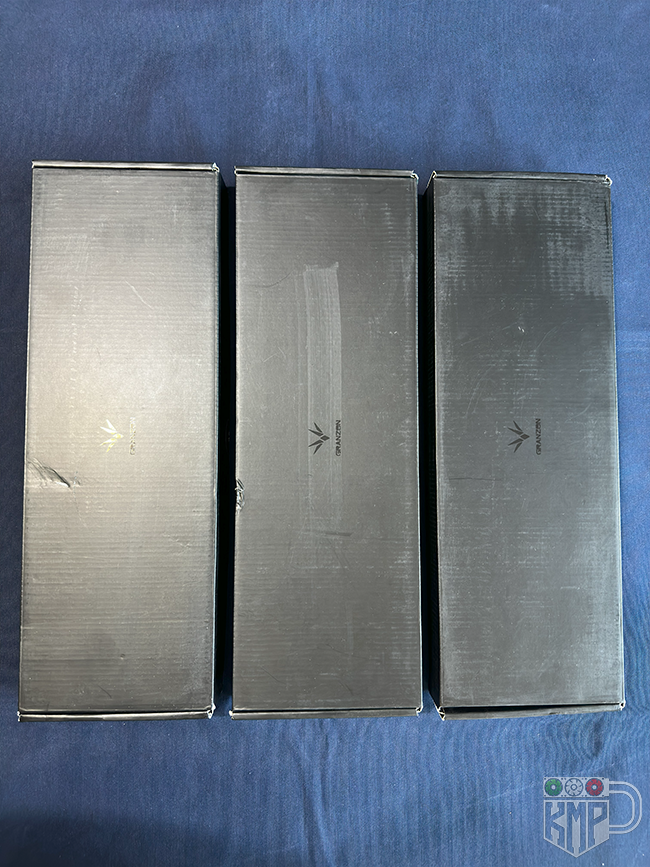
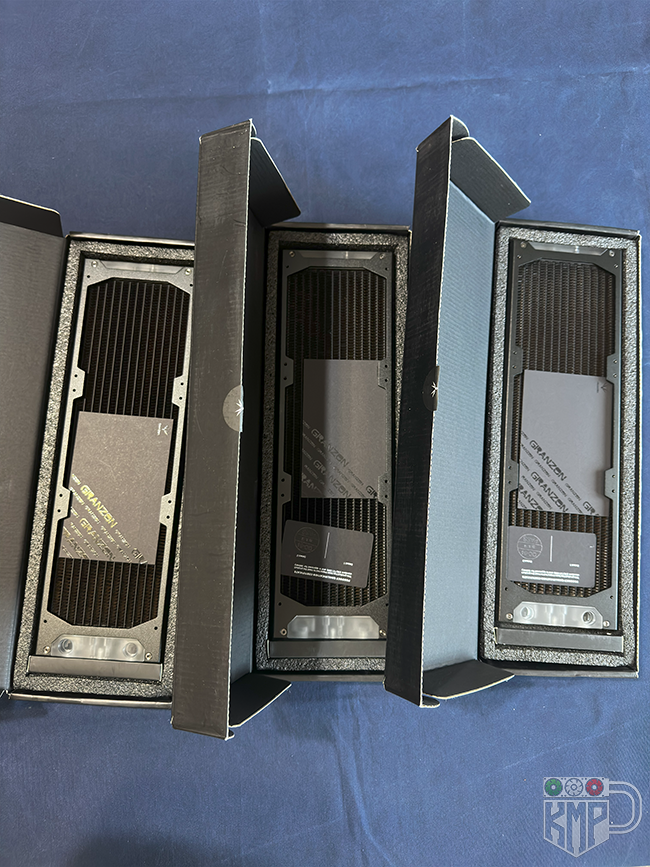
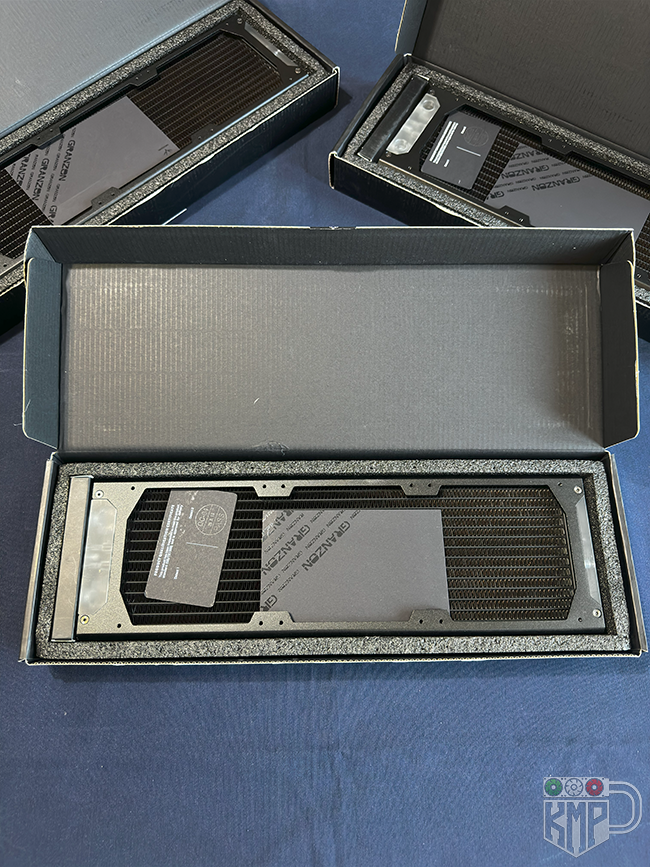
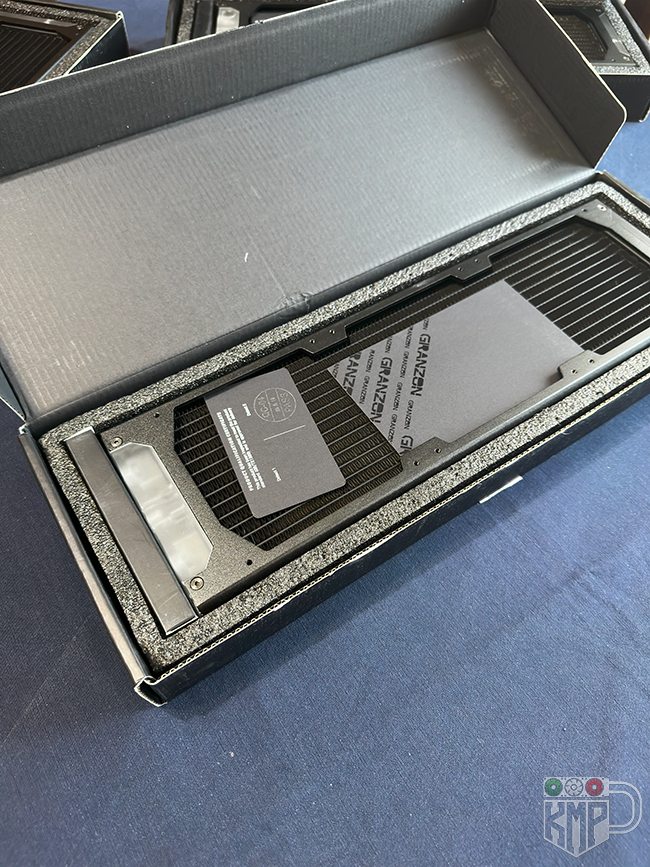
Hey everyone!Here are the three Bykski 360mm radiators that will enhance the liquid cooling system for this mod.Unboxing & First ImpressionsThe build quality is excellent, with a solid structure and well-optimized fin density for efficient heat dissipation. One of the standout features is the transparent section on the side, giving the radiators a futuristic and high-tech look. This detail perfectly matches the Star Citizen aesthetic, adding a sleek, spaceship-inspired vibe to the setup.Customization Incoming!These radiators won’t stay stock—I’ll be customizing them with a Star Citizen-themed design to fully integrate them into the build. I already have some ideas for finishes and aesthetic details, so expect some updates soon!For now, here are some unboxing photos.


-
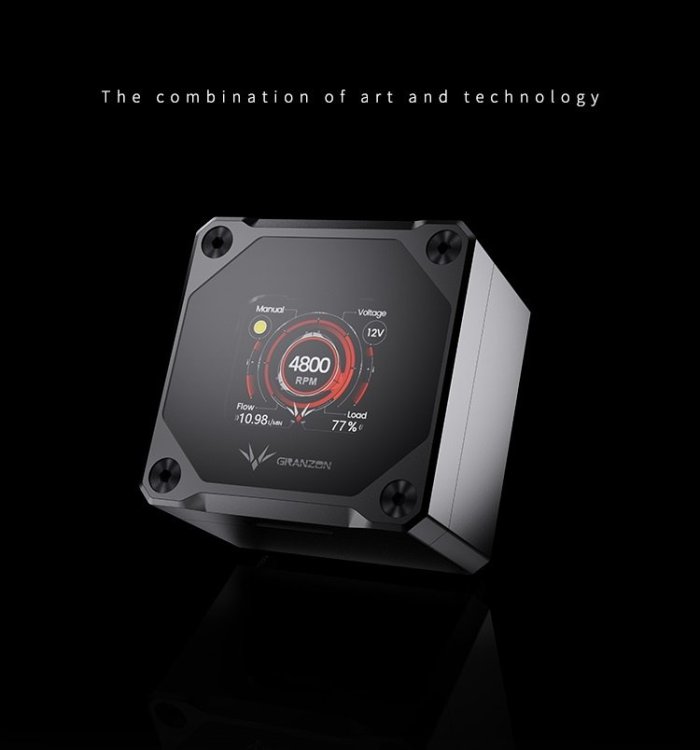
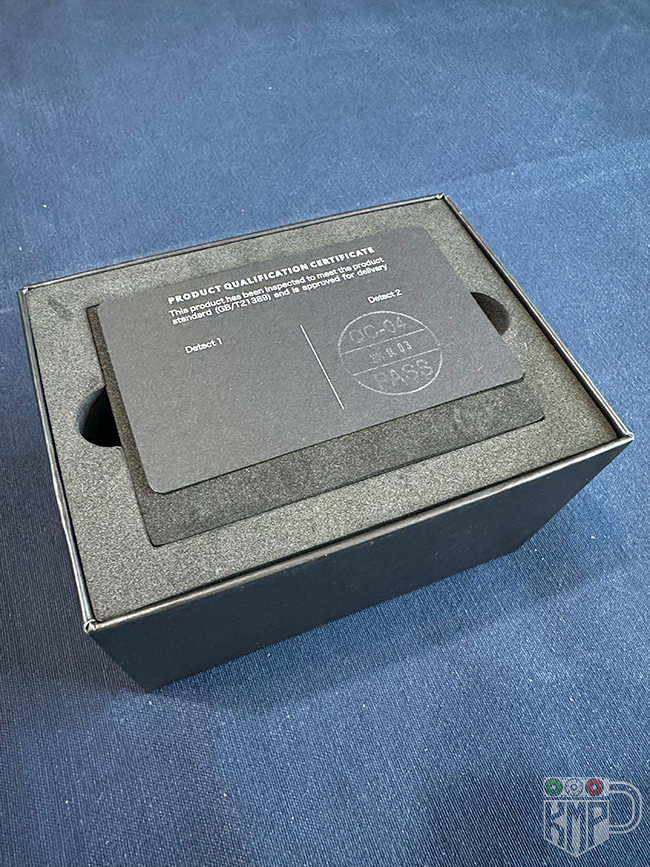
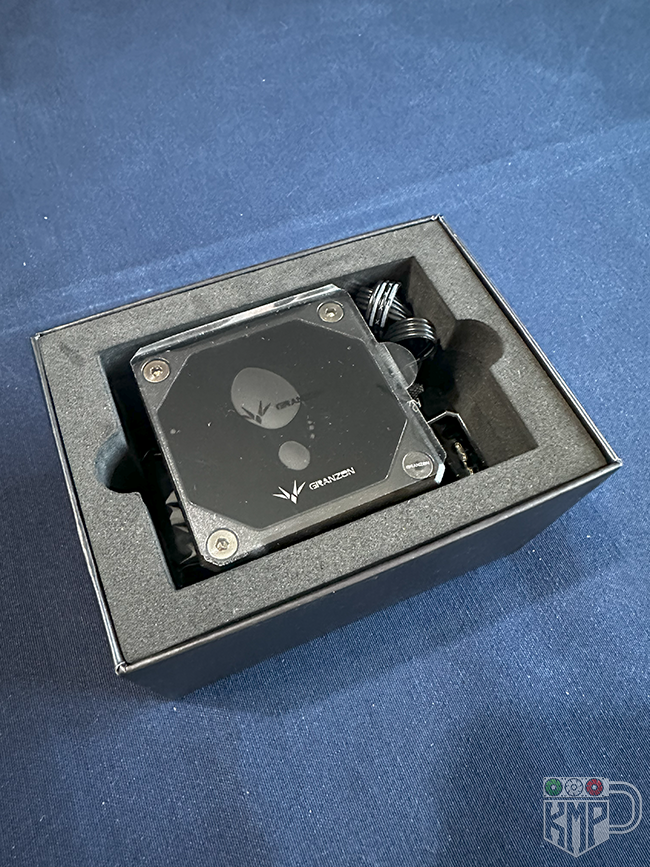
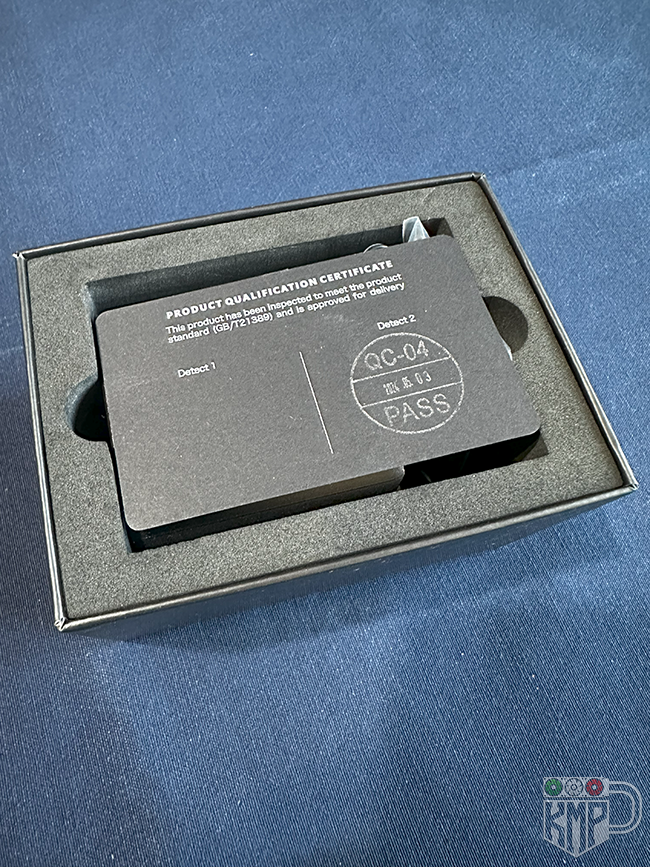
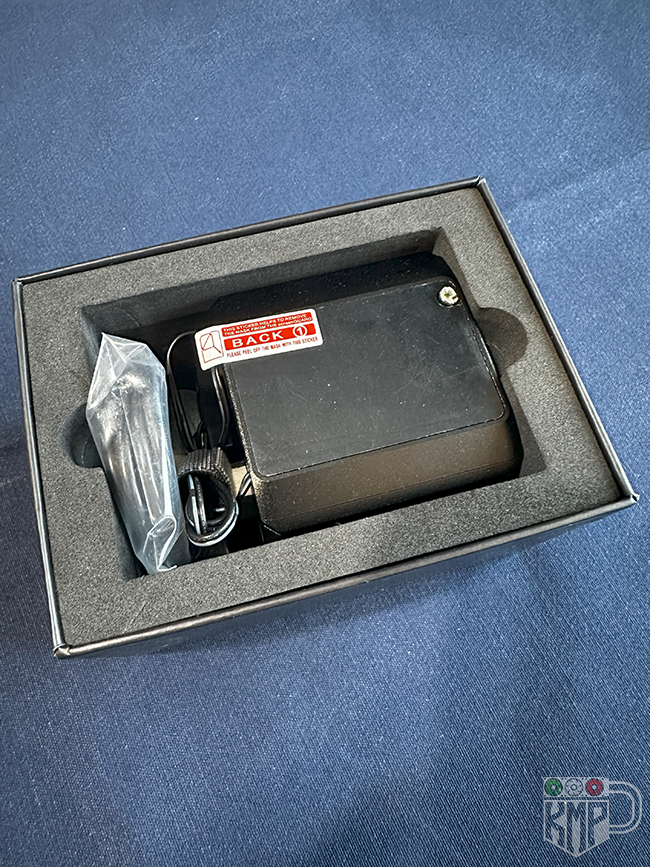
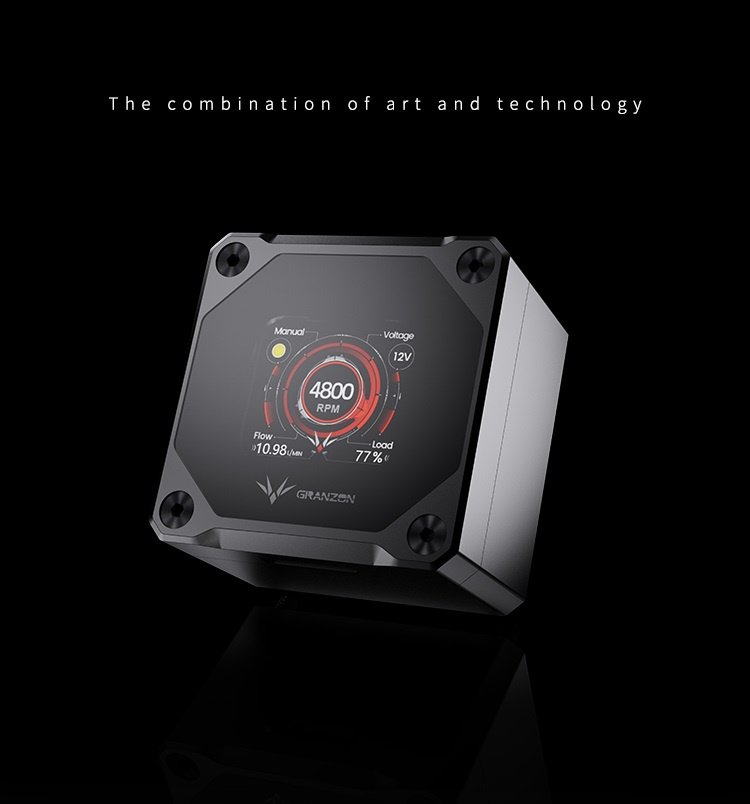
New Arrivals: Pump, Flow Meter, ROG Controller & Loop Tester
Hey everyone!
New batch of components just landed for the Star Citizen-themed build, and I had to share the latest additions with you!
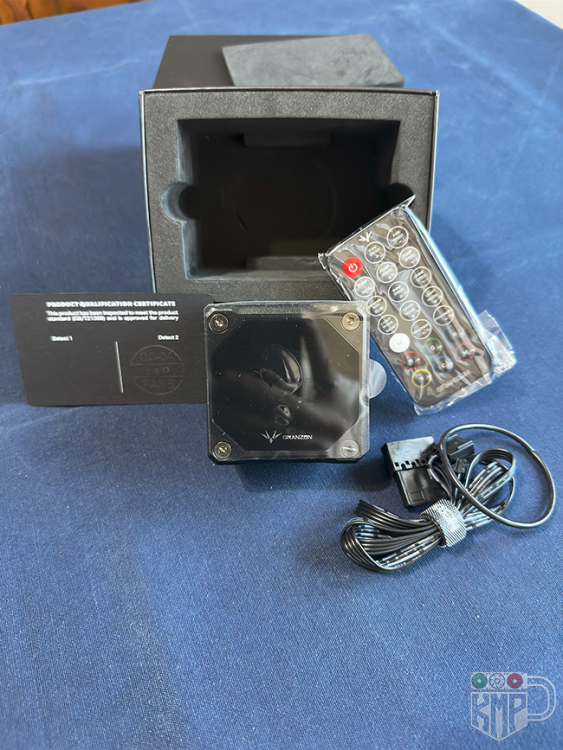
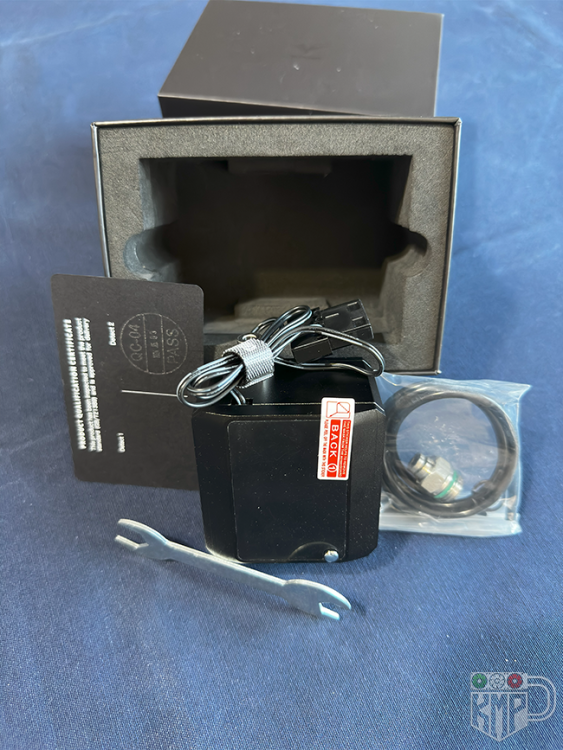
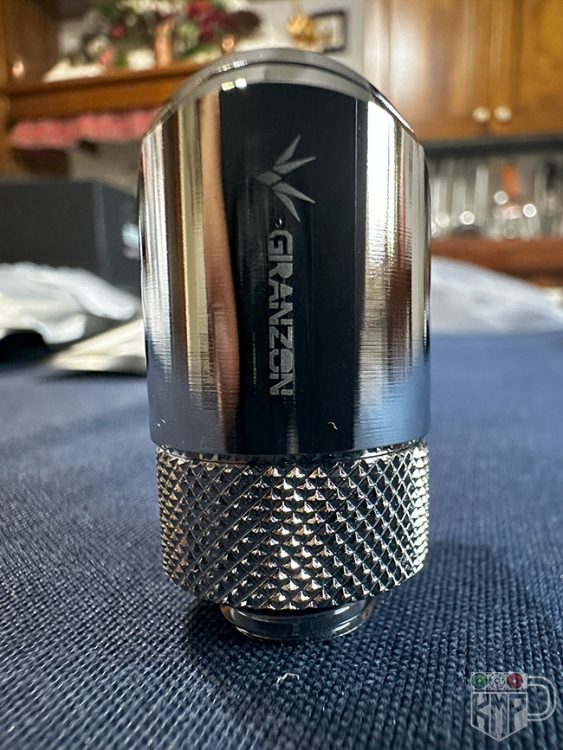
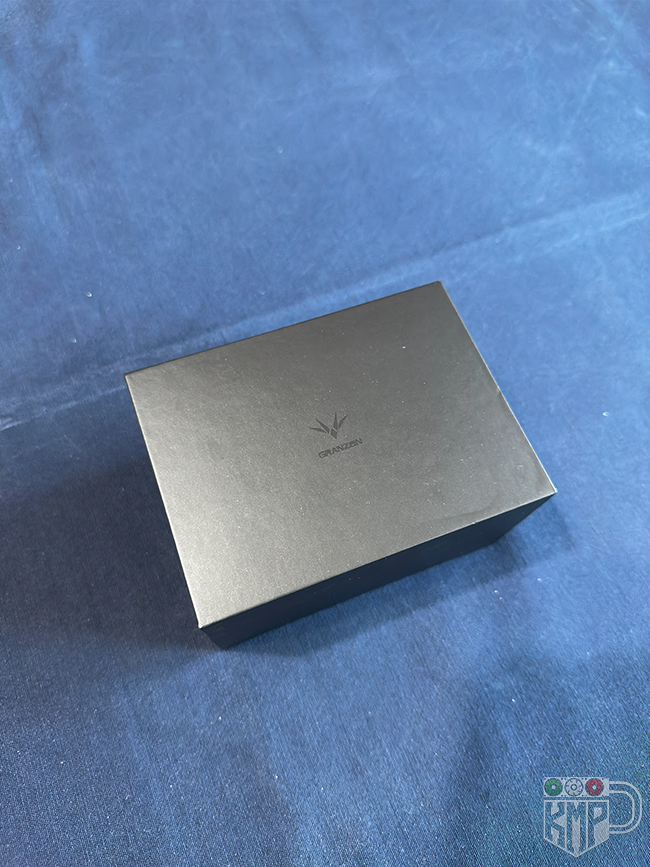
 Granzon DDC Pump + Touch Display
The Granzon DDC pump with integrated touch display is here—a sleek and powerful unit that blends functionality and aesthetics.
-
Real-time readout of RPM, flow rate, voltage, and load
-
Cockpit-style interface, a perfect match for the Star Citizen theme
-
Compact and clean design, ready for custom visuals
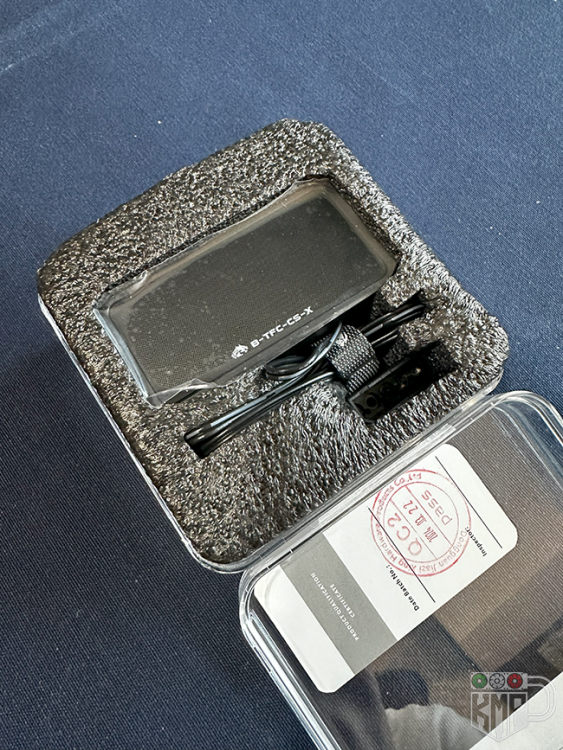
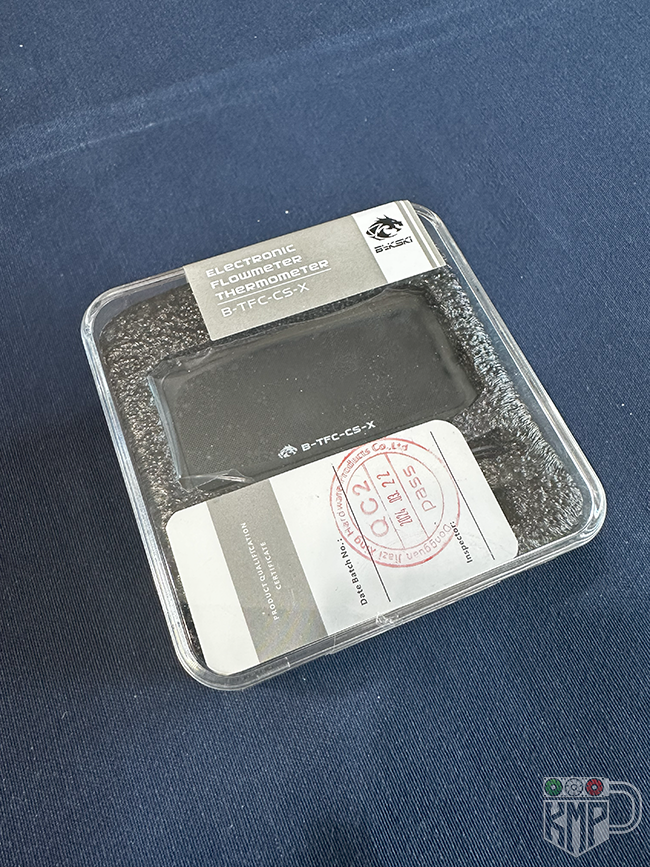
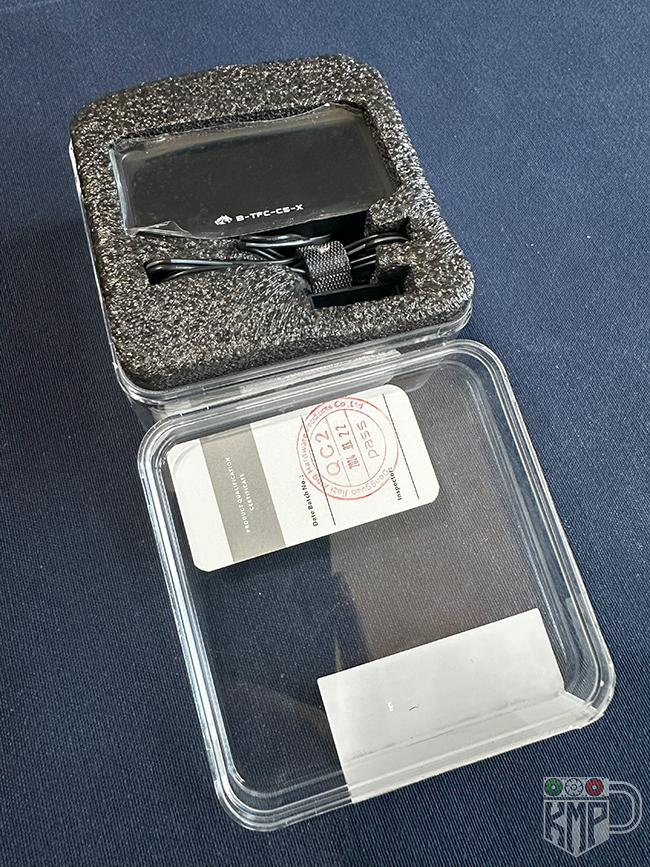
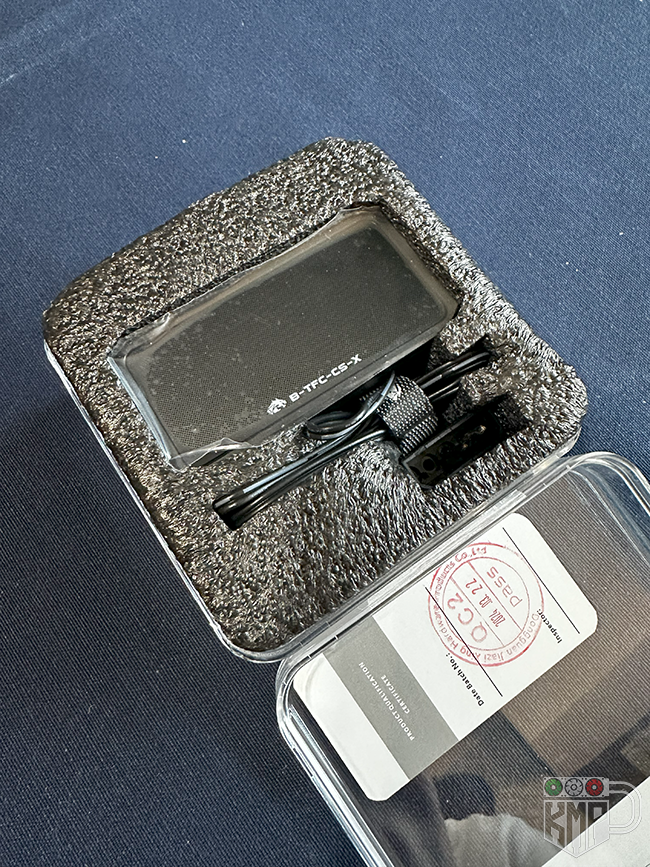
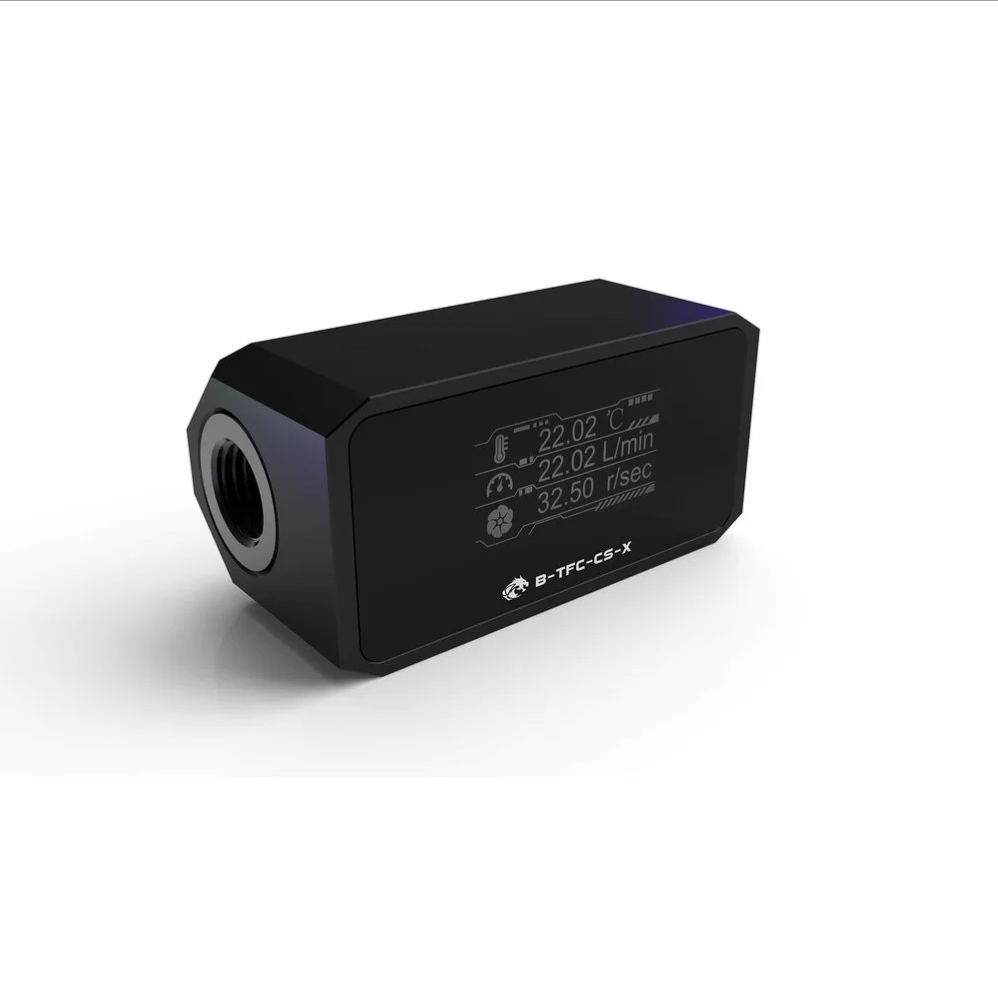
 Bykski Flow Meter B-TFC-CS-X
A must-have addition for the loop: the digital flow meter by Bykski.
-
Shows temperature, flow (L/min), and rotational speed (r/sec)
-
Minimalist and modern look, with a built-in display
-
Will integrate seamlessly next to the secondary monitor HUD
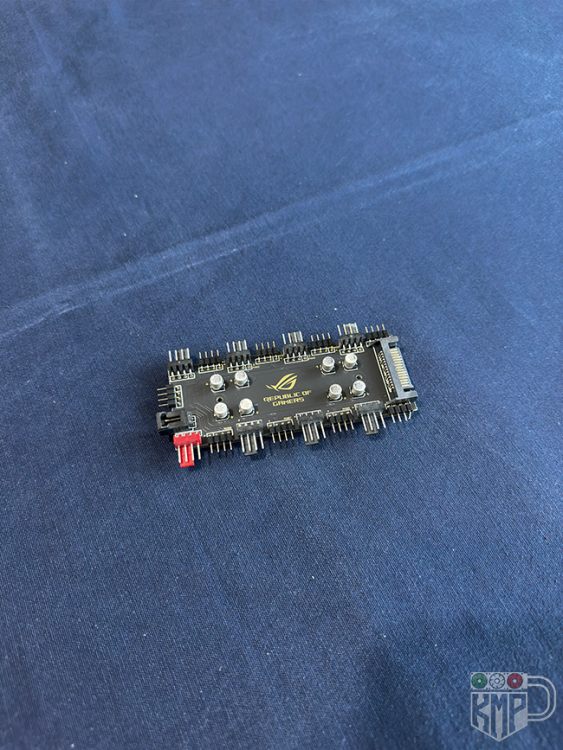
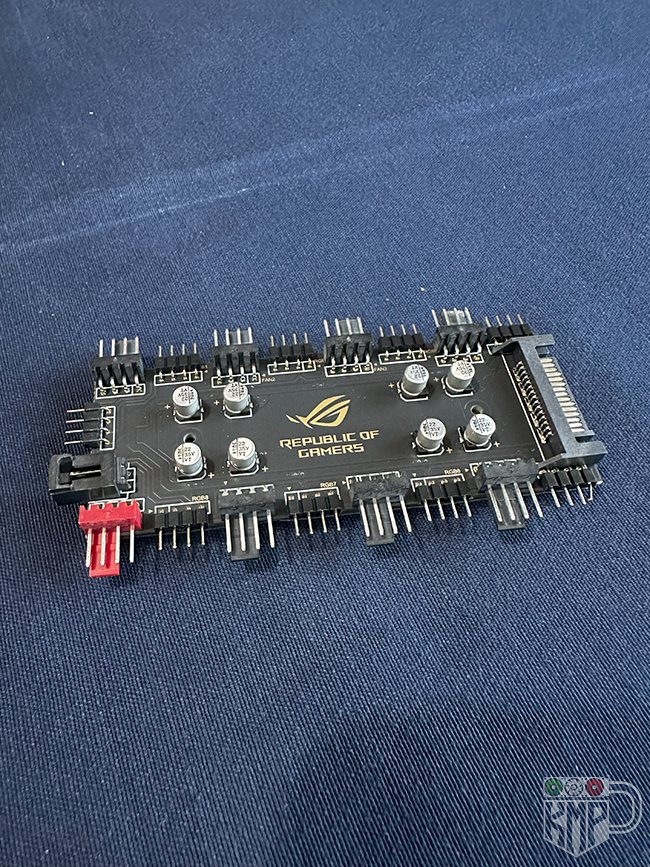
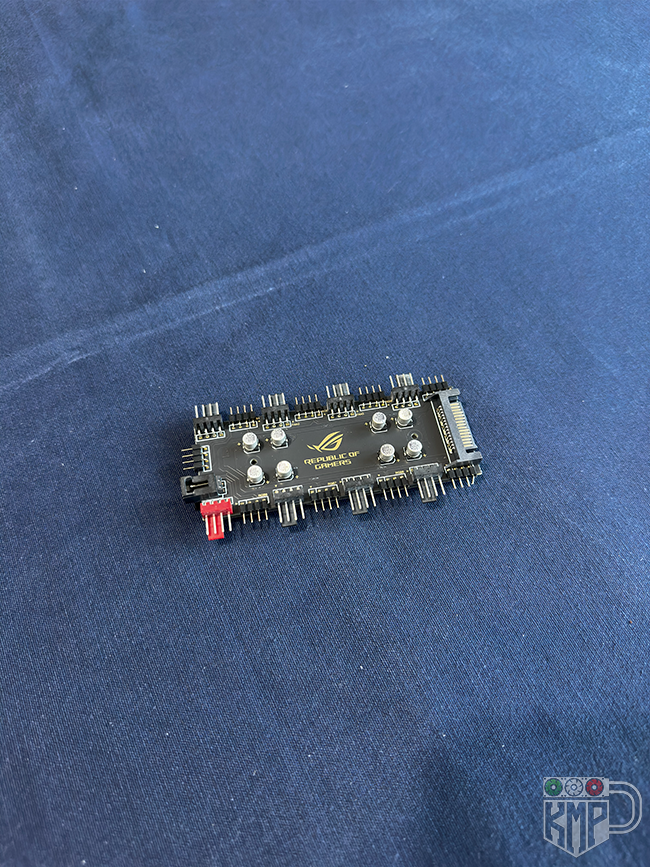
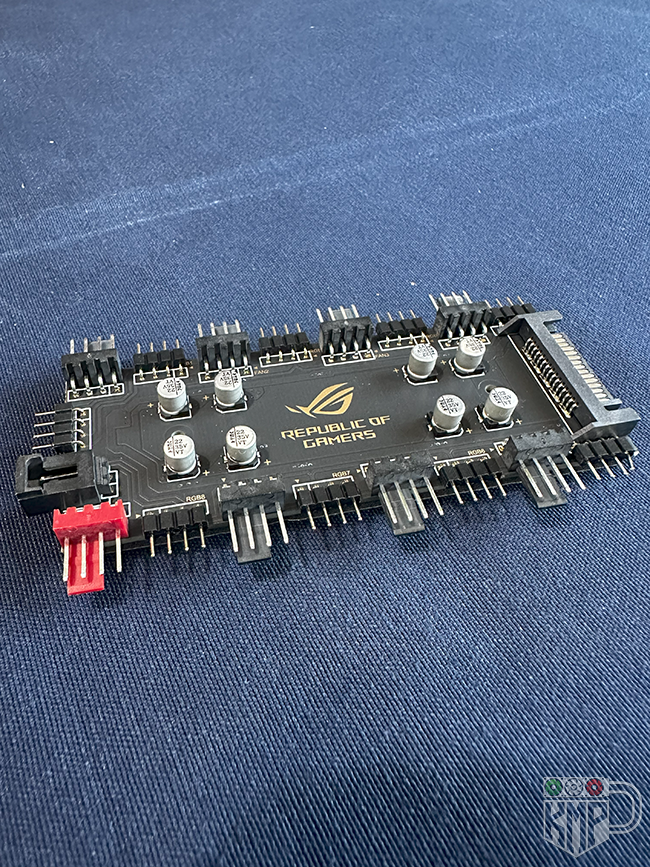
 ASUS ROG Fan & ARGB Hub
This hub will handle fan and RGB strip management across the build.
-
Aura Sync compatible
-
Plenty of ports for clean and centralized cable routing
🧪 Electronic Pressure Tester
Also added an electronic pressure tester for the loop.
-
Essential for leak testing before powering on the system
-
Helps ensure maximum safety and peace of mind during the first fill
 Sharing some pics of the new gear!
As always, each piece will be integrated with care and style to reflect the Star Citizen universe, both visually and functionally. Some will even be customized with unique graphics—more updates coming soon!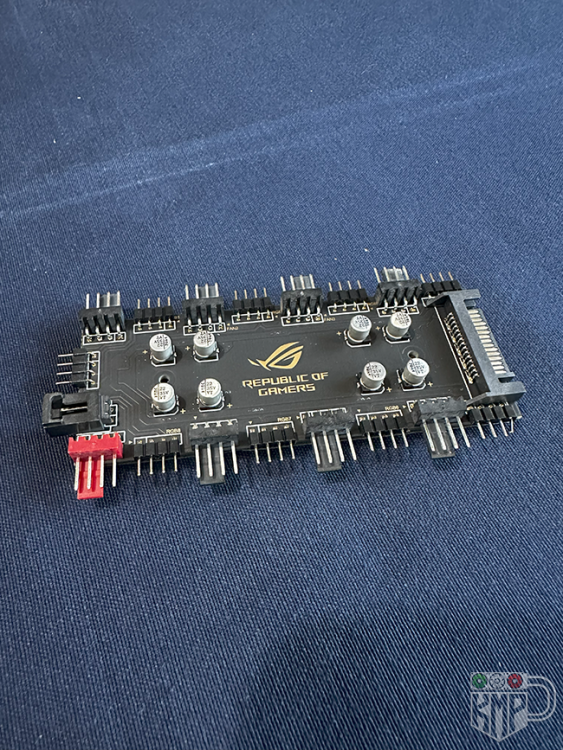


-
-
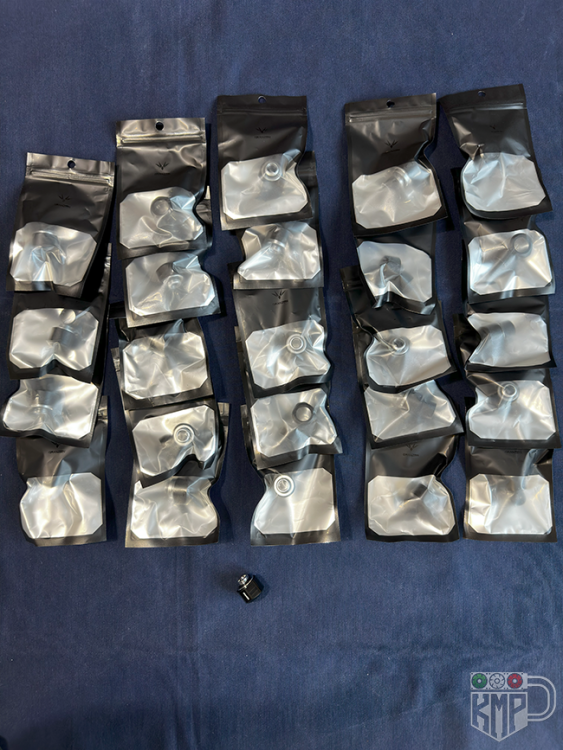
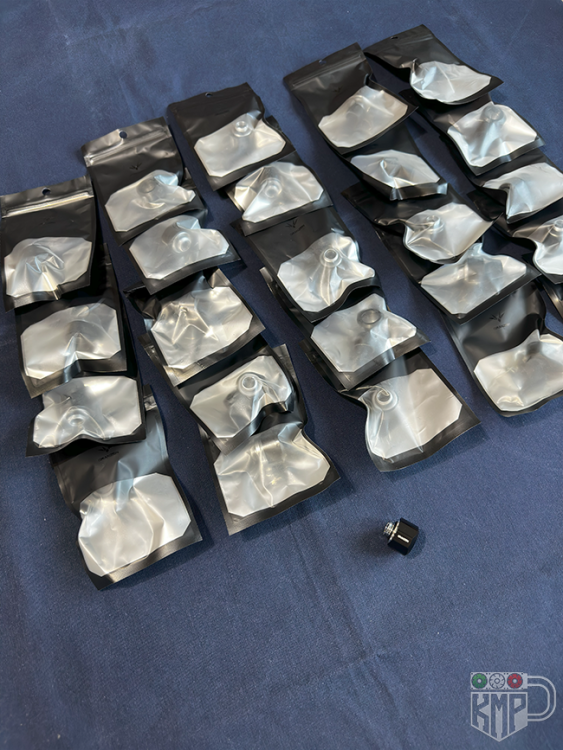
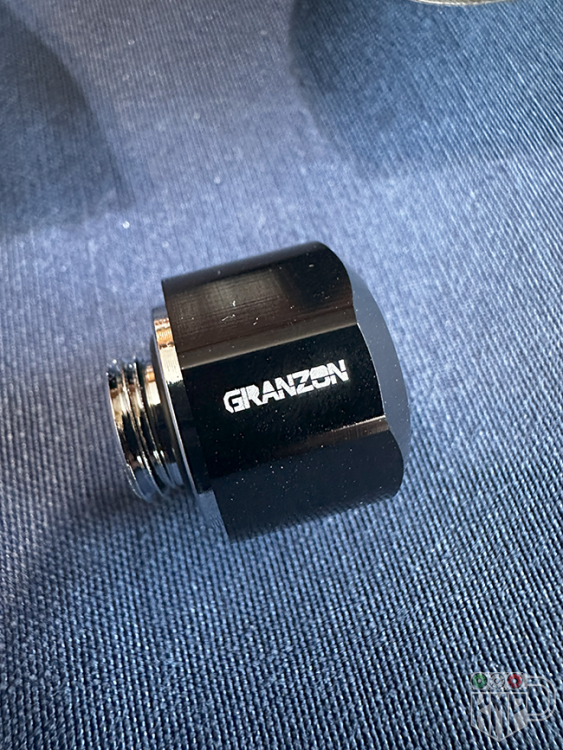
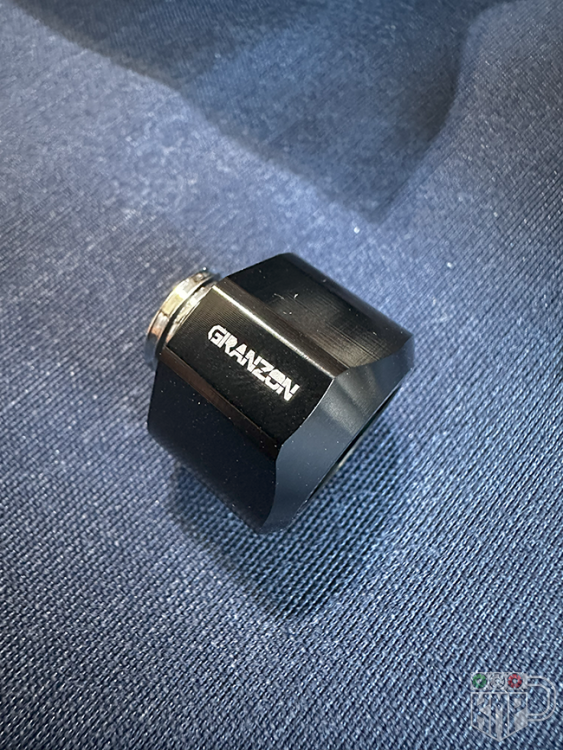
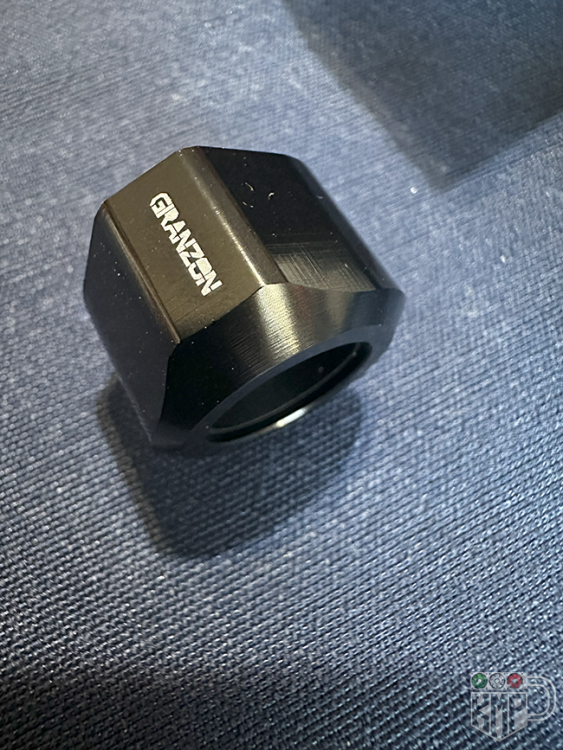
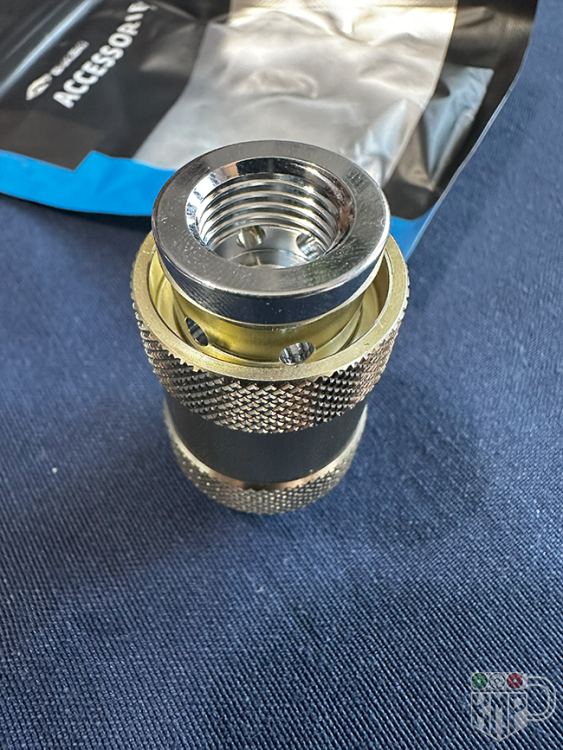
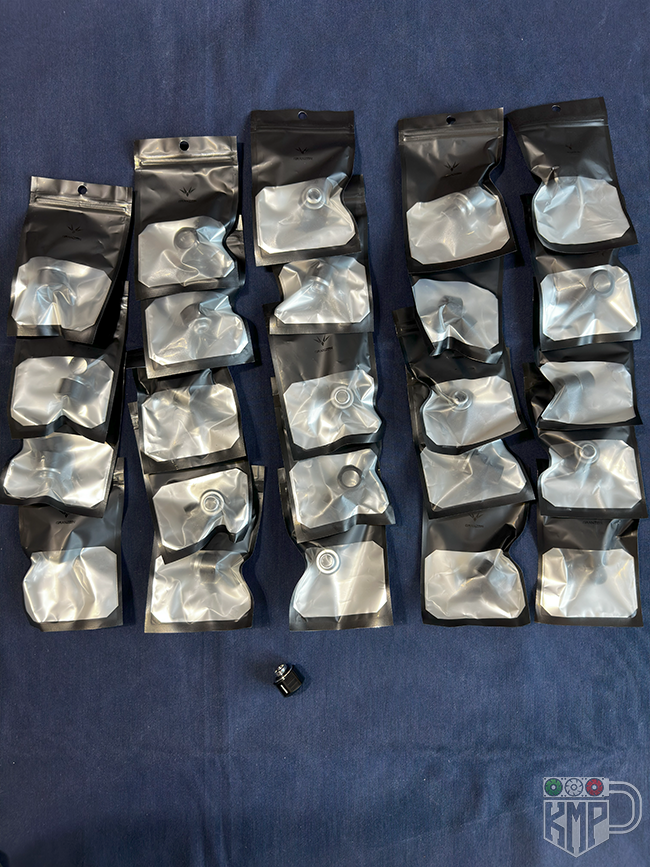
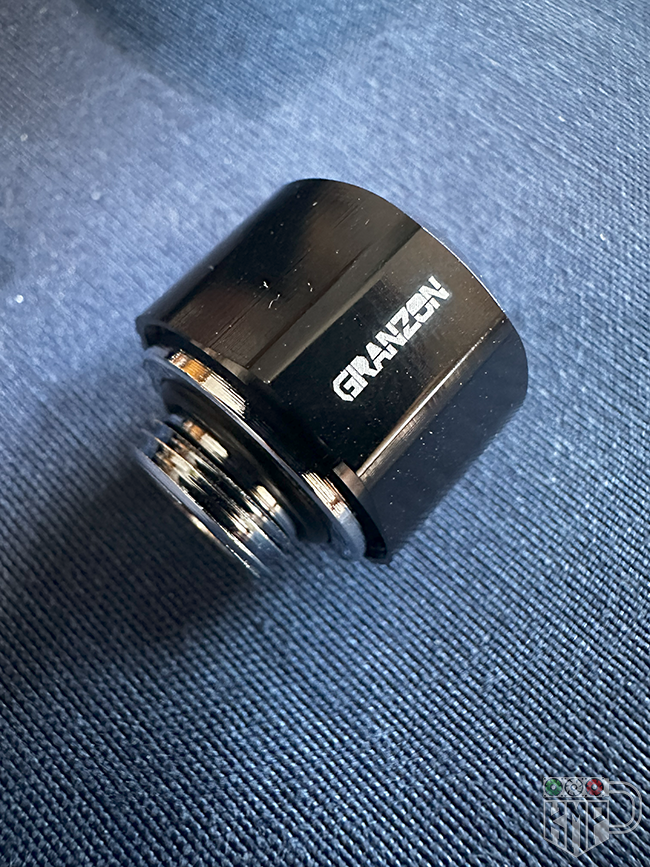
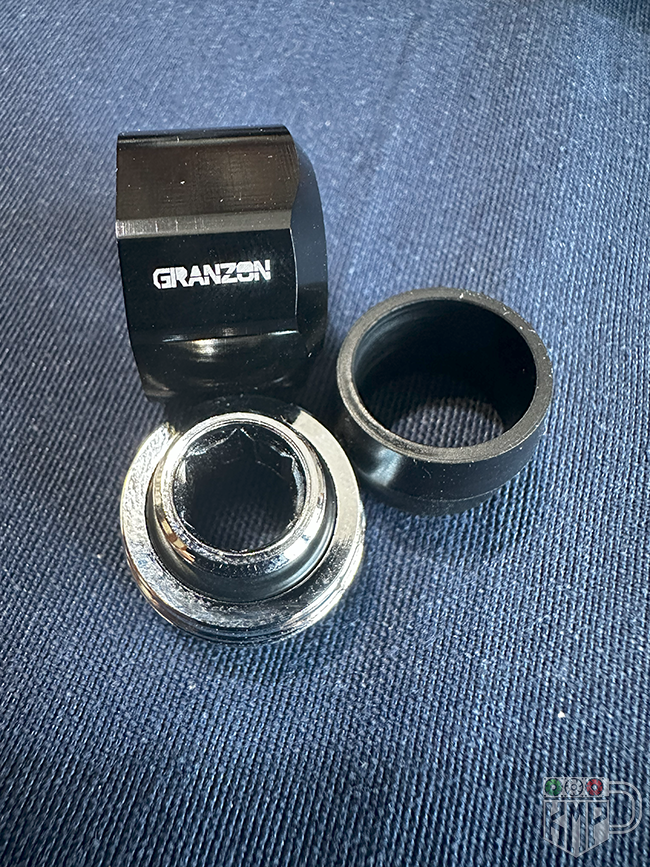
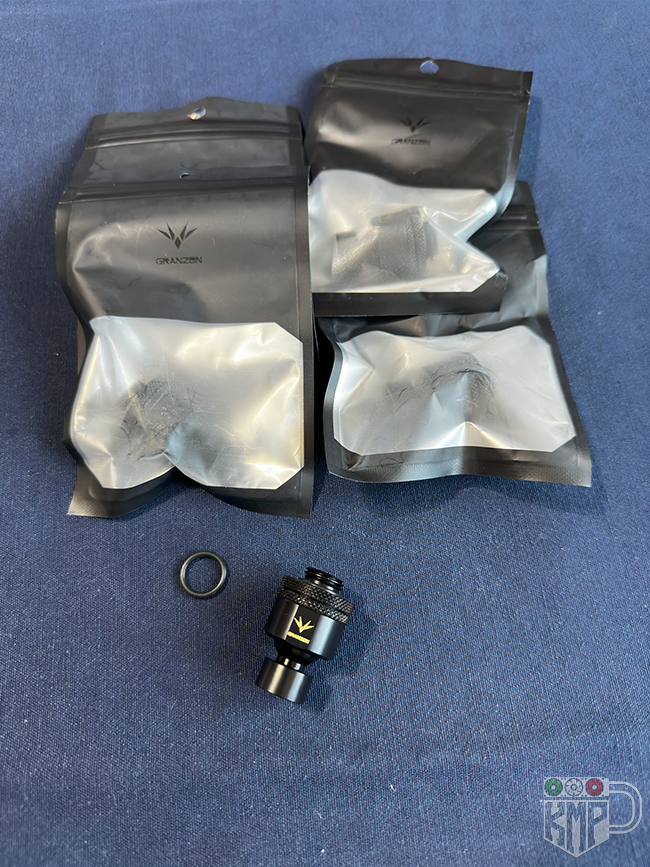
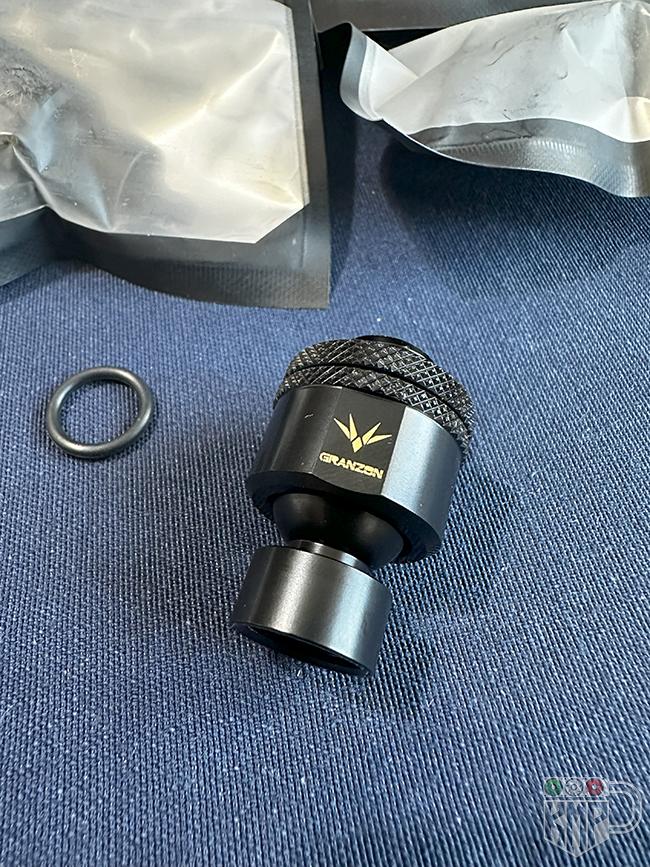
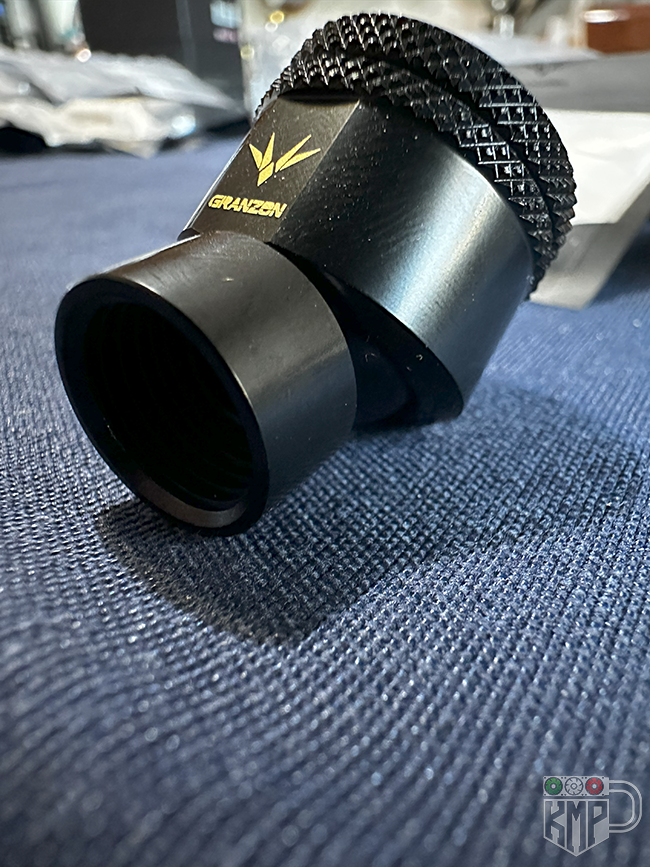
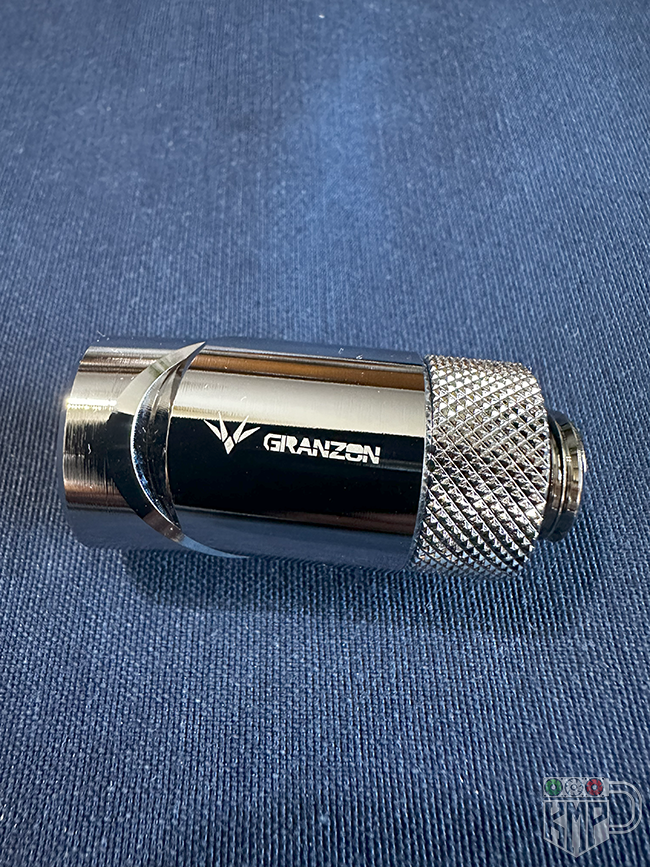
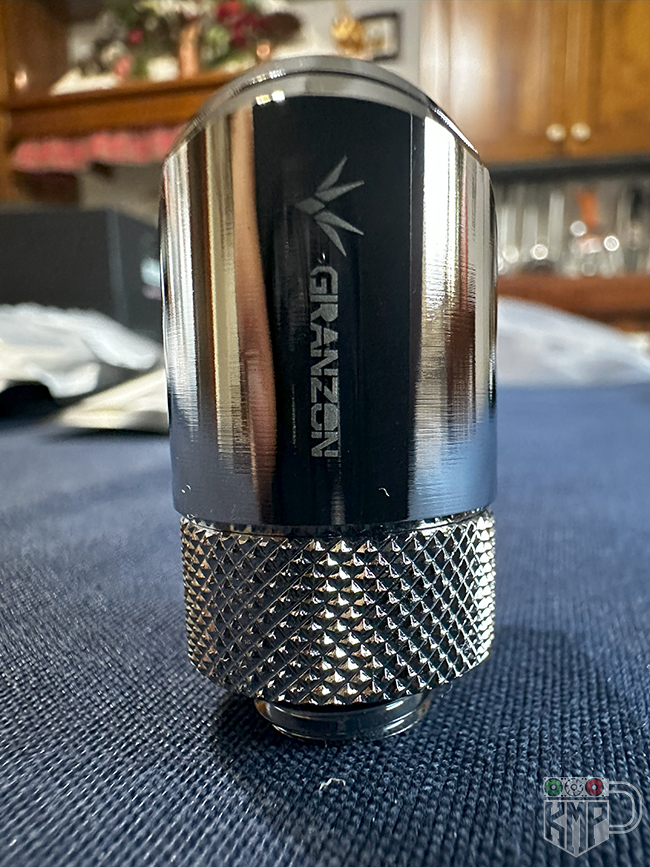
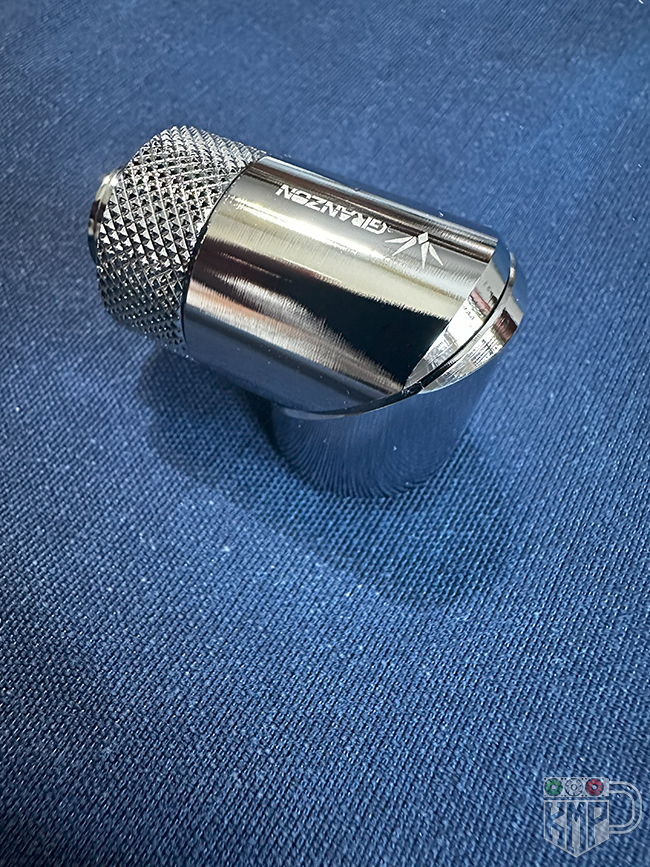
Granzon Fittings Have Arrived
Hey everyone!
Time for another update: I’ve purchased the Granzon fittings for the custom loop, and the first batch has arrived!
 All the fittings you see in the group photo are the same model: these are 14mm hard tube compression fittings, with standard G1/4 threading.
I chose them for their sharp, clean design, which fits perfectly with the technical and futuristic look I’m aiming for in this Star Citizen-themed build. I’ve included a few close-up shots to show the details: glossy black finish, engraved logo, and a very solid construction.
First impressions are great—precise threading, a secure grip on the locking ring, and a generally high-quality feel overall.🧩 Other types of fittings have also arrived, but I’ll be showcasing them in future updates, along with some photos of how they’ll be used in the system.
Soon, I’ll start working on the tube bending and fitting layout, where these will really begin to shine.One step at a time, we’re building the heart of this spaceship.


-
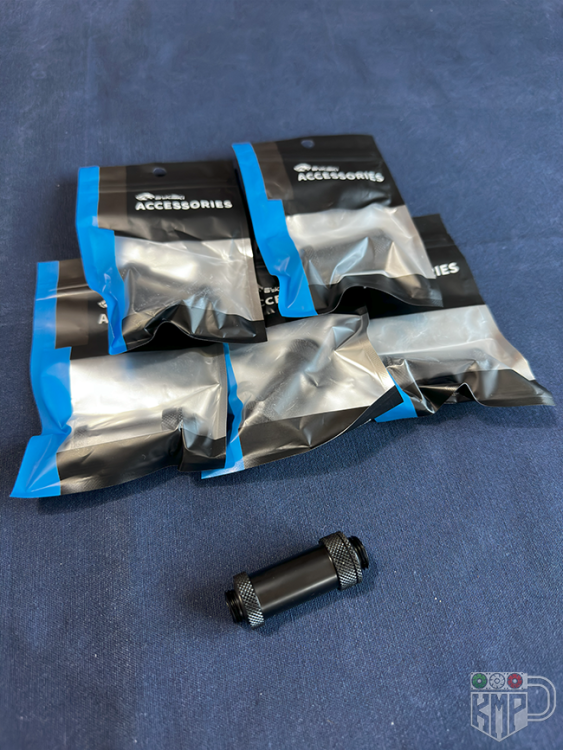
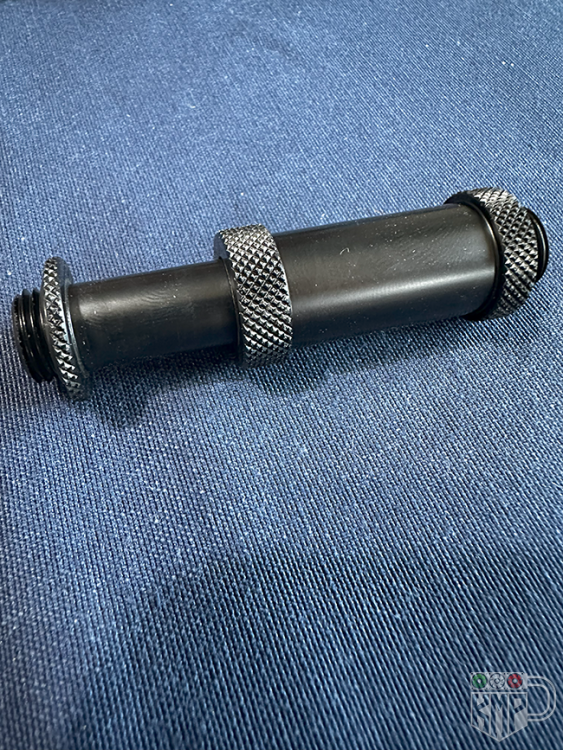
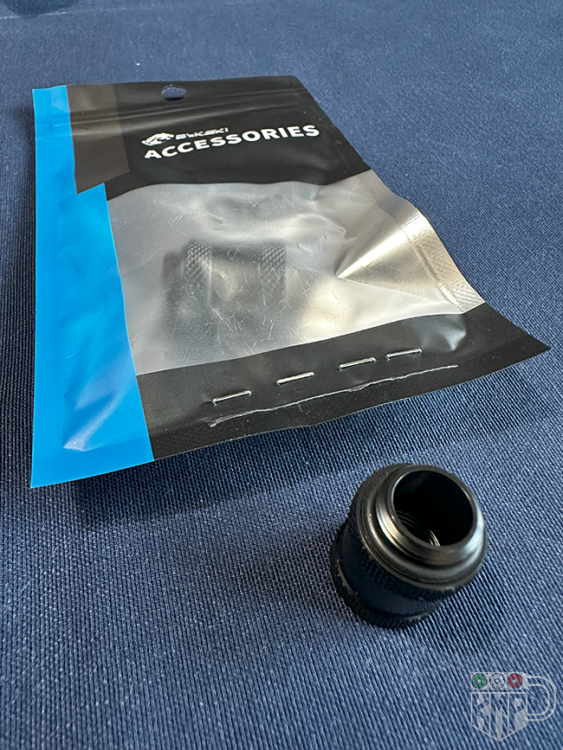
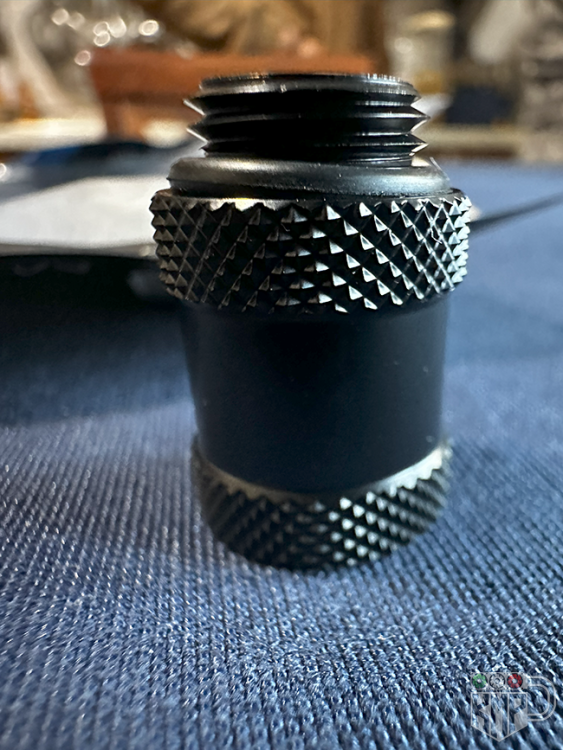
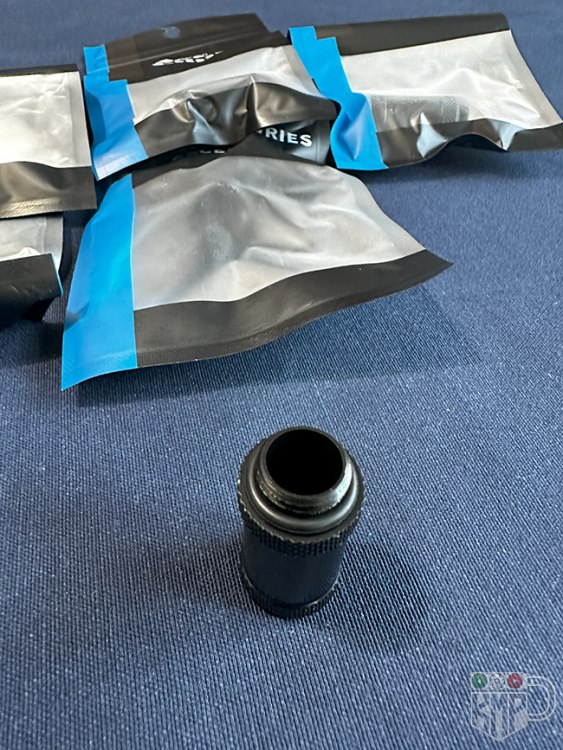
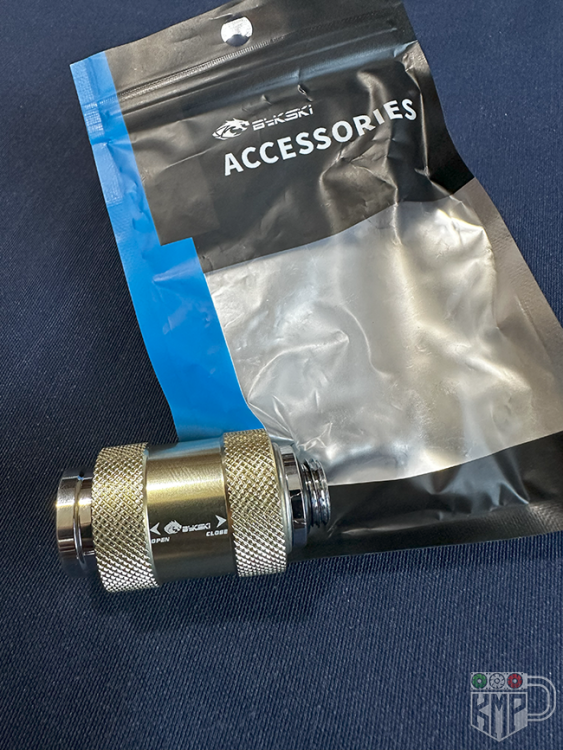
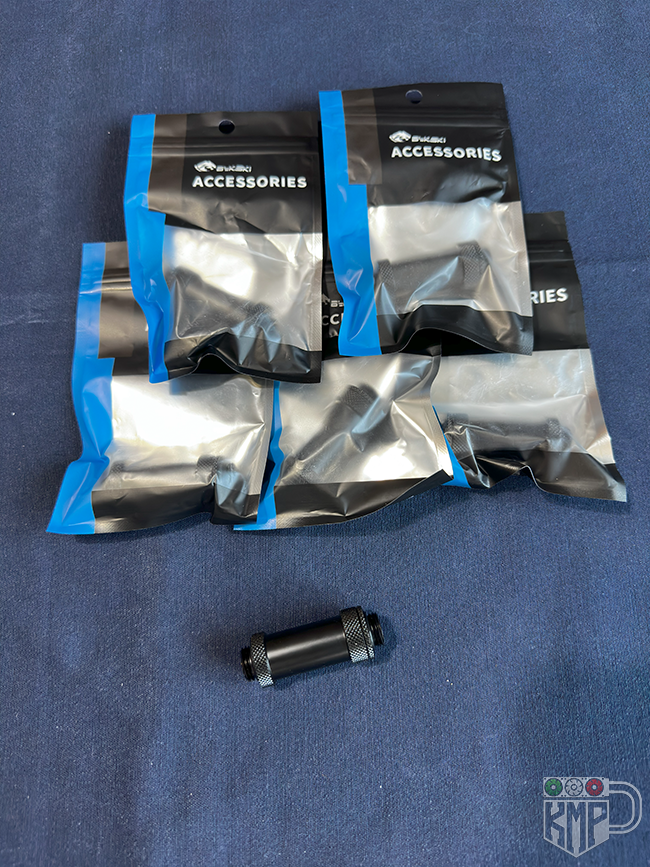
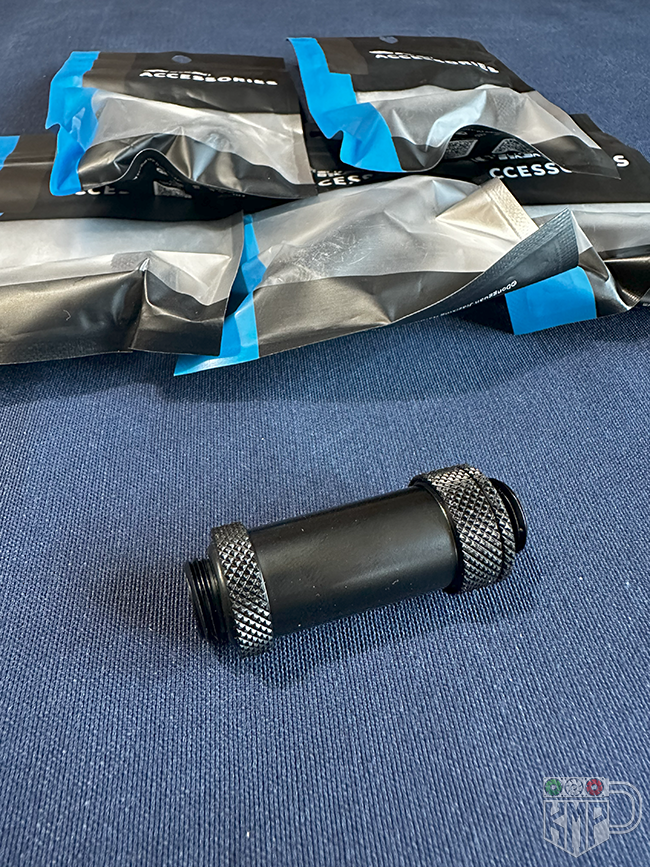
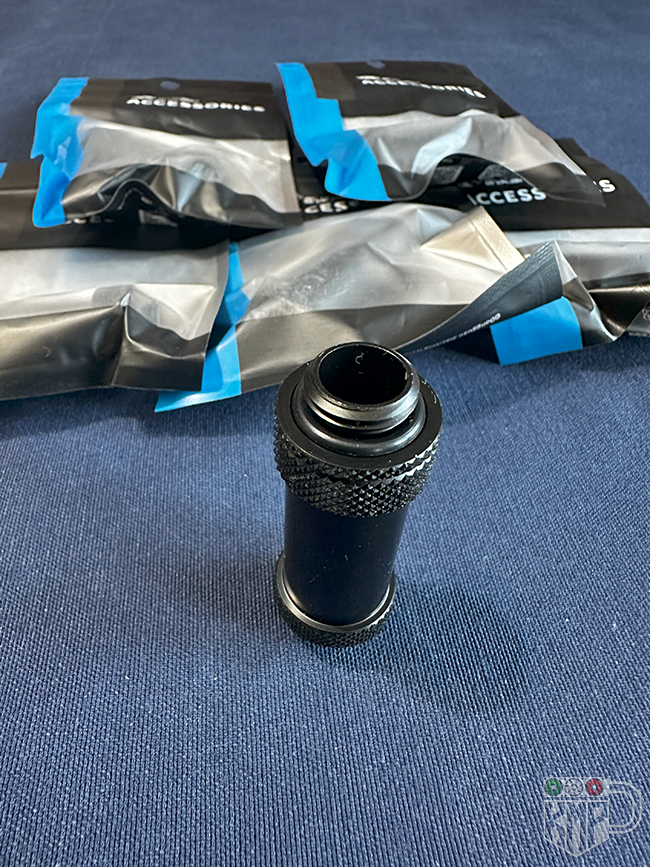
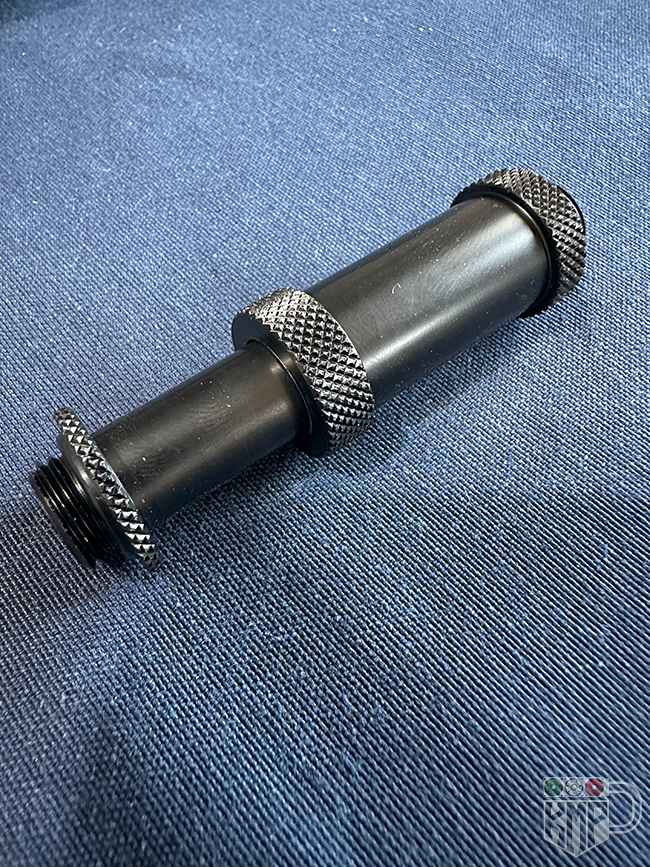
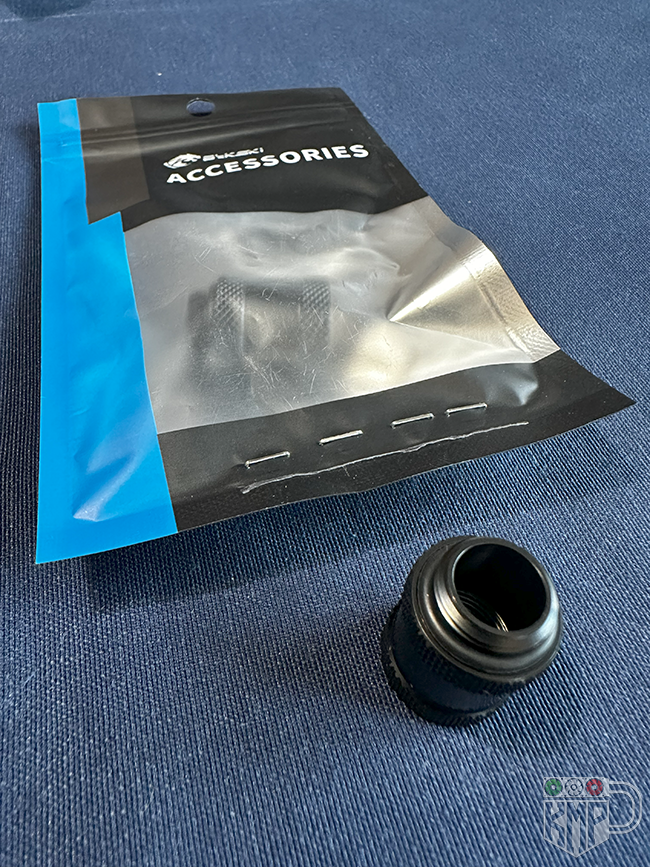
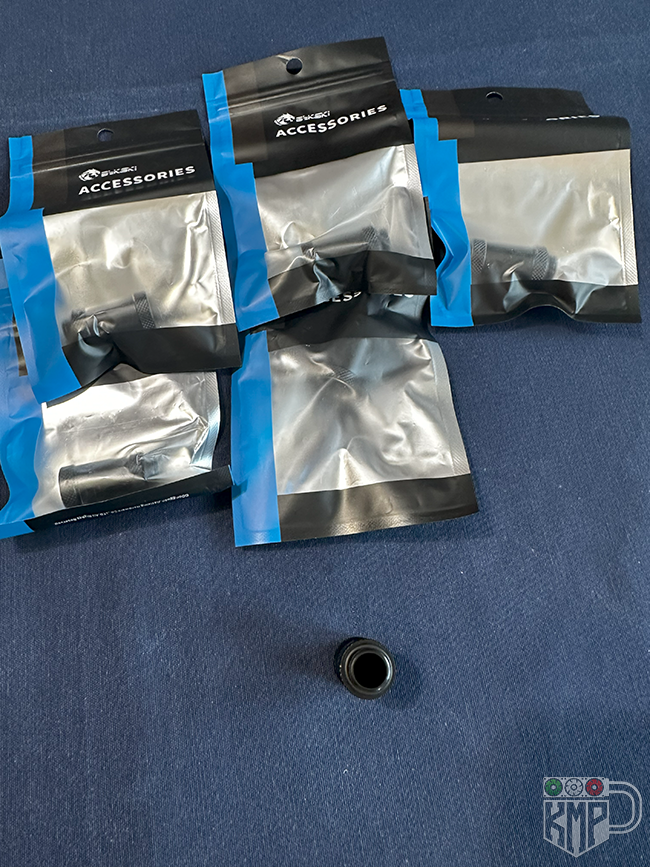
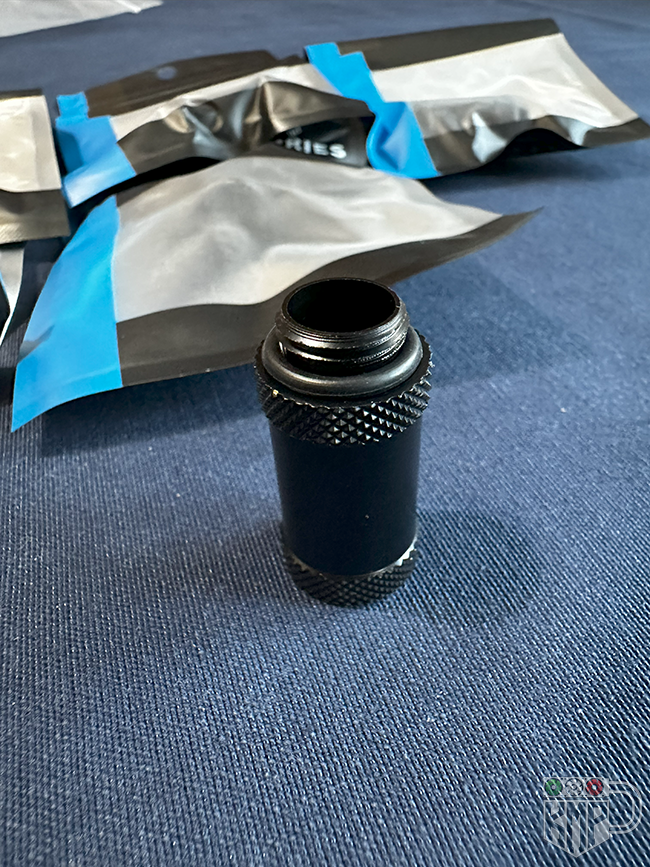
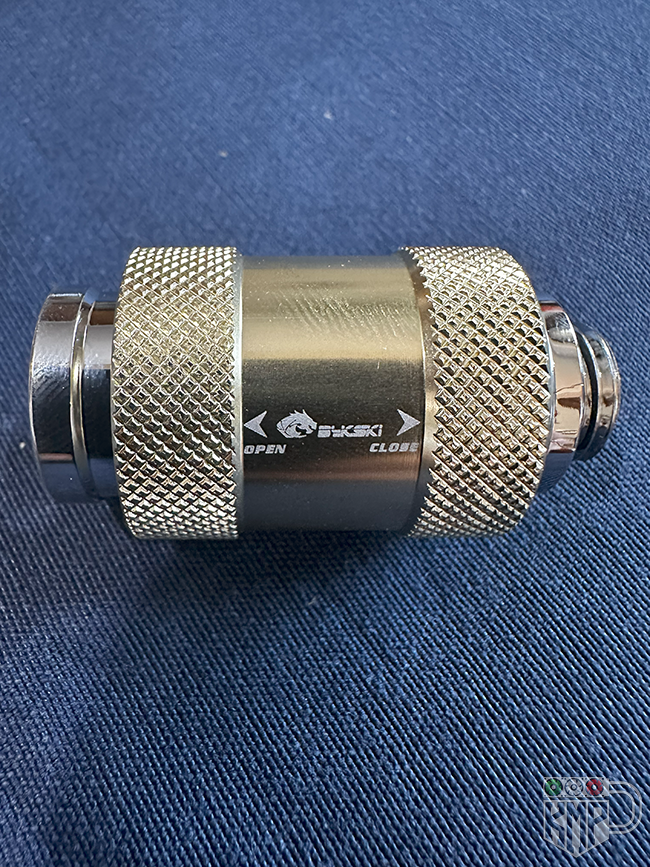
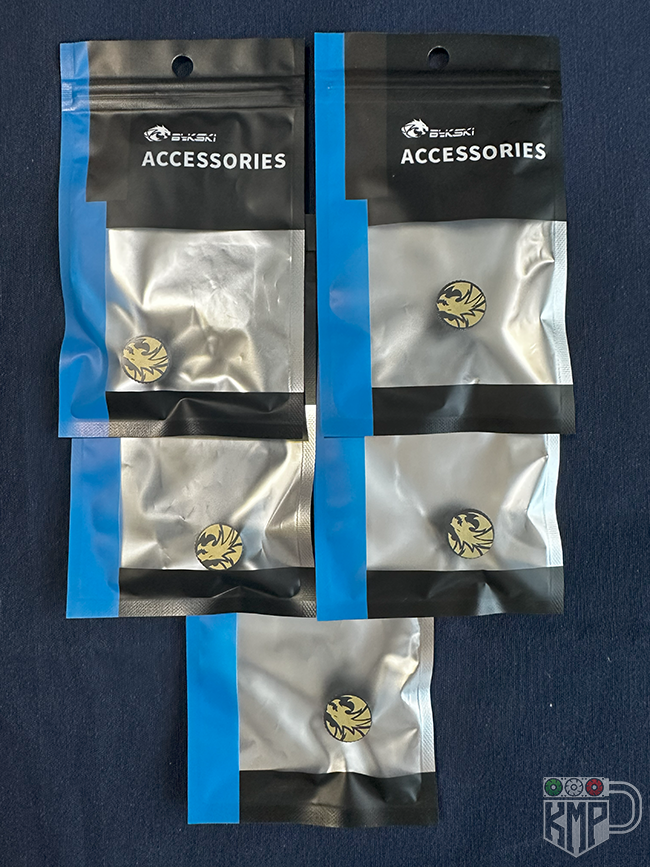
Hey everyone!
As promised, here’s another batch of Bykski accessories that will enrich the custom liquid cooling loop of my Star Citizen build.These are G1/4 extenders of various sizes, including adjustable telescopic models, perfect for bridging precise gaps between components—especially useful in more complex layouts.- The black extenders have a clean, technical look, while the chrome shut-off valve adds a nice touch of contrast.
- I’ve also received a set of end plugs with the Bykski logo, always handy and visually consistent.
On the customization front, I’ve started airbrush painting tests, experimenting with finishes and textures inspired by the Star Citizen universe.
I’m also working in CAD to create custom stencils and graphic details that will be applied to visible components later on.Here are a few pics—and more accessories are still to be shown in the next updates, along with some previews of the visual customization work.
All items shown were personally purchased, allowing me to maintain full creative and technical control over the build.


-
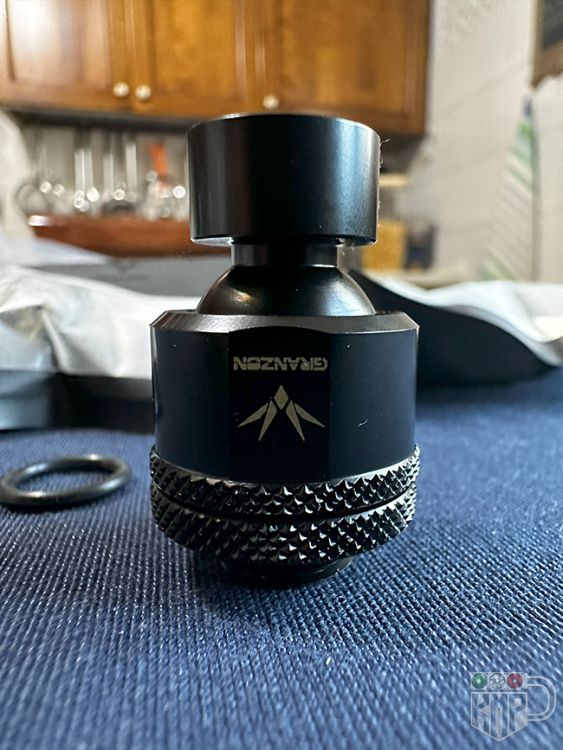
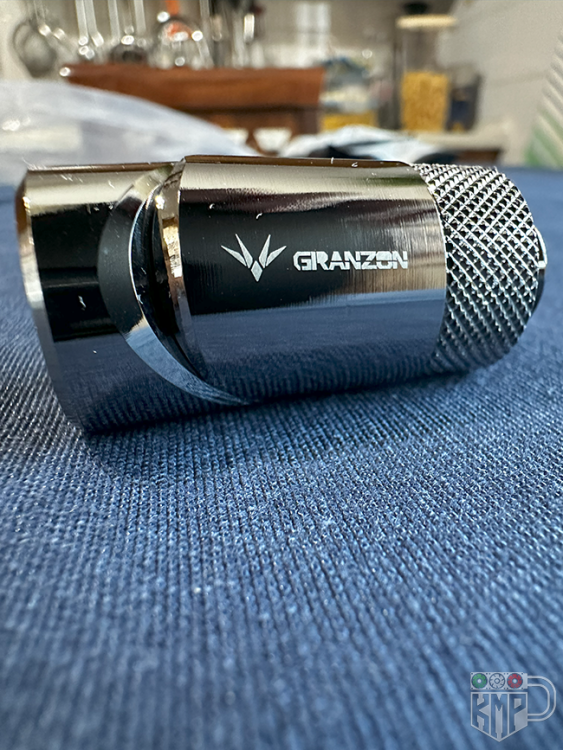
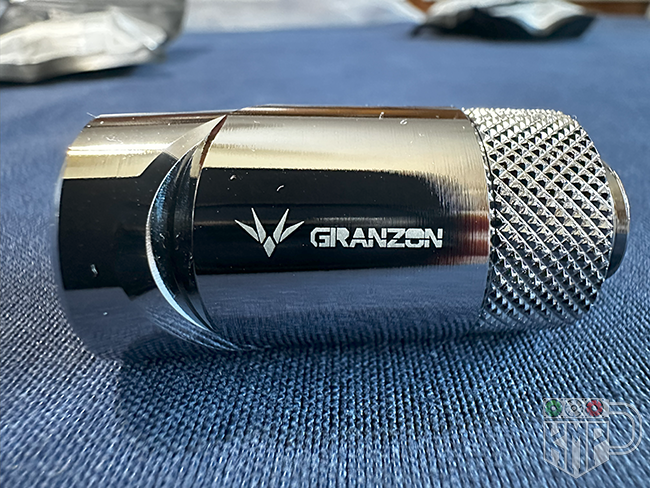
More updates incoming for my build – today I'm showcasing a fresh batch of special fittings that will further enhance the project.
 Granzon G1/4" Multi-Directional Rotary Elbows
These articulated fittings offer maximum flexibility for tube routing – ideal for creative loops and tight spaces.-
Model GD-X (Matte Black):
Compact and aggressive design, they remind me of mechanical joints straight out of a spaceship. -
Model GD-SK (Polished Silver):
Same function, but chosen in silver for a deliberate contrast, as if representing different modules or compartments of the hull.
All the visual choices are inspired by the aesthetics of the Star Citizen universe.
 ️ Meanwhile, airbrush tests are progressing better than expected, and I’m currently working in CAD to design custom stencils and patterns to give each part a unique Star Citizen look.
Check out some photos below! More components have arrived, and I’ll be sharing them with you soon in detail… stay tuned!
️ Meanwhile, airbrush tests are progressing better than expected, and I’m currently working in CAD to design custom stencils and patterns to give each part a unique Star Citizen look.
Check out some photos below! More components have arrived, and I’ll be sharing them with you soon in detail… stay tuned!


-
-
Hey everyone,
Apologies for the recent silence – I’m also in the middle of a full home renovation... the whole place is basically a construction site! The work will go on for several months, but it’ll be worth it in the end.
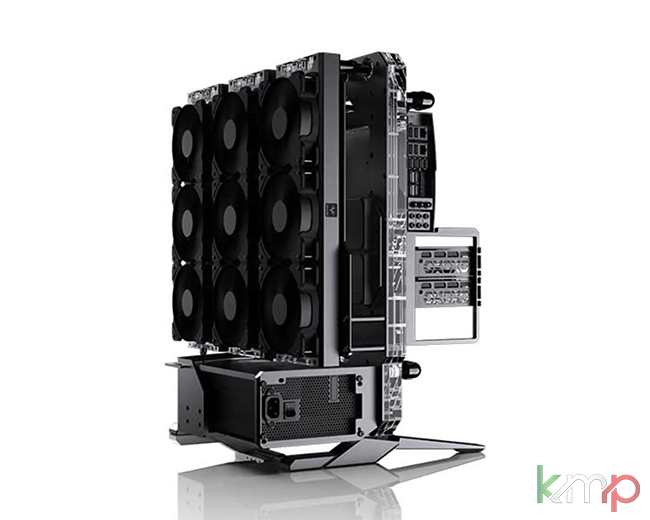
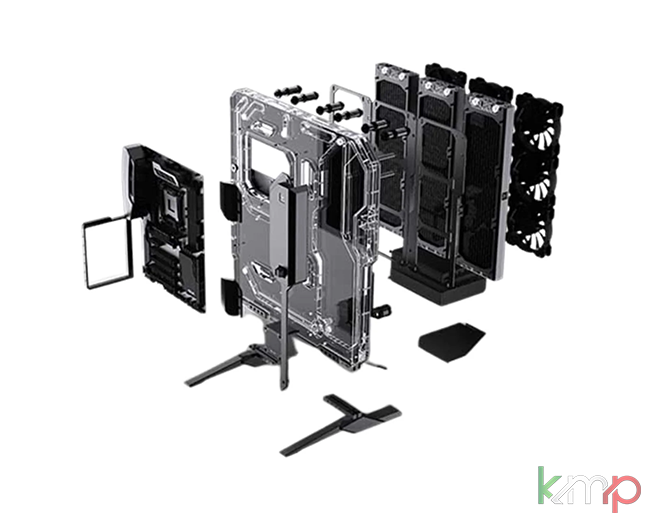
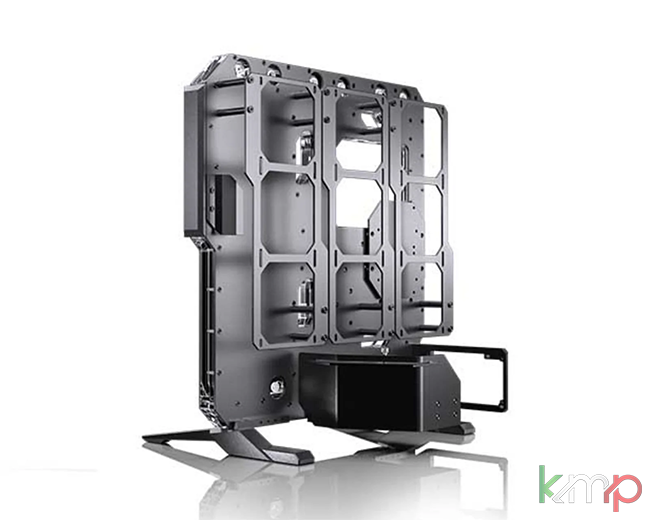
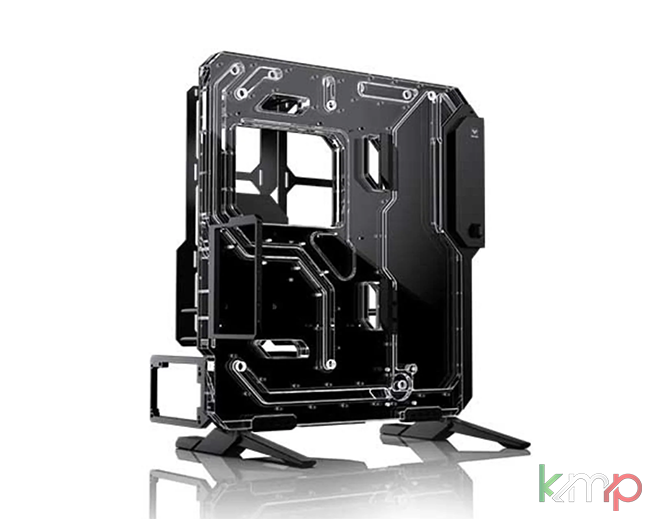
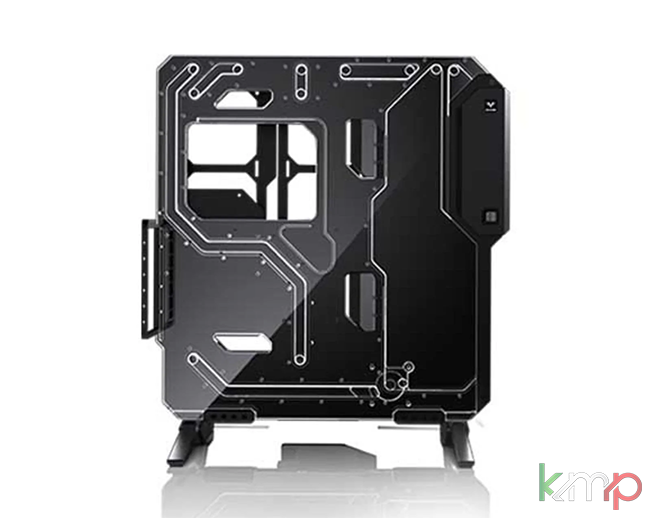
One of the core pieces of this Star Citizen-themed mod has finally arrived: the Granzon G20!
An absolute beast of futuristic design, built from precision-machined acrylic and metal. Designed for extreme custom liquid cooling builds, its open-frame layout makes it perfect for showcasing hardware while allowing smart radiator and tubing placement.
🧩 Modular structure with integrated fluid channels
 Supports up to 3 x 360mm radiators
Detachable panels and optimized routing for tubing and cables
The design looks like it came straight from an RSI or Crusader Industries hangar!
This will be the backbone of the entire aesthetic build.
What do you think? Does it look like a good fit for a Star Citizen-style reinterpretation
_______________________________________________________________________________________
 I also placed an order with EKWB on April 13, 2025, but so far… still nothing has shipped. Estimated shipping date: June 9, 2025.
I understand production difficulties, but honestly… these lead times are hard to accept. I’ll leave it there.EKWB Order Includes:
-
EK-Quantum Velocity² D-RGB - AM5 Nickel + Acetal
-
EK-CryoFuel Dye Pack
-
EK-CryoFuel Loop Cleaner + Superflush (250mL Concentrate)
-
EK-CryoFuel Clear (100mL Concentrate)
_______________________________________________________________________________________
🧪 In the meantime, I’ve purchased high-purity double-distilled water, free of bacteria, dissolved salts, and gases – intended for medical/industrial use.
I’ll be crafting my own custom coolant – I told you customization would go all the way!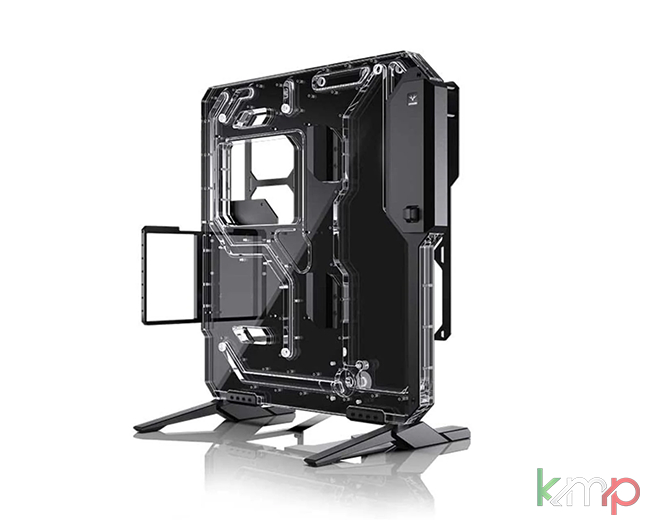
-
-
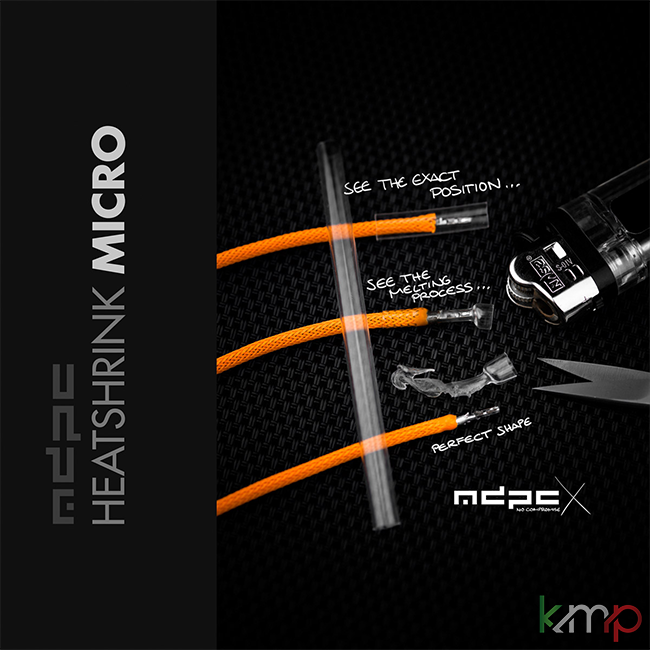
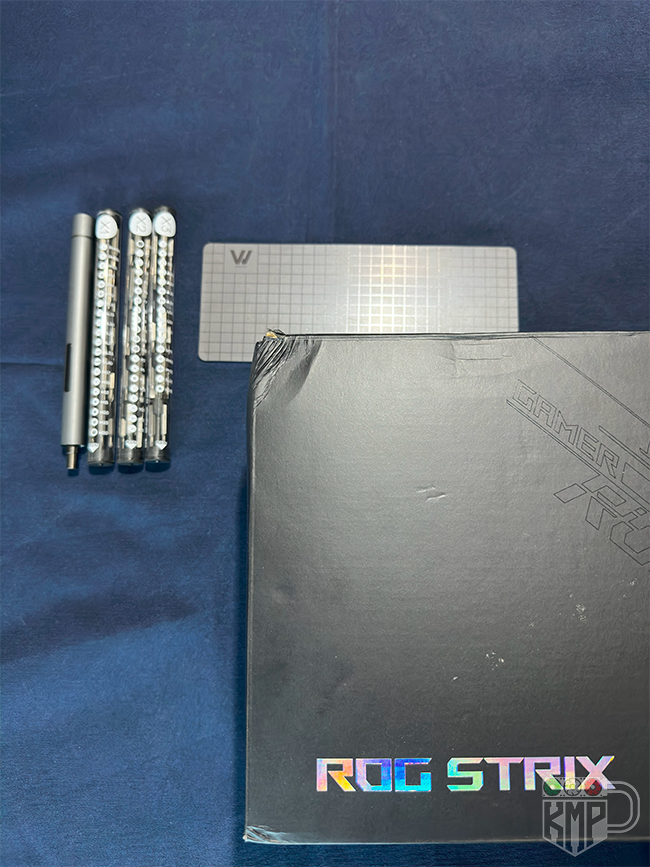
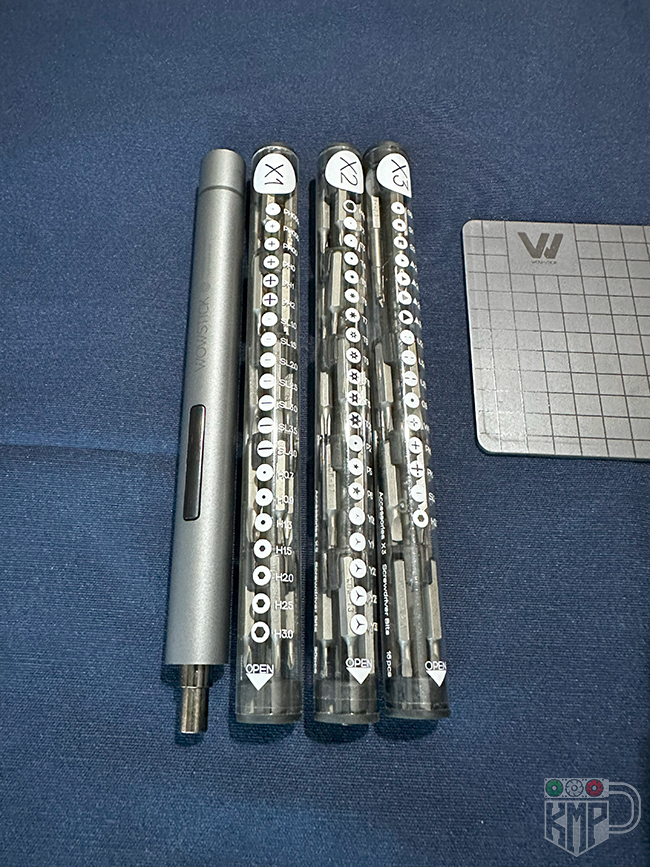
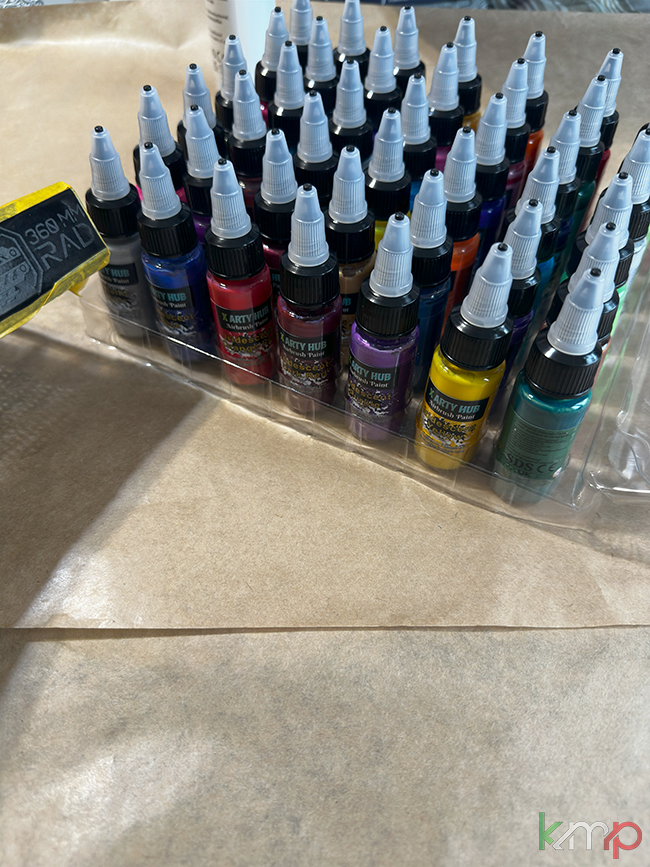
First Color Tests & MDPC-X Order
Hi everyone!
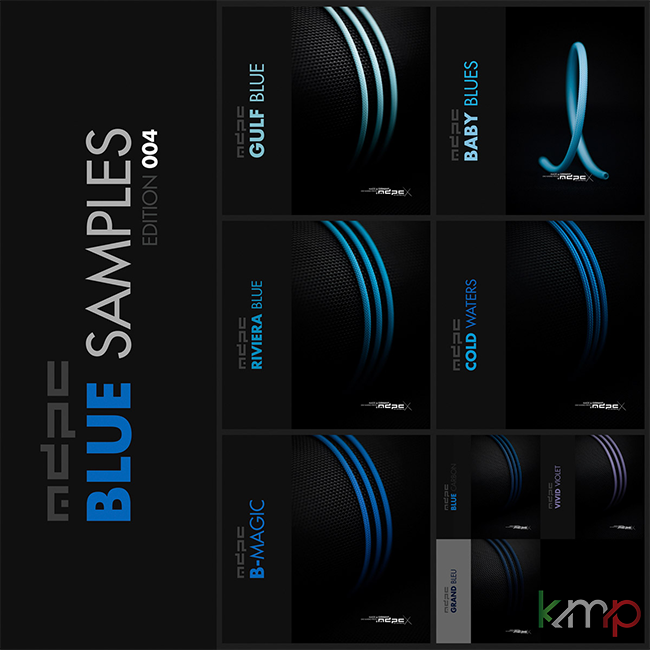
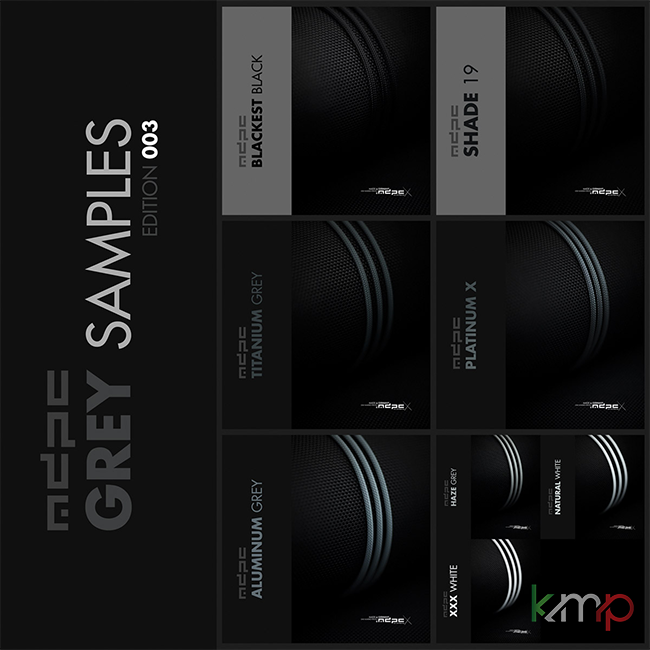
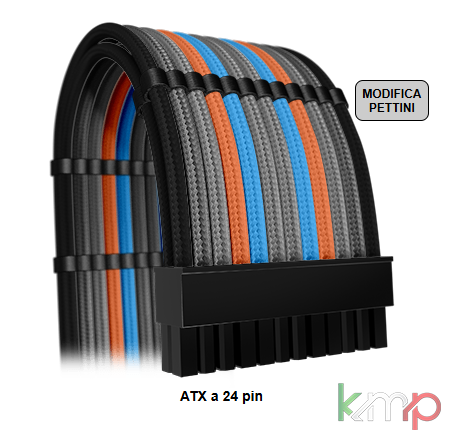
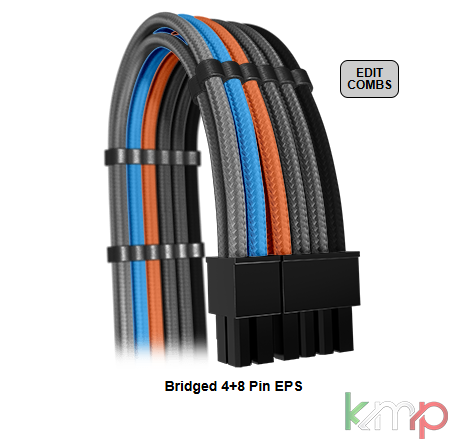
I’ve just placed an order with MDPC-X for all the sleeving gear I need for the custom cables in my Star Citizen mod: premium sleeves, color sample packs, and transparent micro heatshrinks for super clean and precise finishes.
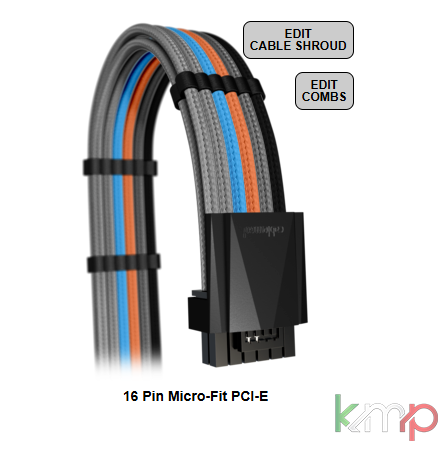
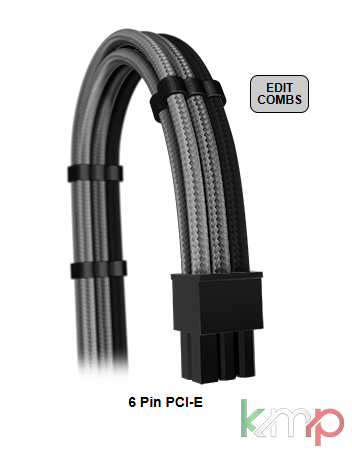
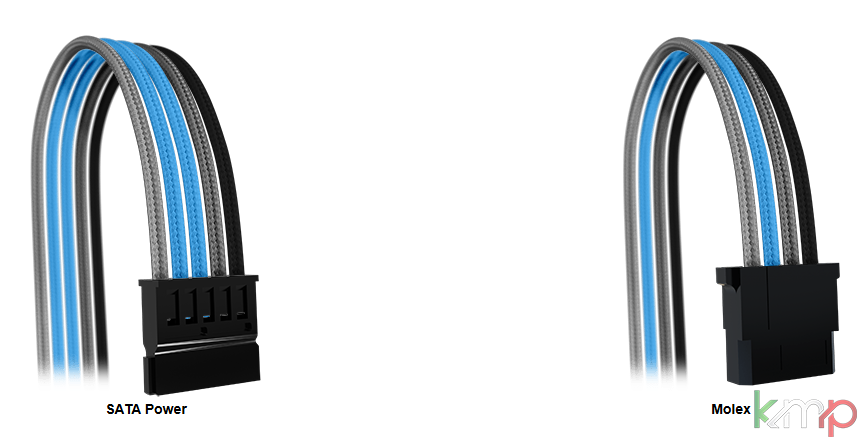
🧵 I’ve also started testing some cable color combinations for ATX, EPS, PCI-E, SATA, and Molex cables. It's still early, but here are some first visual mockups

 As always, I'm aiming for full aesthetic and functional customization—right down to the wiring!
 Let me know what you think about the color schemes! I’d love to hear your feedback, suggestions, or ideas.


-
Ciao a tutti! Mi sono reso conto adesso che pubblicavo i post in inglese, deve essersi trattata di una svista dovuta ad i copia ed incolla tra le varie piattaforme, chiedo scusa!
Dopo tanto lavoro "dietro le quinte", ecco un aggiornamento un po' diverso dal solito!
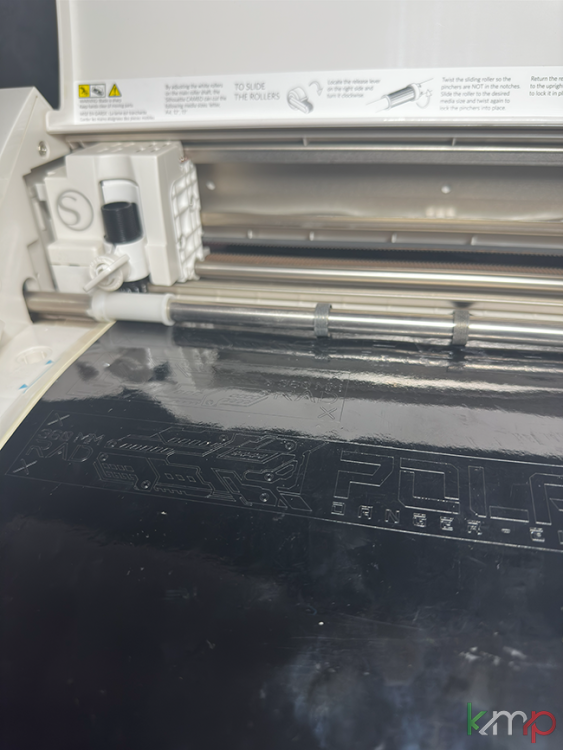
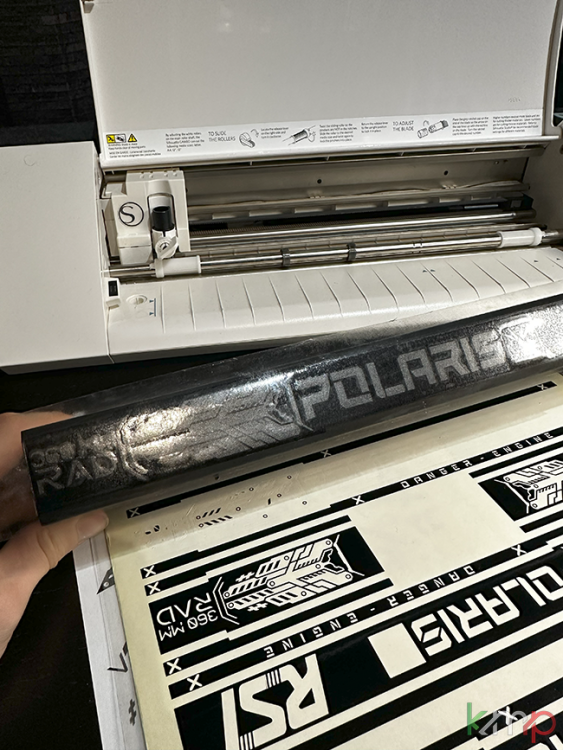
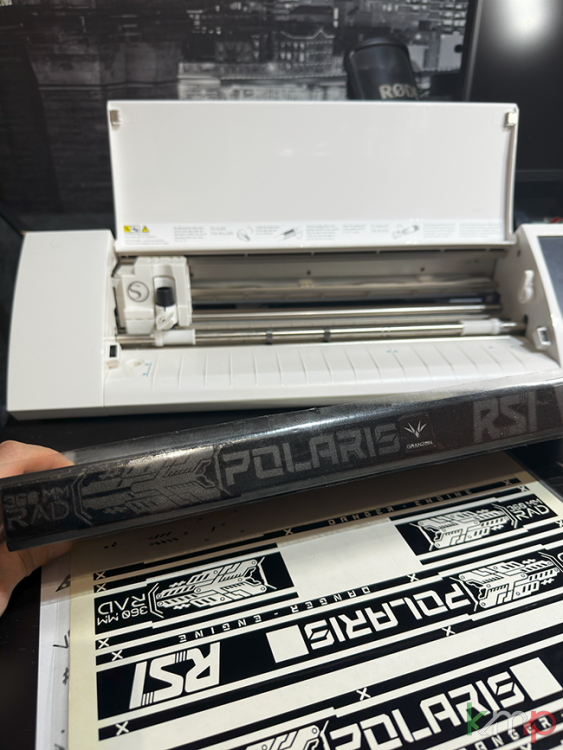
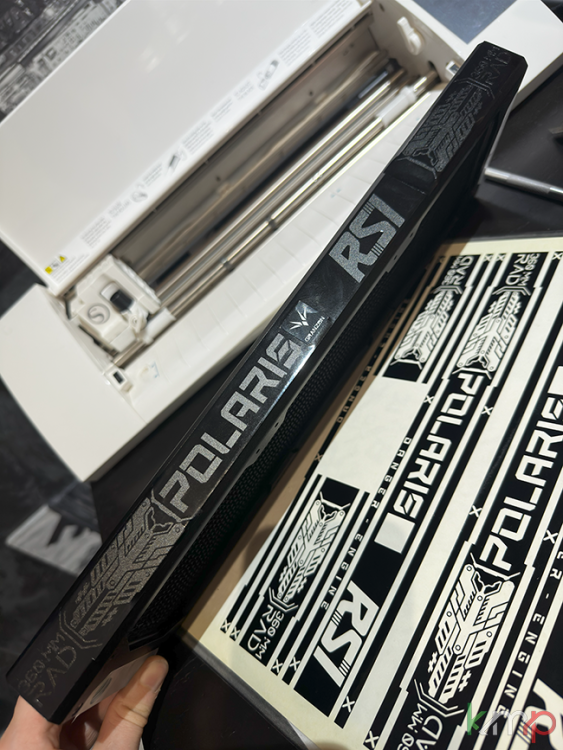
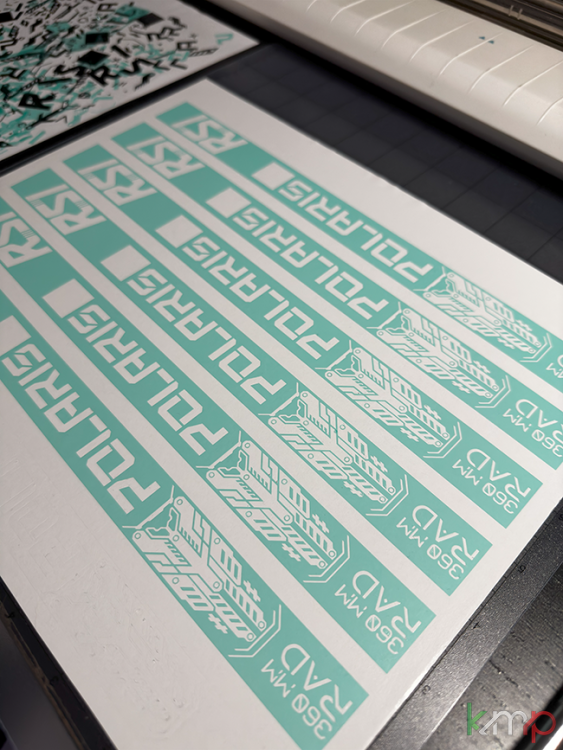
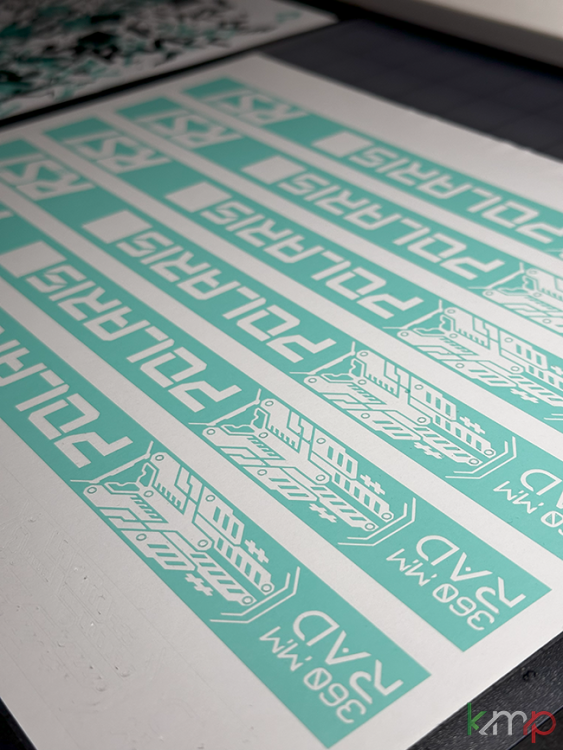
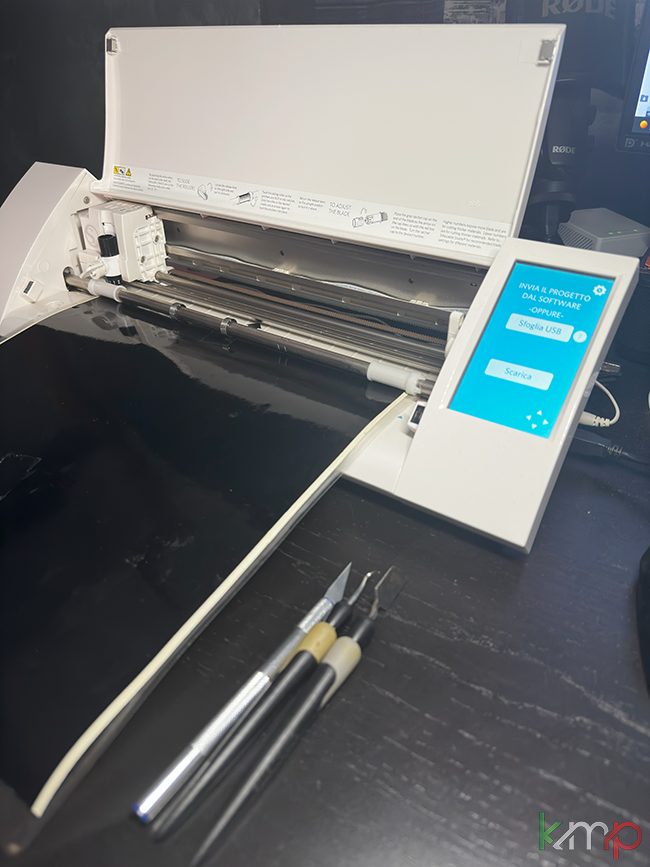
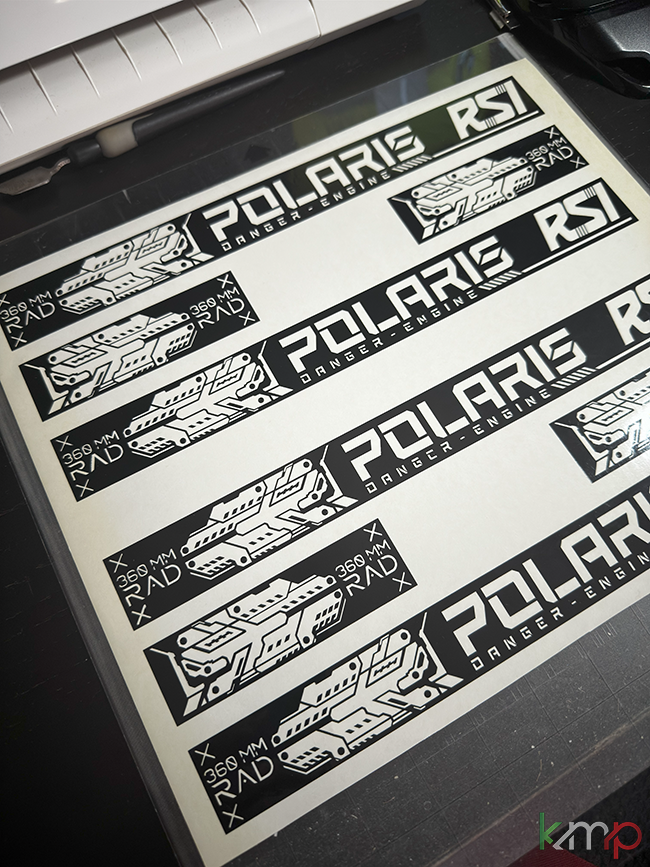
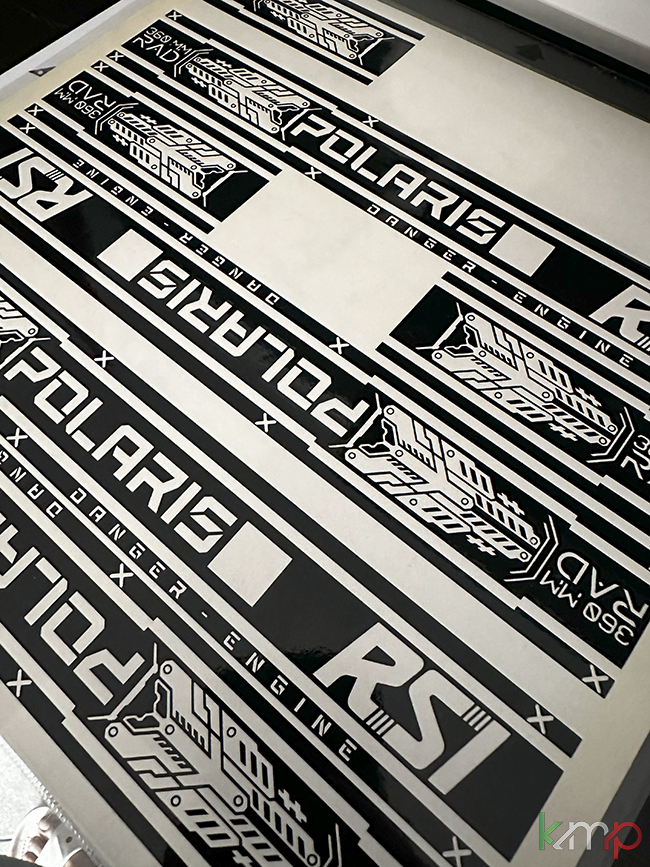
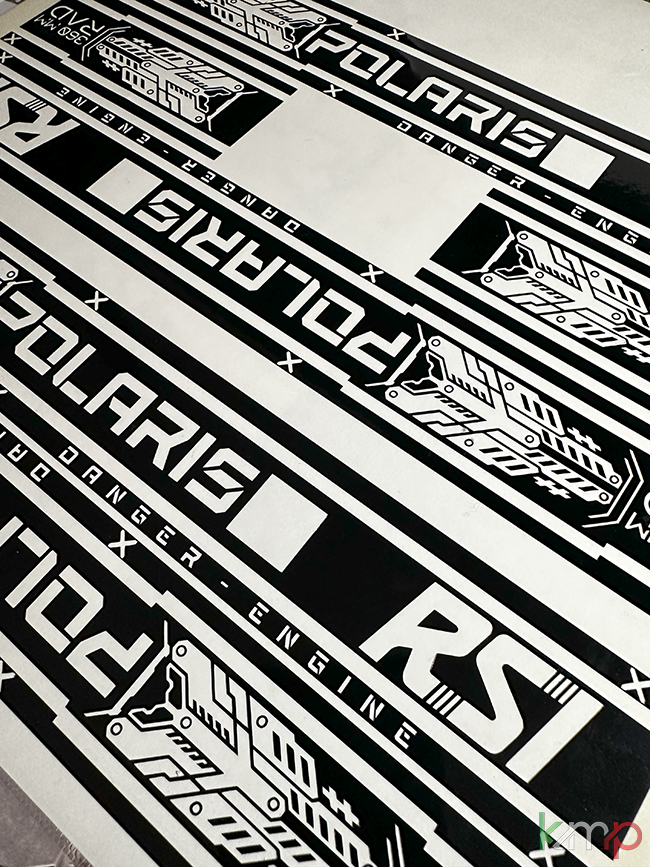
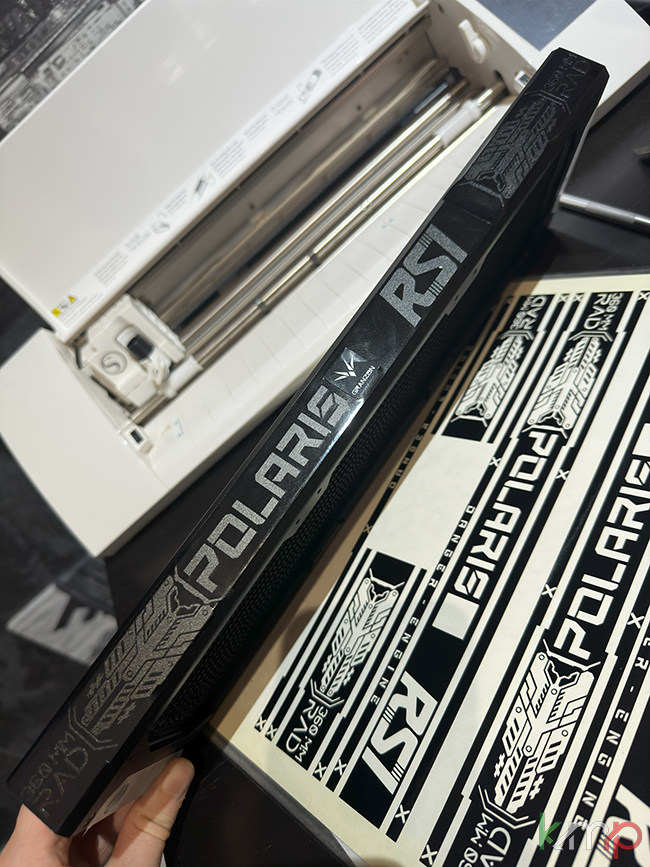
 Mi sto concentrando sulla parte estetica della mod, iniziando i primi test per stencil e grafiche personalizzate da applicare ai componenti. Per l'occasione ho tirato fuori una vecchia ma gloriosa Silhouette Cameo 2 – sì, quella con l’interfaccia da altri tempi, ma che fa ancora egregiamente il suo sporco lavoro
  Ecco alcune fasi mostrate nelle immagini:
-
 ️ Taglio dei vinili
-
 Rimozione dei negativi con cutter di precisione
-
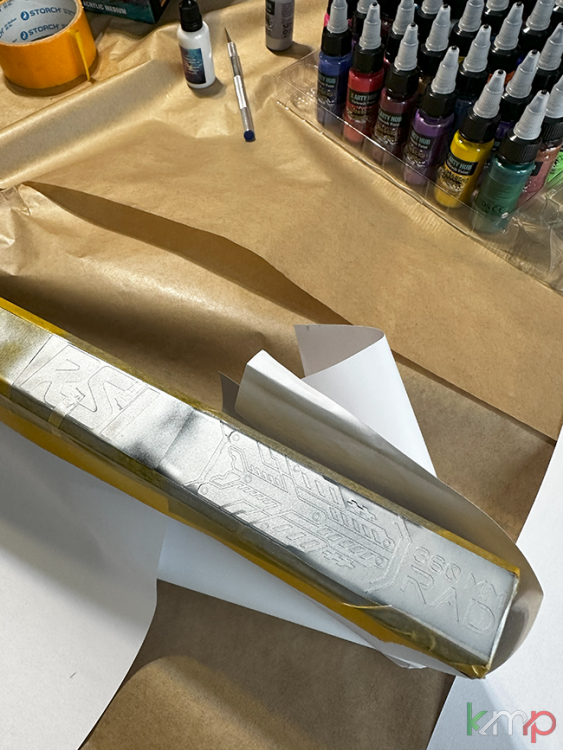
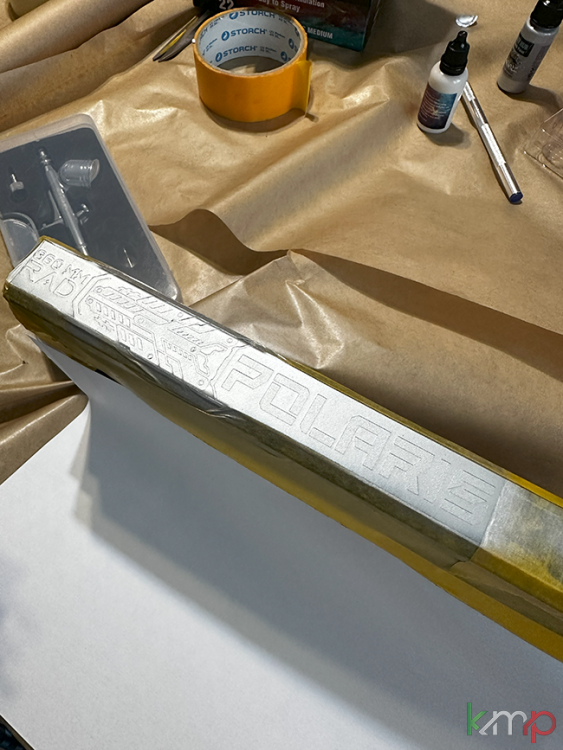
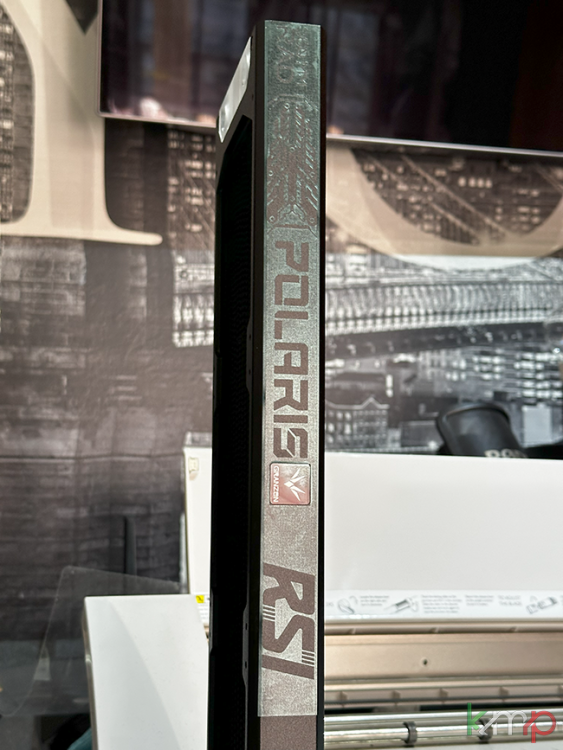
🧪 Prime applicazioni di prova su superfici (in questo caso, un radiatore)
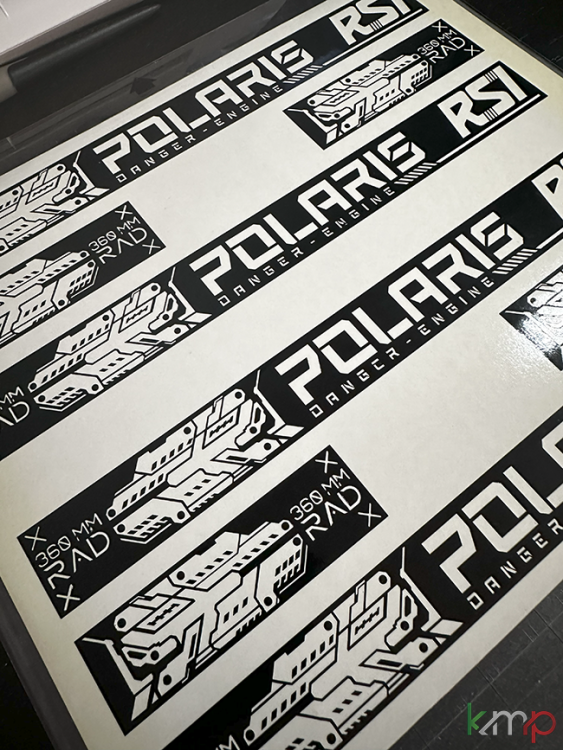
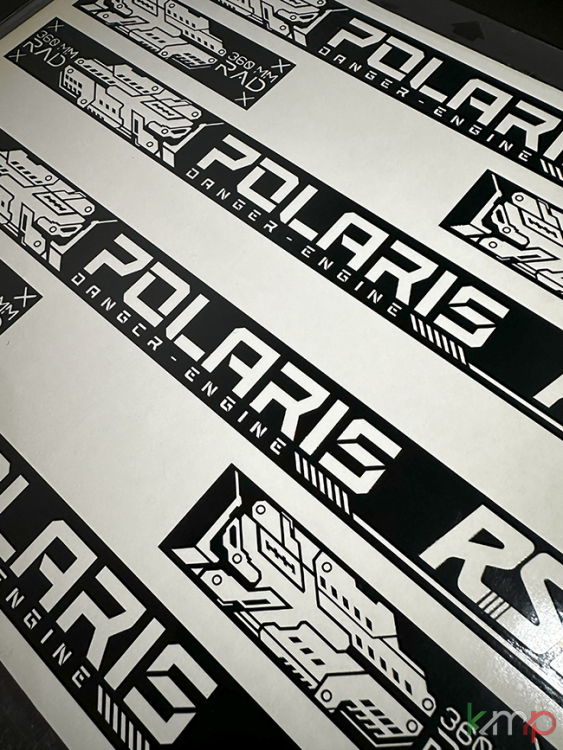
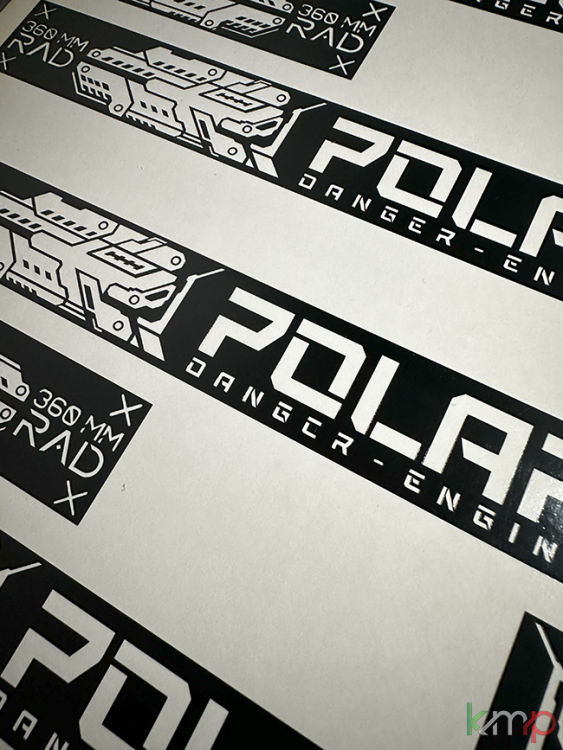
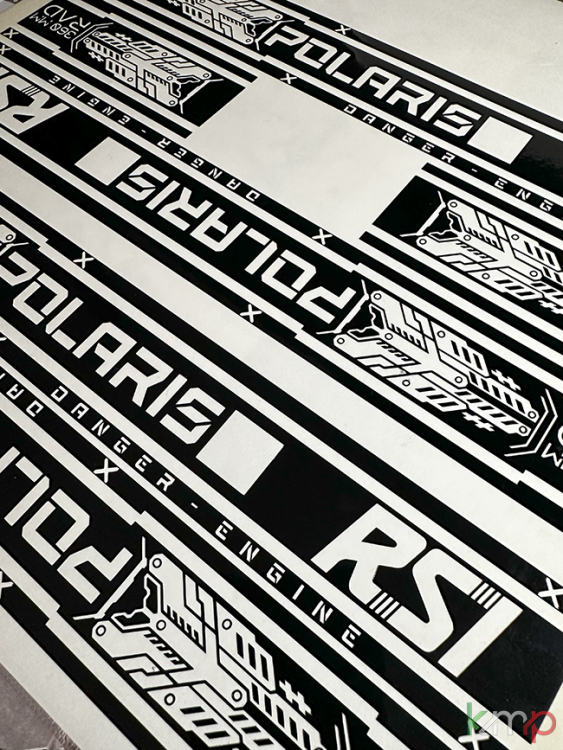
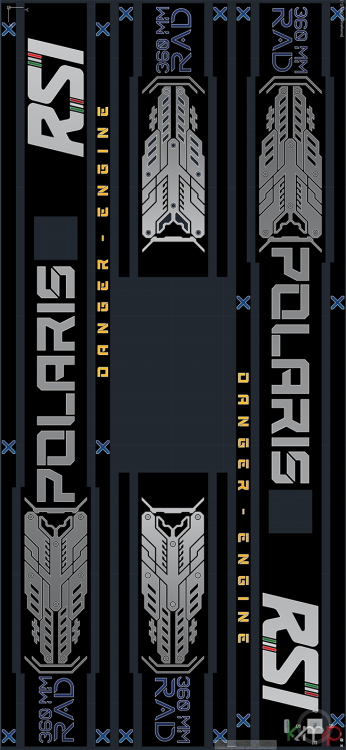
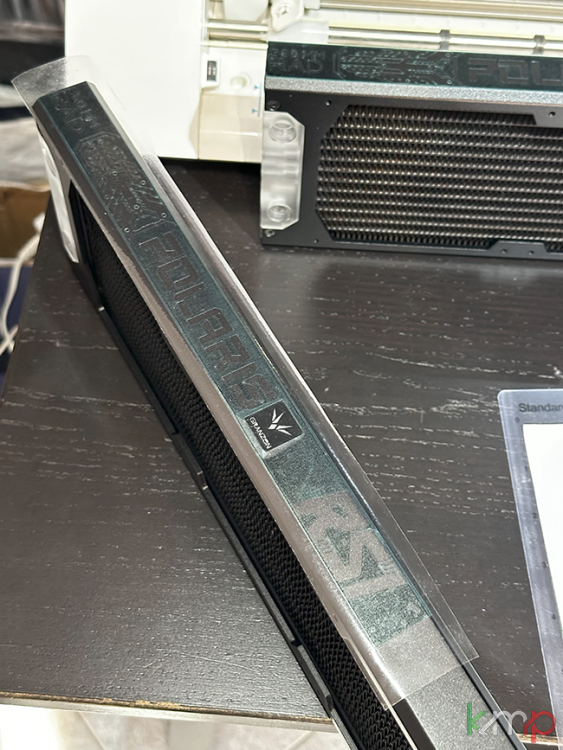
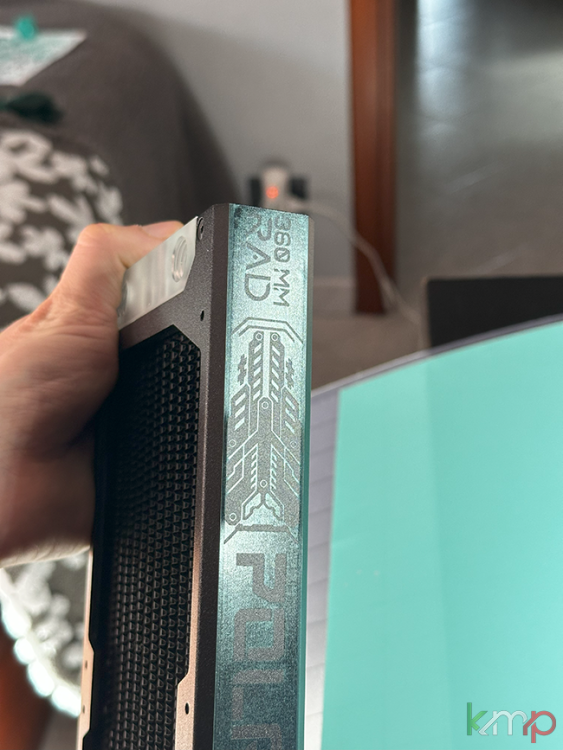
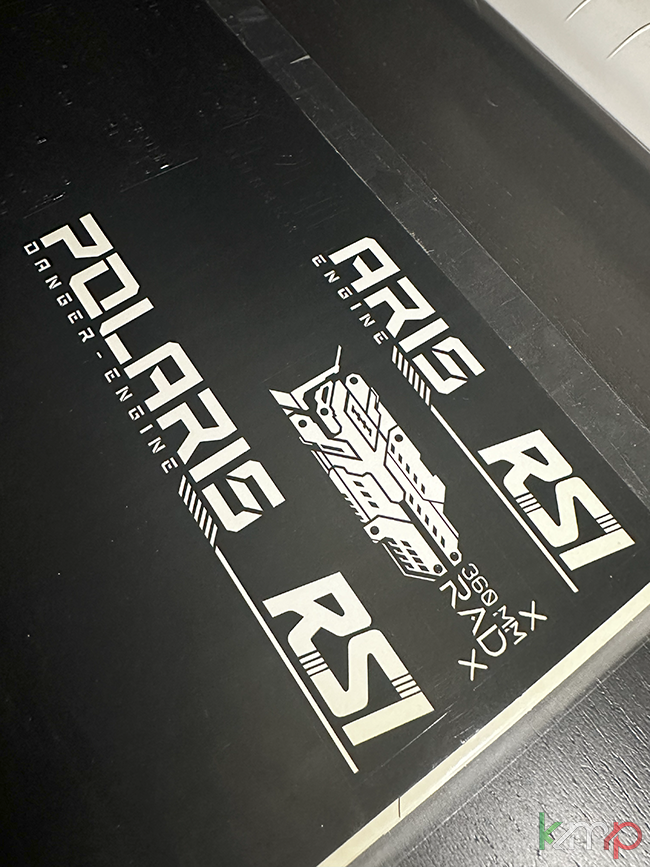
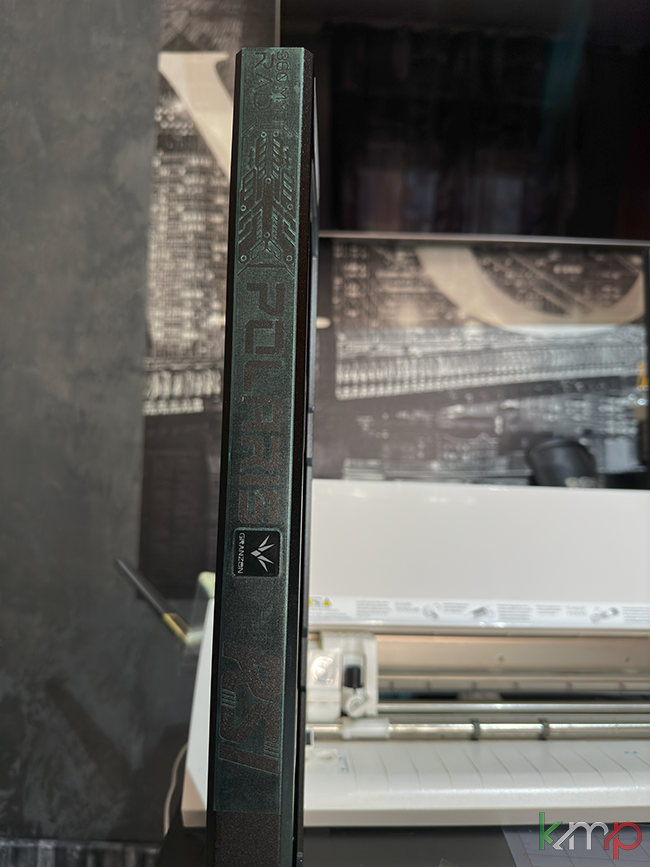
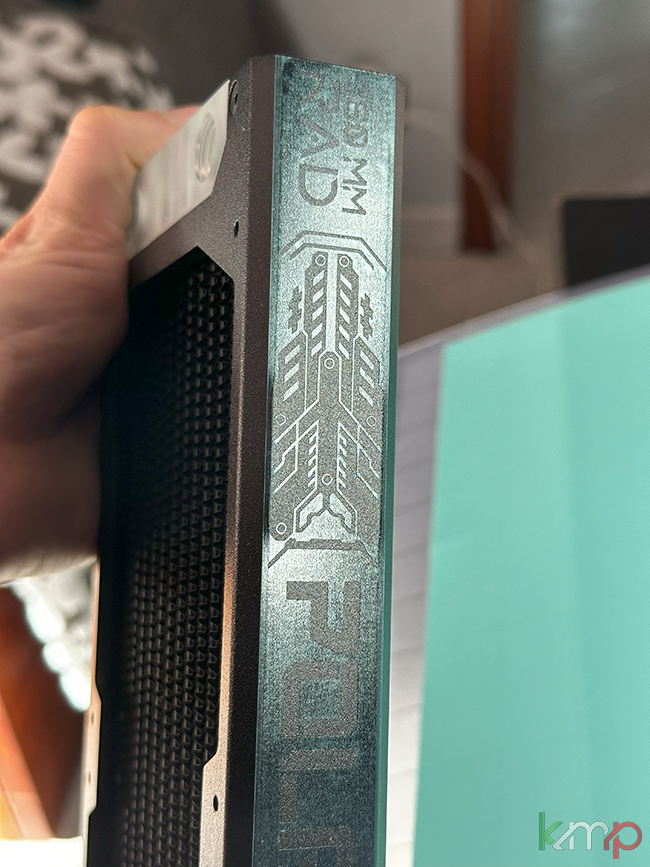
Ho realizzato adesivi e stencil ispirati al design della RSI Polaris, con elementi come:
-
"POLARIS – Danger Engine"
-
"RSI"
-
"RAD X 360MM"
-
e altri motivi tech-futuristici, per un look da vero modulo navale militare.
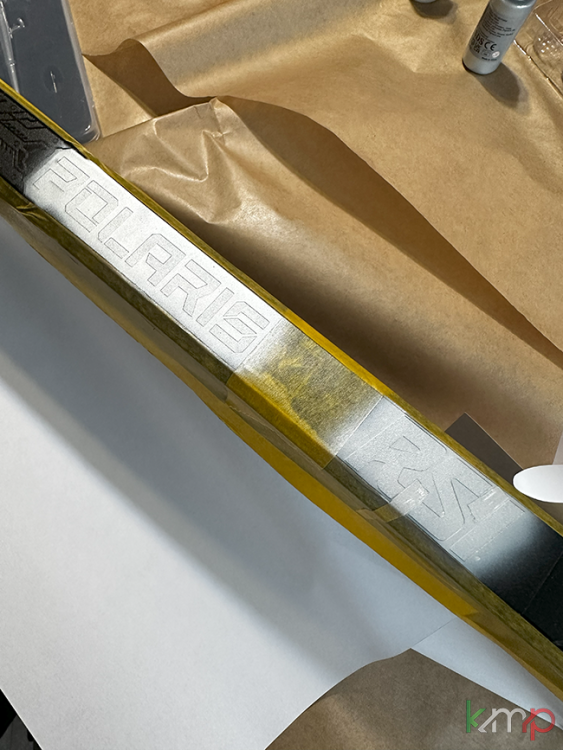
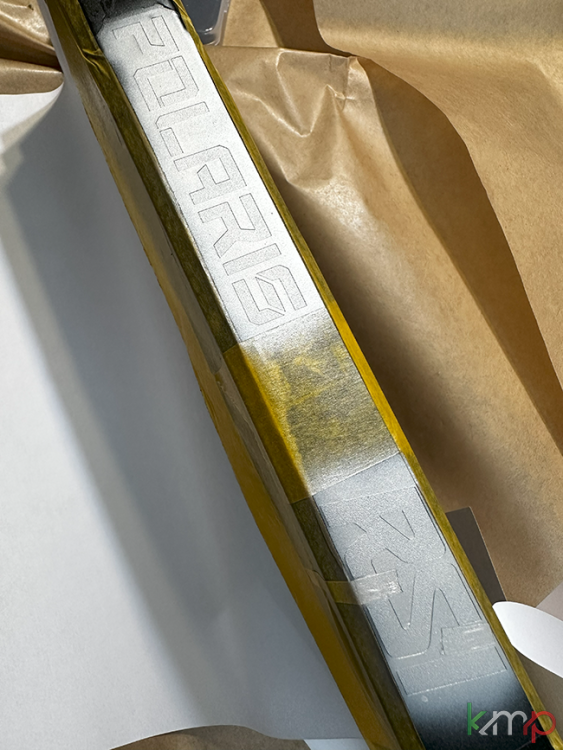
 Questa è ancora una fase sperimentale, ma sono già soddisfatto dei risultati:
"i dettagli sono nitidi, il vinile aderisce bene e promette ottimi risultati nella fase successiva di verniciatura ad aerografo."
Avete idee o simboli da suggerire? Loghi Star Citizen, scritte, sigle o codici futuristici? Scrivetemeli pure nei commenti!


-
-
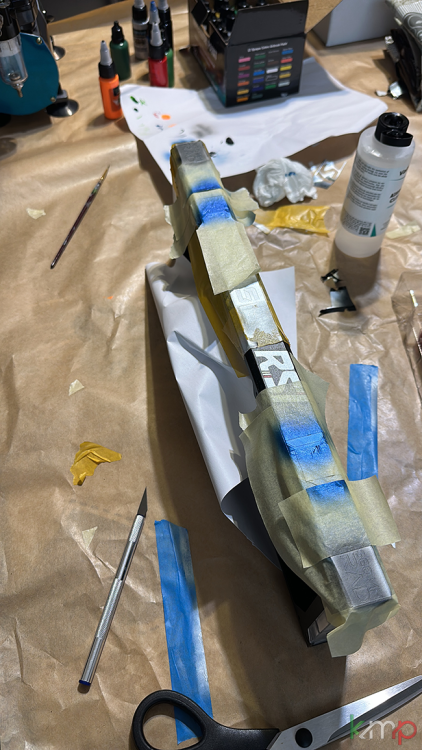
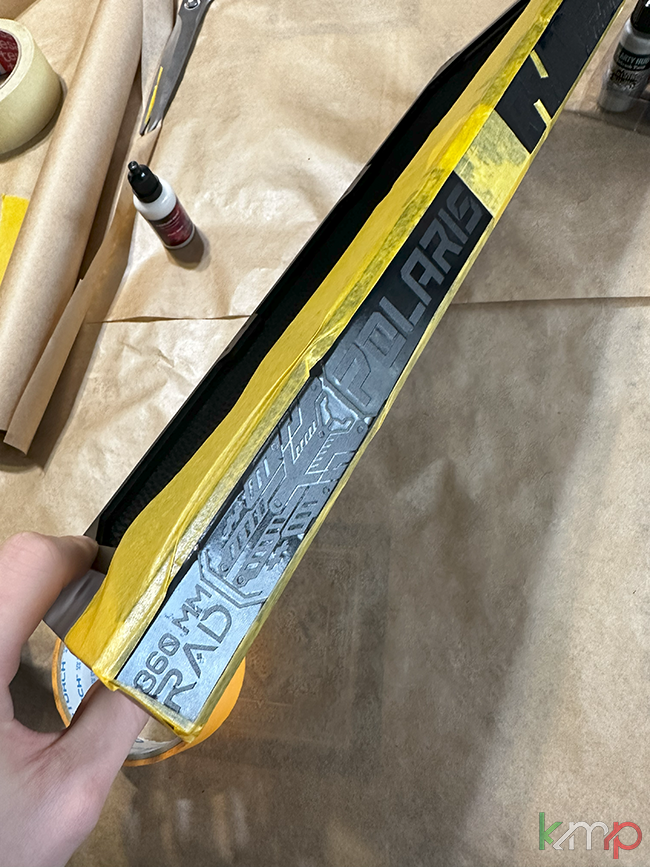
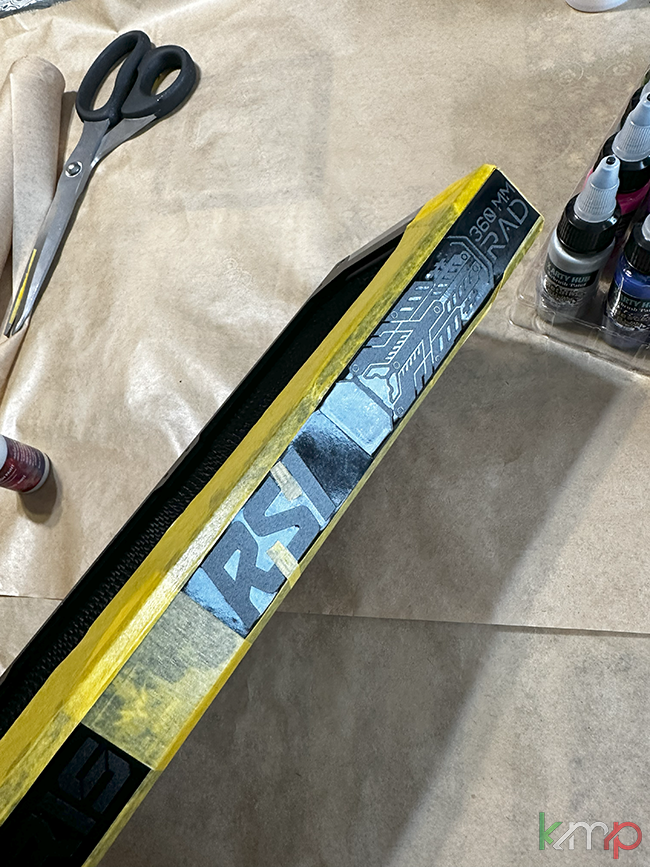
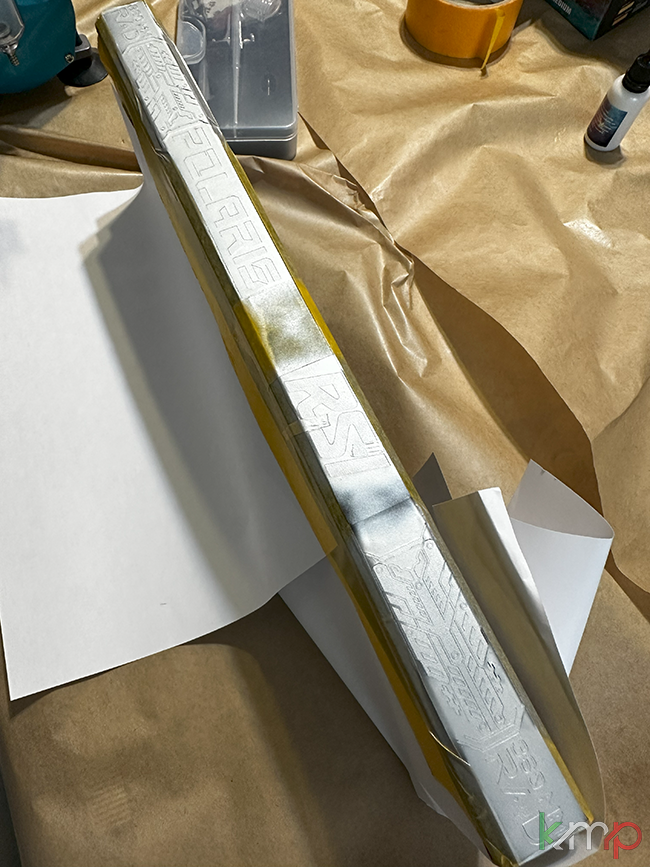
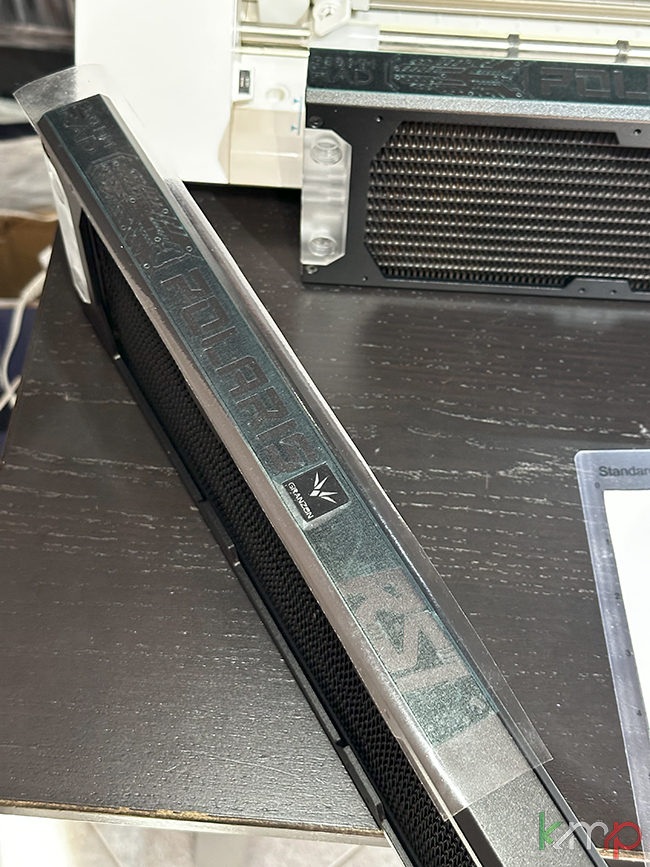
Test verniciatura con stencil su radiatore
Oggi ho avviato i primi test di verniciatura su uno dei radiatori della mod.
L’obiettivo di questa fase è valutare:-
la tenuta dello stencil durante l'applicazione e la verniciatura
-
la pulizia dei bordi una volta rimosso
-
la leggibilità dei dettagli più sottili
-
il comportamento della vernice su superficie metallica pulita
Materiali e strumenti utilizzati:
-
Vernice acrilica metallizzata argento
-
Stencil in vinile adesivo, tagliati a plotter
-
Aerografo con ugello da 0,3 mm (bassa pressione)
-
Nastro carta per mascherature localizzate
La superficie del radiatore è stata semplicemente pulita, senza trattamenti o primer.
🧪 Metodo di applicazione:
Dopo aver posizionato lo stencil e mascherato le aree circostanti, ho effettuato alcune passate leggere e incrociate con l’aerografo, lasciando asciugare tra uno strato e l’altro.
Una volta che la vernice è risultata asciutta al tatto, ho rimosso lo stencil con attenzione per osservare:
-
se i bordi delle grafiche sono rimasti netti
-
se le scritte piccole sono leggibili
-
se il vinile ha aderito in modo uniforme o si è sollevato
 Precisione e difficoltà:
I dettagli utilizzati in questi stencil sono dell’ordine di 0,6 mm, estremamente fini.
È una sfida ottenere bordi puliti su elementi così piccoli, soprattutto utilizzando strumenti non professionali e trovandosi ancora alle prime esperienze con l’aerografo.Le sfide però non mi spaventano – vediamo insieme cosa ne uscirà!
Condividerò presto il risultato finale con foto in luce diretta.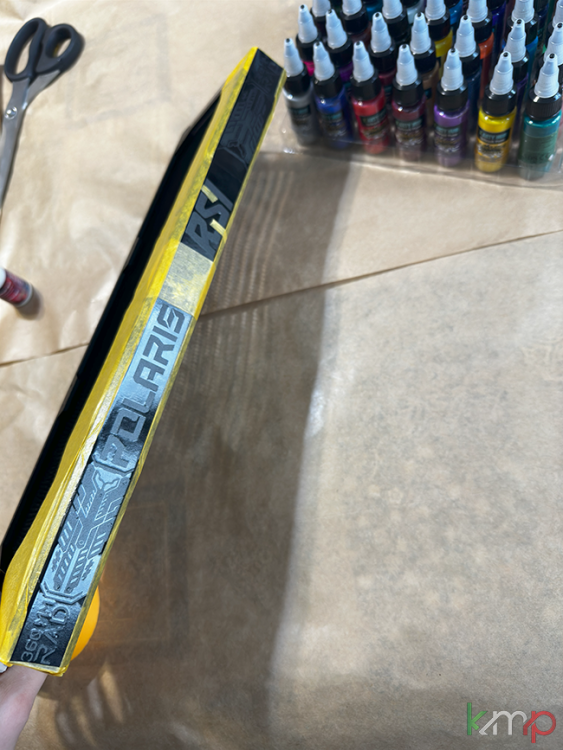


-
-
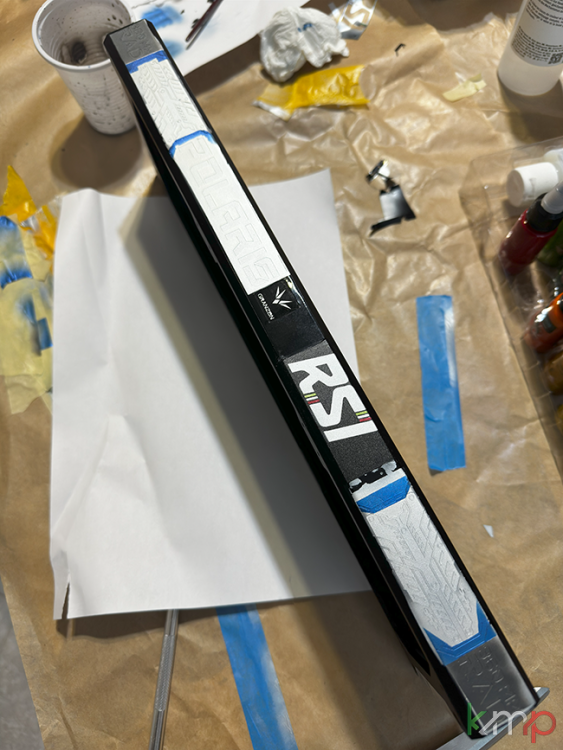
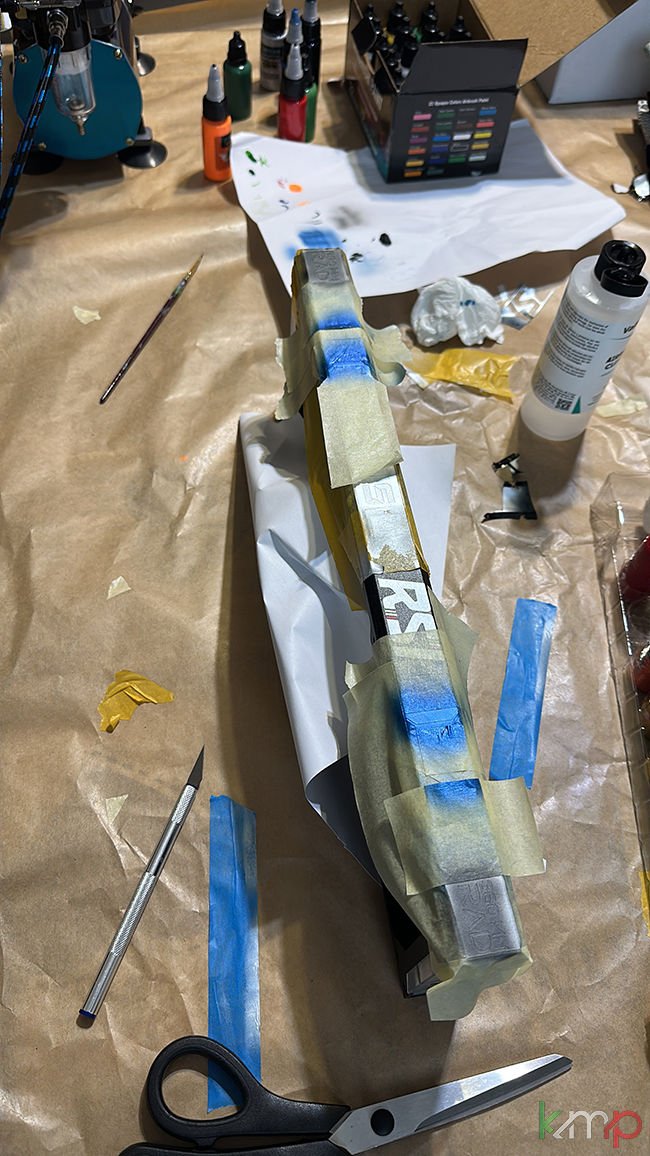
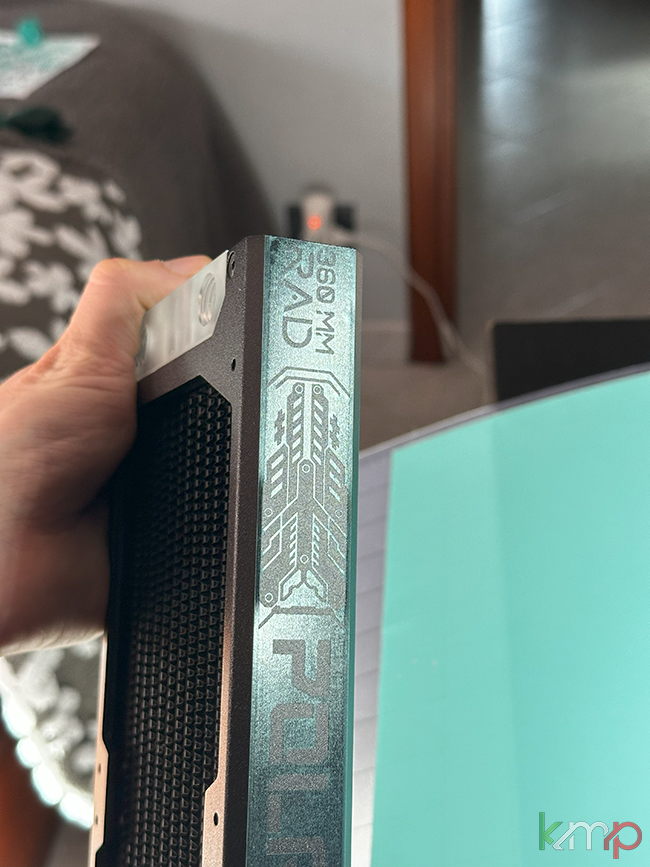
Star Citizen PC Mod – Update verniciatura dettagli: bandiera
 e co.
e co.
Proseguono i test con stencil e vernici!
Questa volta ho voluto iniziare a realizzare i dettagli più minuti come ad esempio la bandiera italiana, in scala ridotta, da applicare sul fianco del radiatore principale. Procedura:
-
mascheratura precisa delle aree da verniciare;
-
applicazione degli stencil realizzati precedentemente;
-
spruzzata con vernice colorata direttamente tramite aerografo;
-
rimozione accurata degli stencil una volta asciutto.
 Nota importante: la dimensione dei dettagli – come le linee della bandiera – è dell’ordine del millimetro. Non sto usando strumenti professionali, e questa è la mia prima esperienza con l’aerografo.
Ciononostante, il risultato è stato sorprendentemente pulito:-
i bordi non hanno sbavato;
-
i colori sono rimasti separati;
-
nessuna infiltrazione sotto gli stencil!
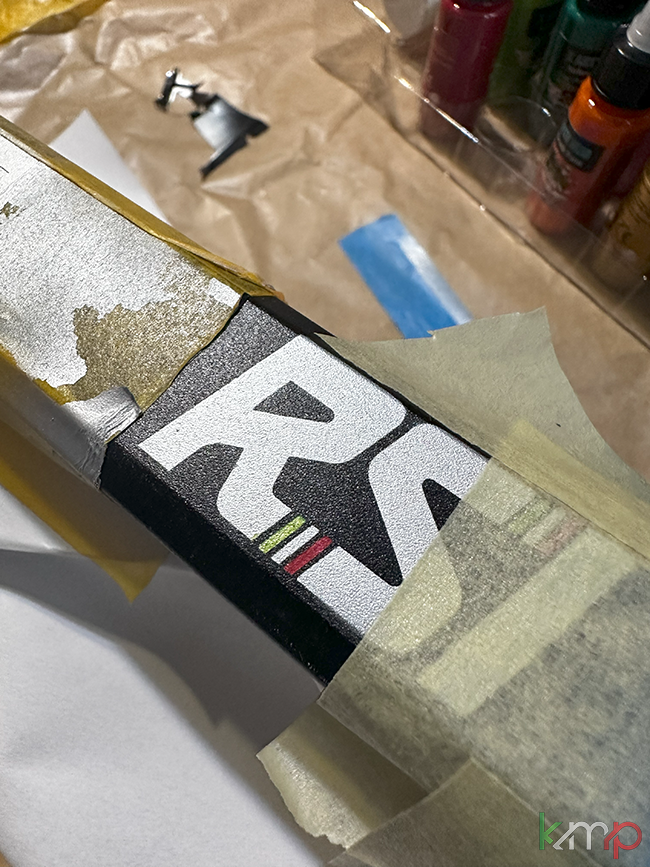
Il tricolore, il logo RSI e tutte le diciture si stanno integrando bene nella build ispirata alla Polaris.
 Fatemi sapere cosa ne pensate e se avete spunti per ulteriori dettagli tecnici o simboli da integrare nei prossimi step!
Le sfide non mi spaventano: ogni giorno si impara qualcosa di nuovo


-
-
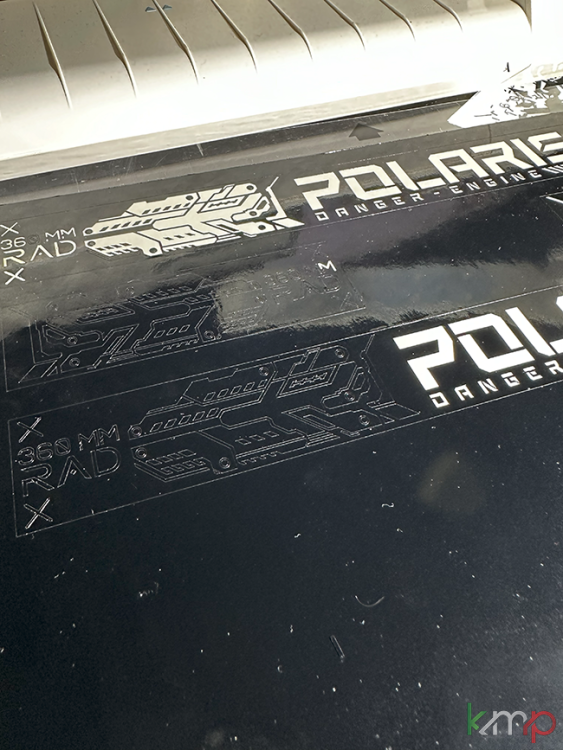
Ciao a tutti!
Scusate l’assenza di questi giorni: sono stato operato (niente di grave, per fortuna!), ma il recupero ha rallentato un po' i lavori sul progetto.
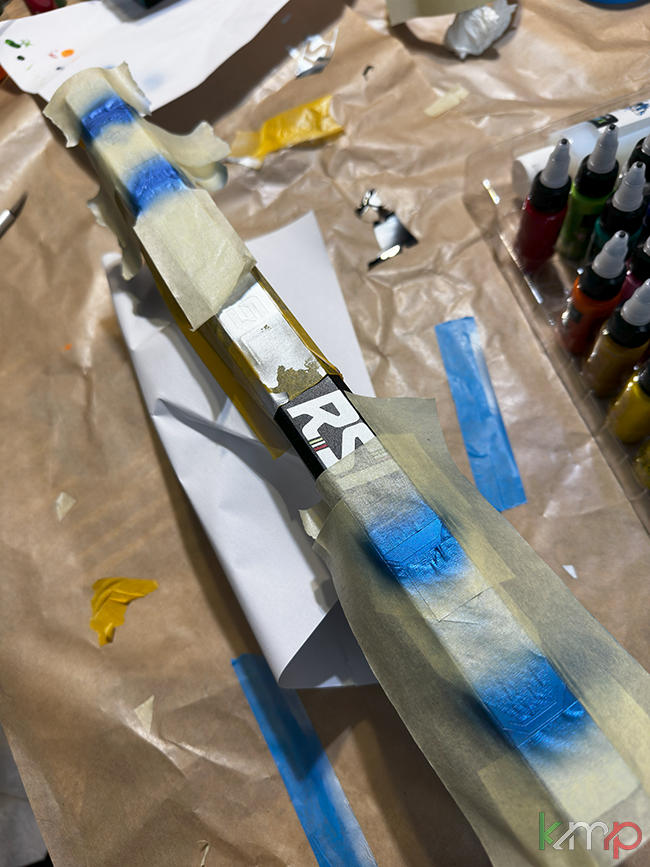
Nonostante ciò, ho continuato a portare avanti il lavoro quando possibile, anche se con ritmi ridotti.In particolare, ho testato le prime verniciature con aerografo su uno dei radiatori, come avete potuto vedere dallo scorso post, utilizzando come stencil della carta vinilica tagliata con la Silhouette Cameo.
Come prevedibile, quel materiale non è pensato per questo tipo di lavorazione e alcuni dettagli minuti sono stati inevitabilmente portati via durante la rimozione, compromettendo parzialmente il risultato. Tuttavia, l’esperimento è stato utile per valutare:
-
il comportamento degli stencil su superfici leggermente curve
-
la tenuta dei bordi durante l’applicazione della vernice
-
l’aderenza sulle superfici non trattate
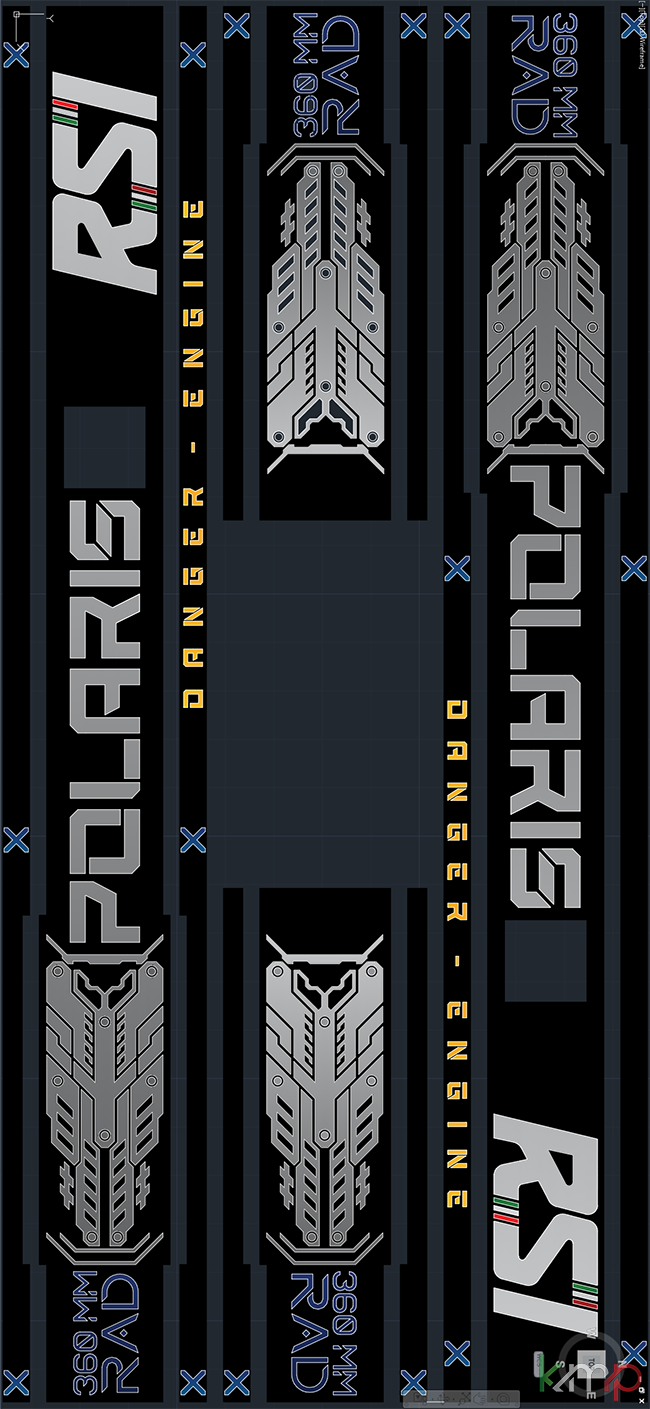
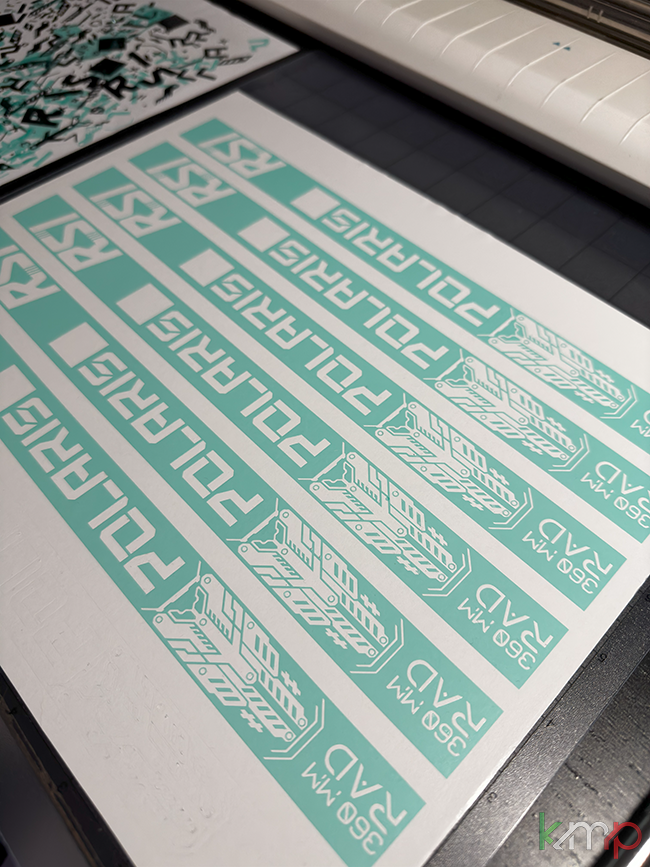
Ho quindi deciso di rifare completamente le grafiche, migliorando le proporzioni, i livelli di dettaglio e la logica di composizione.
 Inoltre, ho finalmente acquistato la carta specifica per stencil da verniciatura, molto più resistente allo strappo e con un’adesione più controllata, adatta a questa tipologia di lavorazione.
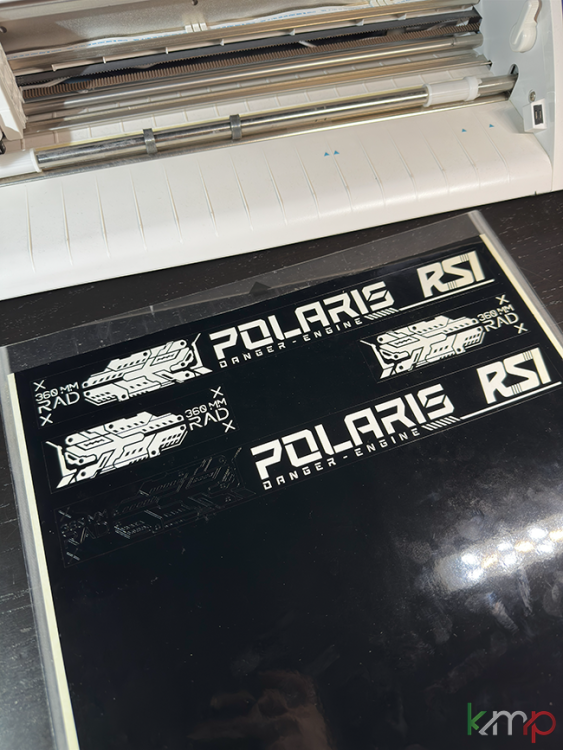
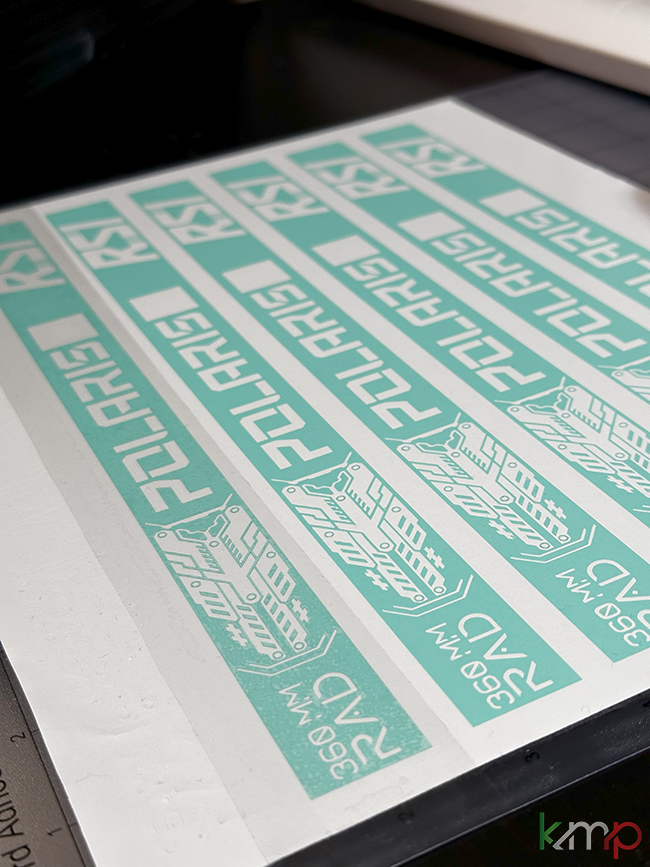
Le immagini che vedete mostrano:
Inoltre, ho finalmente acquistato la carta specifica per stencil da verniciatura, molto più resistente allo strappo e con un’adesione più controllata, adatta a questa tipologia di lavorazione.
Le immagini che vedete mostrano:
-
il file digitale finale delle grafiche aggiornate
-
il taglio preciso con la nuova carta
-
l’applicazione sul radiatore, pronta per la nuova fase di verniciatura
Appena possibile vi mostrerò anche il risultato finale.
Nel frattempo, se avete consigli su materiali da usare o su come gestire dettagli così piccoli (alcuni elementi sono inferiori al millimetro!), sono tutto orecchie.Grazie a chi continua a seguire e supportare questa mod a tema Star Citizen!


-


Ciao! Sembra che tu sia interessato a questa conversazione, ma non hai ancora un account.
Stanco di dover scorrere gli stessi post a ogni visita? Quando registri un account, tornerai sempre esattamente dove eri rimasto e potrai scegliere di essere avvisato delle nuove risposte (tramite email o notifica push). Potrai anche salvare segnalibri e votare i post per mostrare il tuo apprezzamento agli altri membri della comunità.
Con il tuo contributo, questo post potrebbe essere ancora migliore 💗
Registrati Accedi