Project: Mod in a Week // "Fallout Cause SP" (Completed)
-
3rd Day - Monday 28-11-11 - Update 2
Gave everything a final sand down, cleaned it up and gave it a coat of primer:
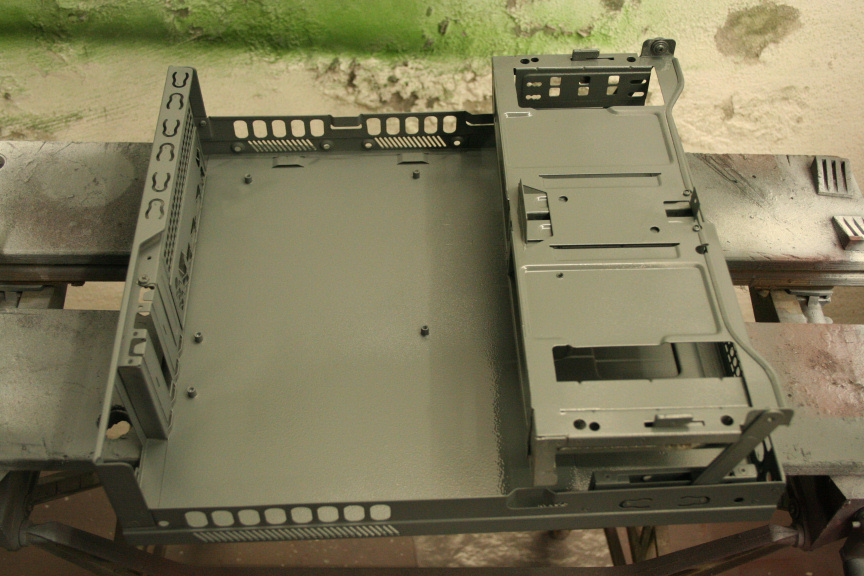
For some reason the image of the primed front part of the case was corrupted but eh, nothing important.
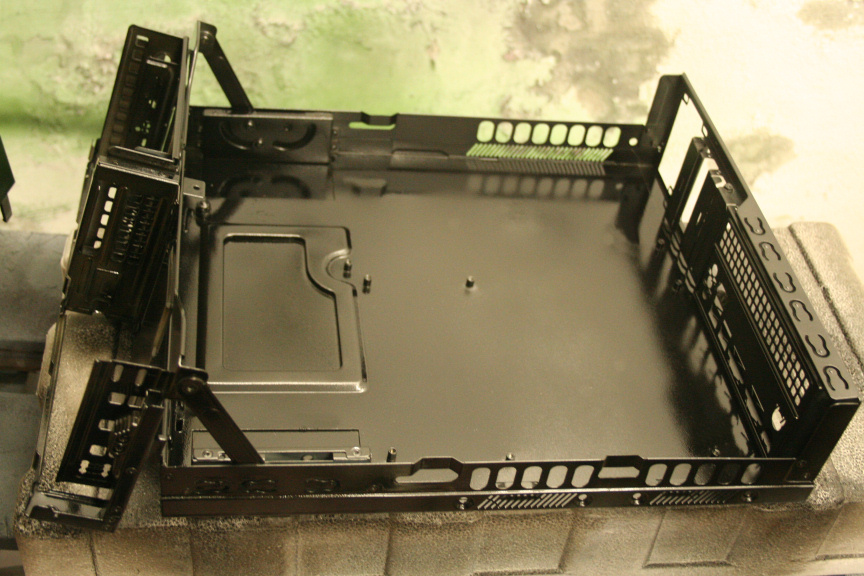
After waiting drying time I applied 2 coats of glossy black, now I have matt black but I used glossy in order to be able to sand it down so fragments will remain a bit shiny which will add further to that used and thrown about look.
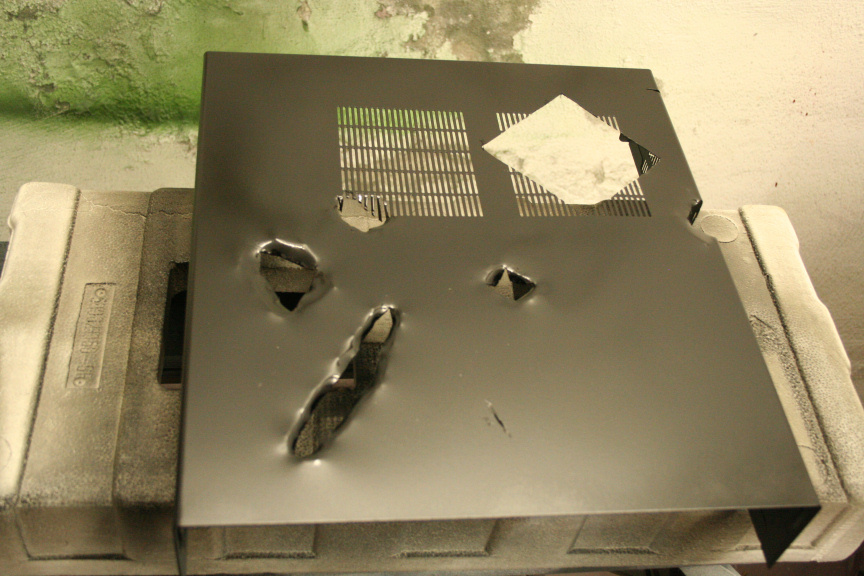
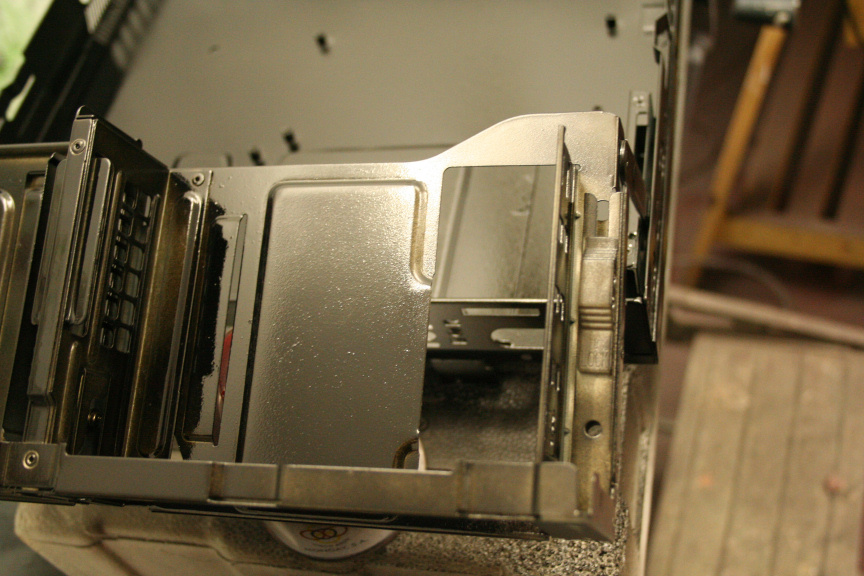
For the devices mounting point since some will be seen through grills or holes I decided to try something new, I watered the paint down more than usual (added an extra part of water) in order to prevent it from being a solid color and included an acrilic brown compound normally used for plastic and metal surfaces that imitate wood (I guess you could call it an artificial wood barnish), I ended up quite liking it!

That´s it for today, tomorrow I will be going down to my local paint supplies shop to acquire the colors that I´ll be using and the rust effect compound.
Thanks for reading!
//
4th Day - Tuesday 29-11-11
Today has been a bit slow, this is because I went to buy the yellow I wanted to use for this, and they didn´t have the exact one I wanted in the usual paint I use. So I bought the tone in a paint I´ve never used, it´s still acrilic and is completely fine and compatible with the primer and lacquer I use, it´s purely it´s water/paint/density rations that are different, no idea why. It has ups and downs, the up is that it´s much thicker than the paint I normally use, meaning two coats is enough for a solid color. The down is that it takes 4-5 times longer to dry, which is fine if you´re doing a solid colour, you just get it over with and leave it overnight to cure. But when you want to add other tones on top like I will be doing, it´s annoying because you waste a lot of time on it being ready for the next coat. But aniway doesn´t really matter. I covered the sections I dont want yellow and started painting.
First Coat:
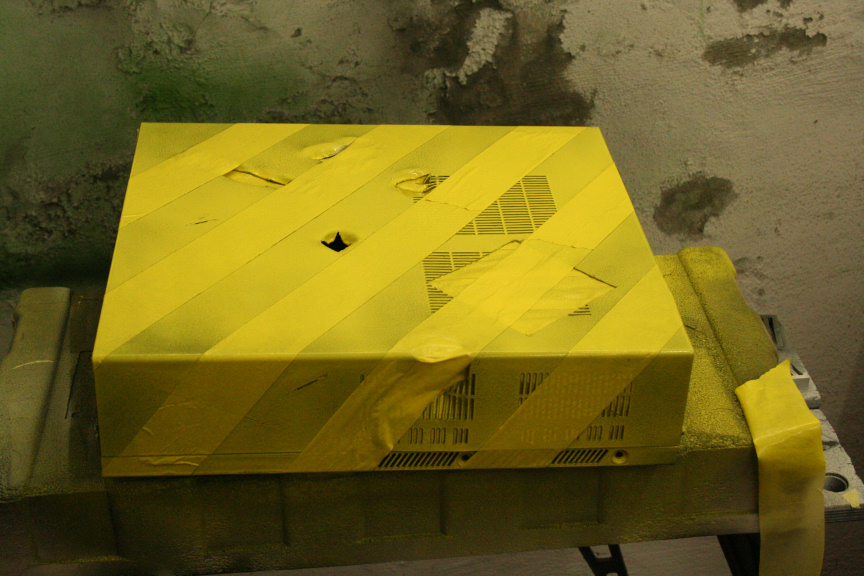
Second and last yellow coat:
Have to wait till tomorrow but the process will be darkening it with a black paint mist so no area has the same tone, sanding it down first to prep for coating and further down to show usage and deterioration right in to the metal. Once done, rusting effects all over the place, more concentrated obviously where there are openings.
It´s easier to show you than to explain it, but you´ll see tomorrow!
Thanks for reading!
//
5th Day - Wednesday 30-11-11 - Update 1
It´s paint effects day!
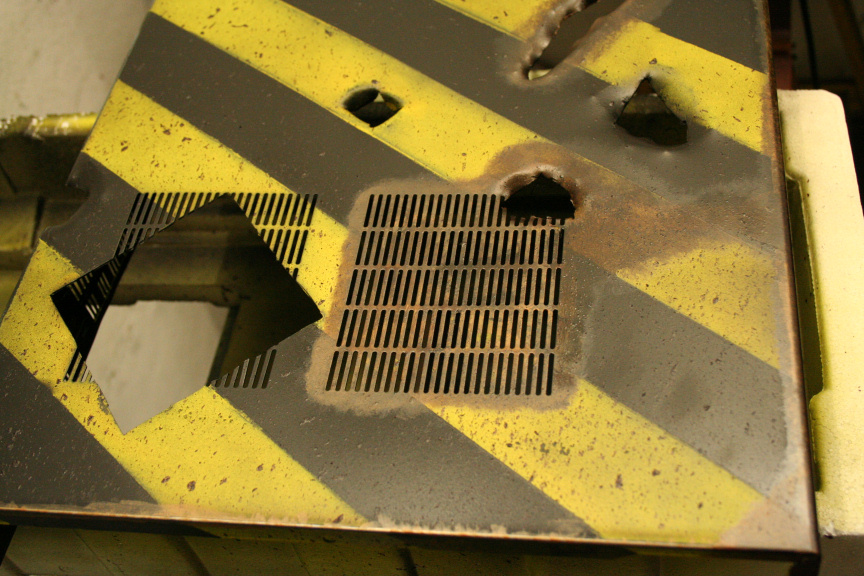
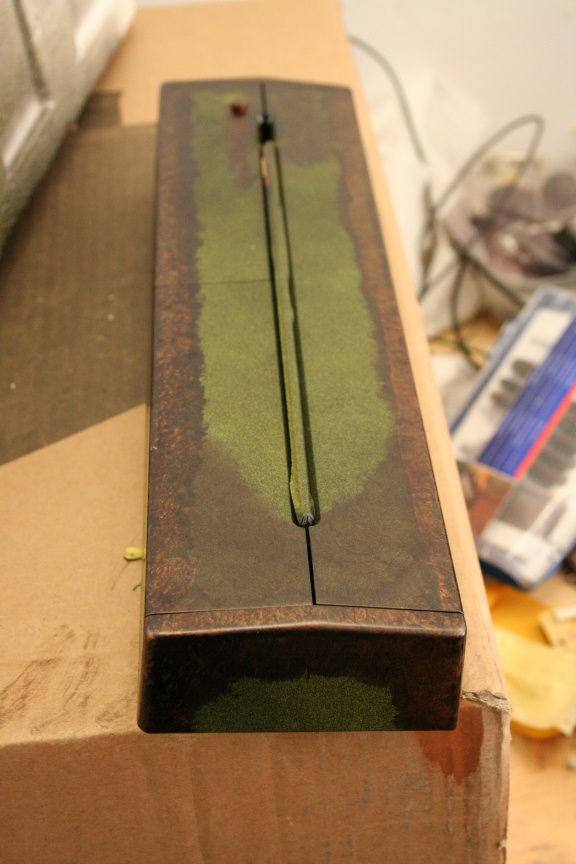
First I took off all the masking tape used to make the lines and I descovered I didn´t totally cover one of the grates so paint leeched through to the inside of the case. At first I was like, easy fix, just repaint the inside, end of that. But as I looked at it further, I kind of like the effect, it gives the inside a bit of a glow, so for now I´m going to keep it:
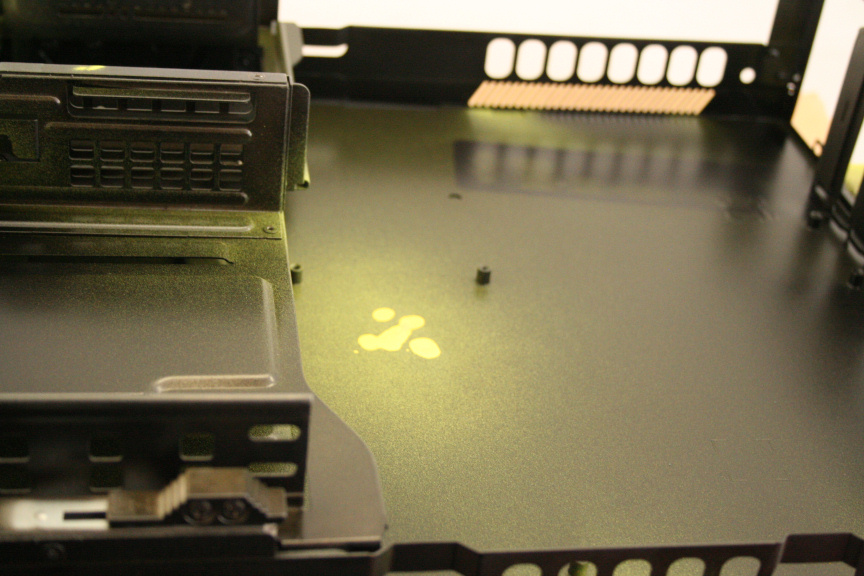
What do you guys think? Keep it? or repaint the inside black as it was originally?
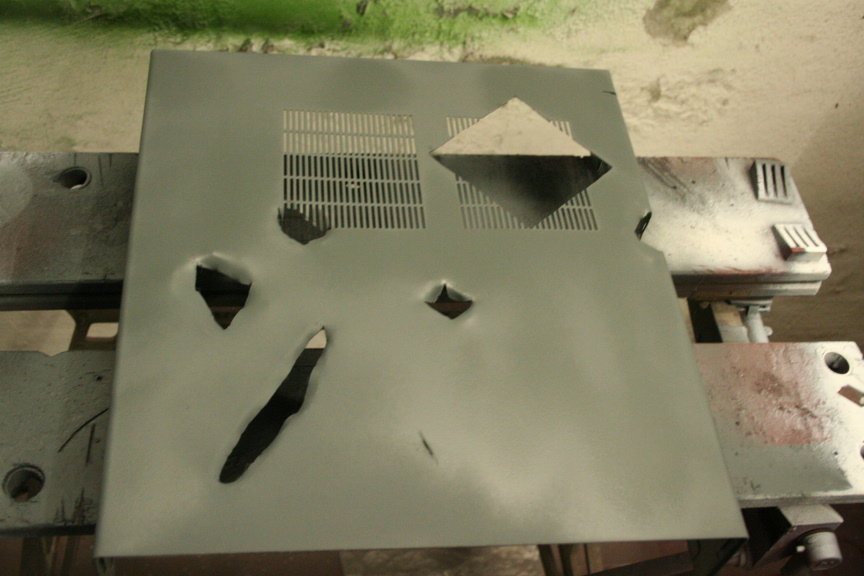
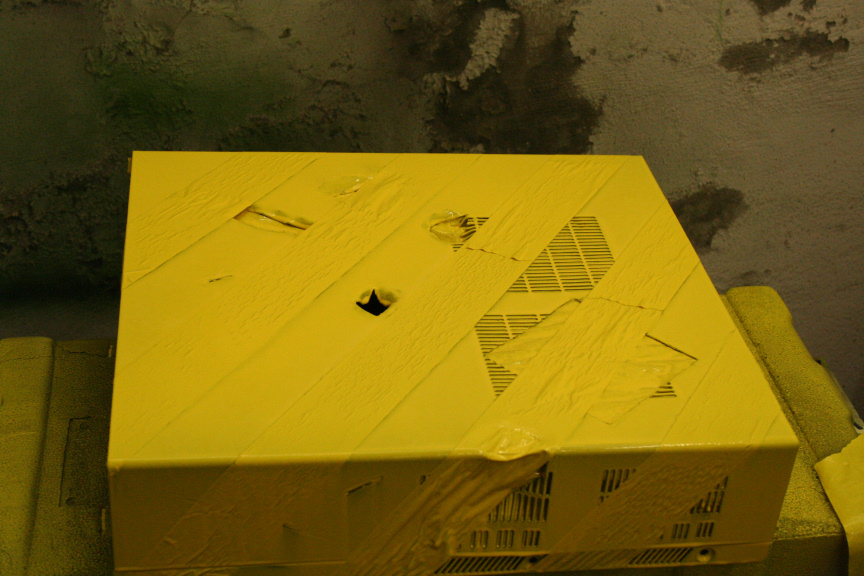
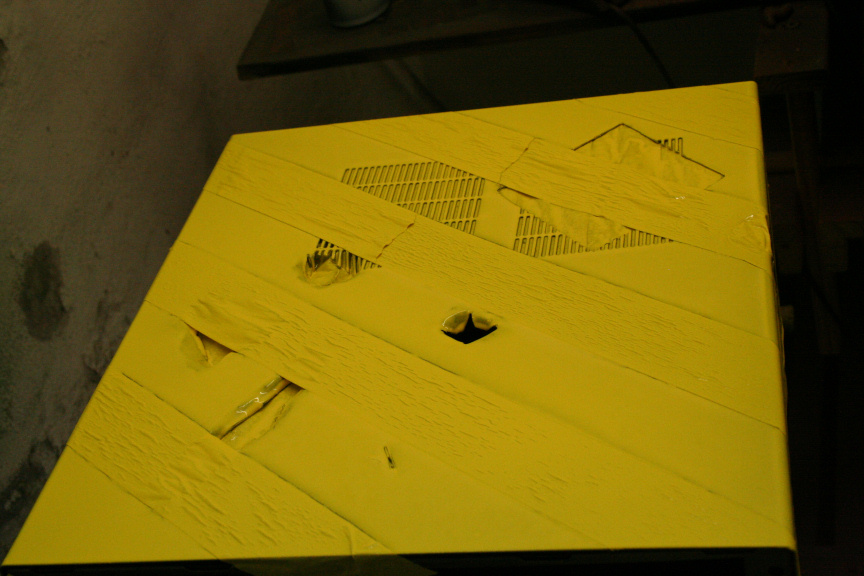
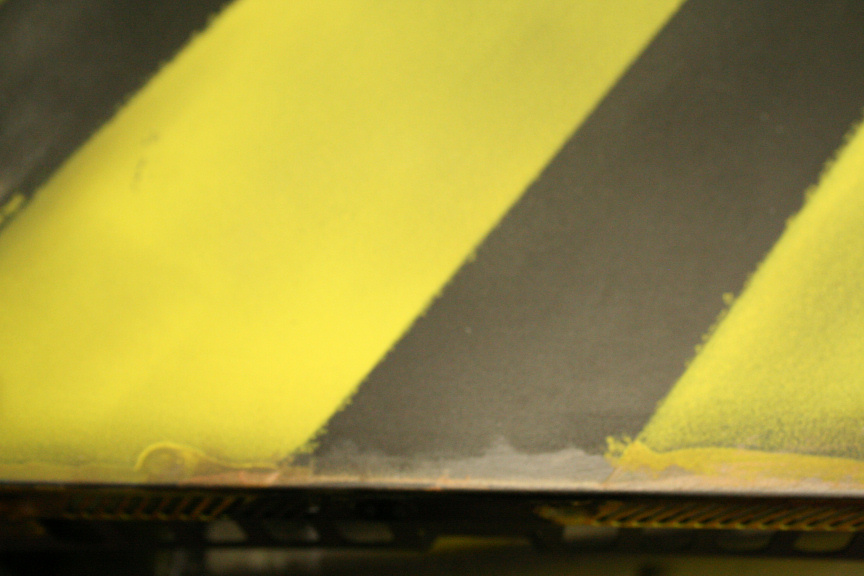
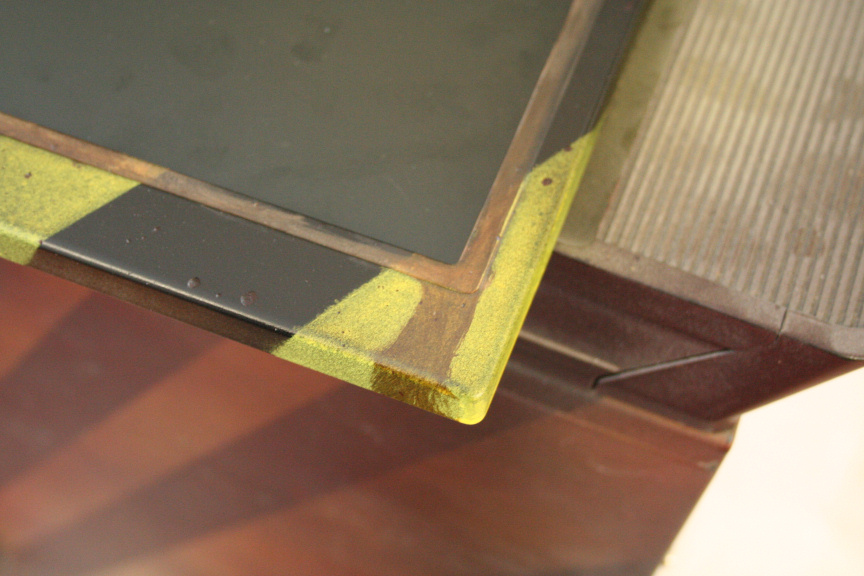
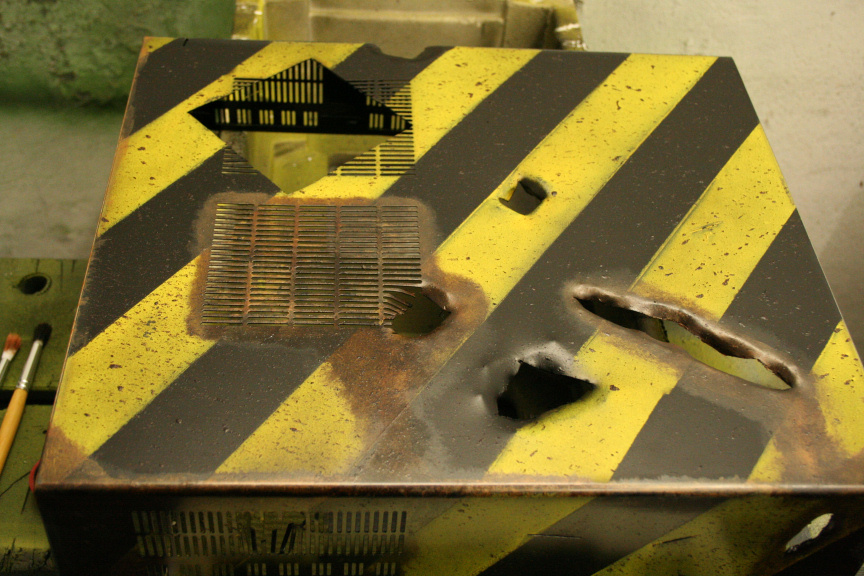
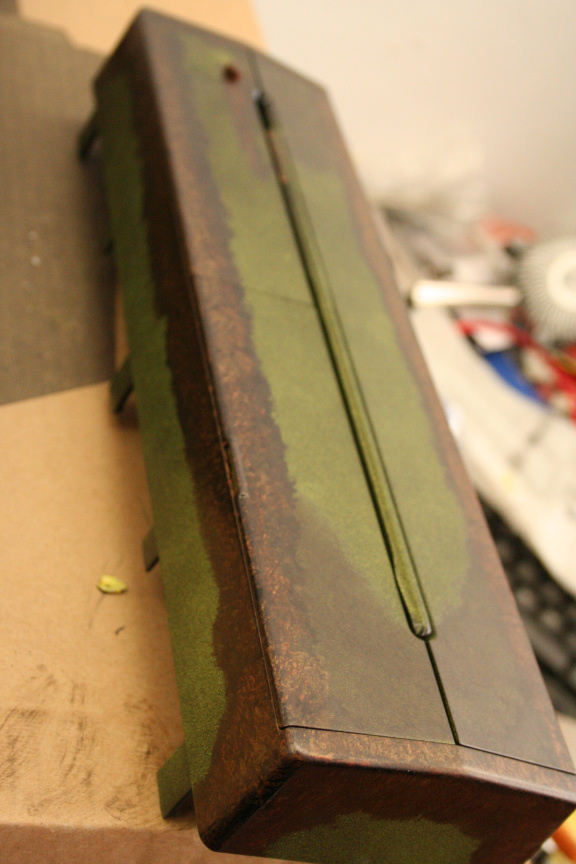
Aniway, now the the important part, here you have the outside with the exterior masking tape removed:
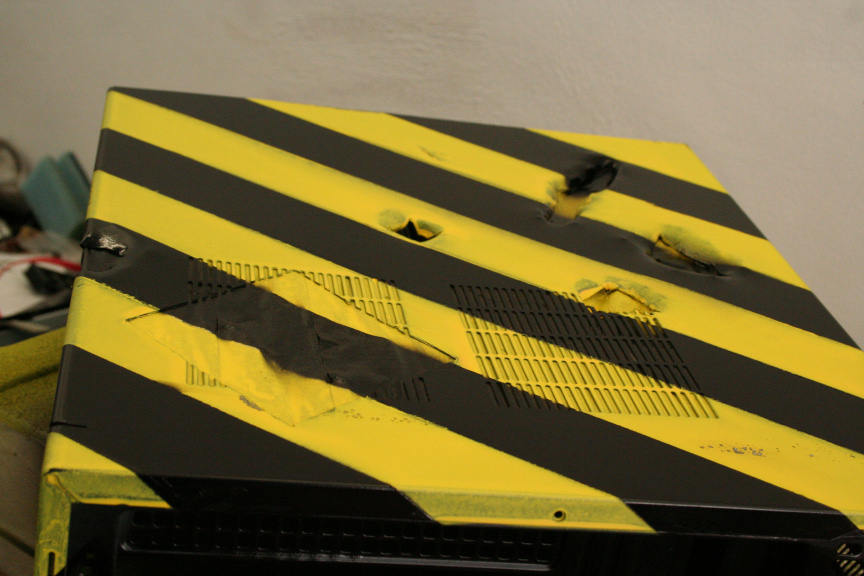
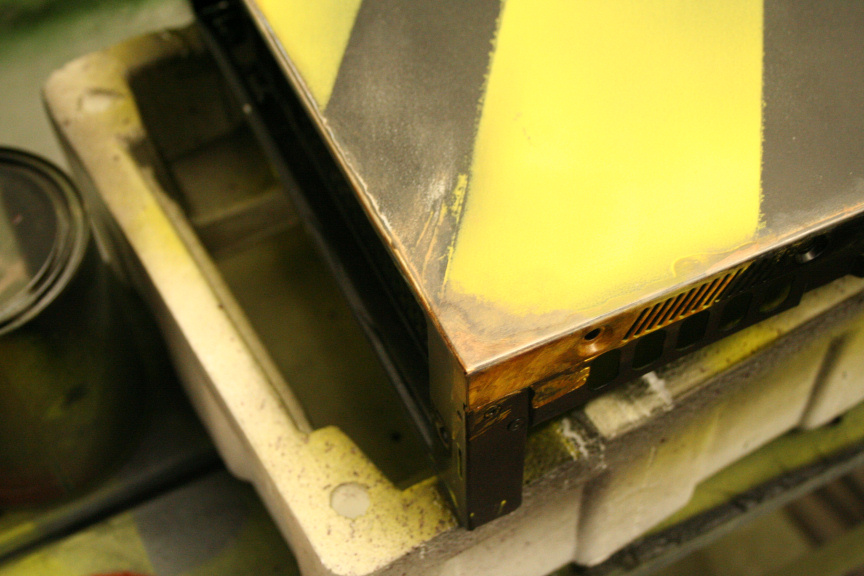
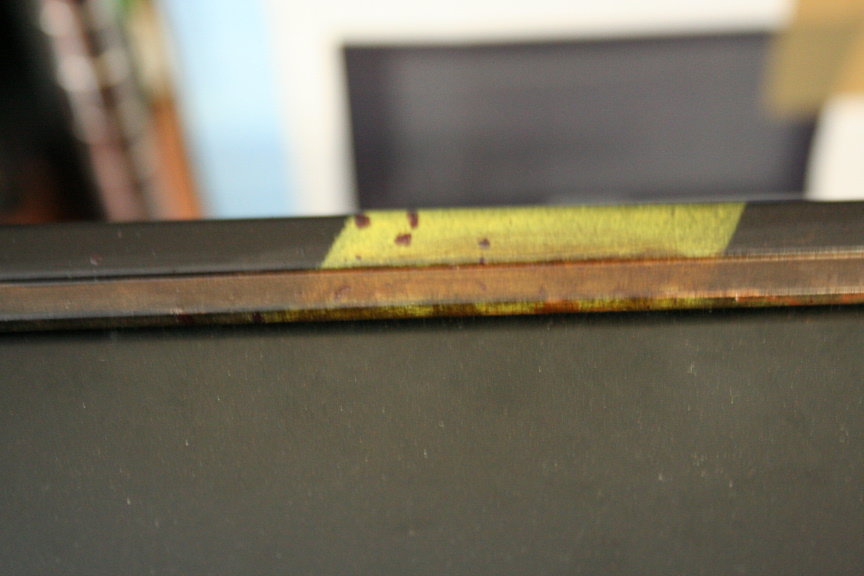
Now with the interior tape removed and the first two effects done, darkening of the colour in an irregular pattern and with copper dark red drops everywhere to simulate dirt and other paint degradation/damage:
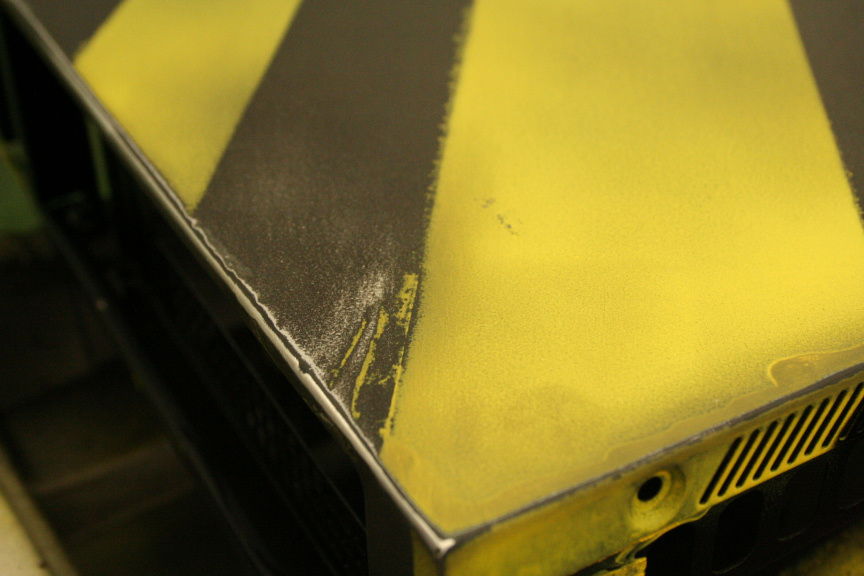
While that is drying I went ahead and started sanding down all corners and curves in the other part of the case to simulate abuse:
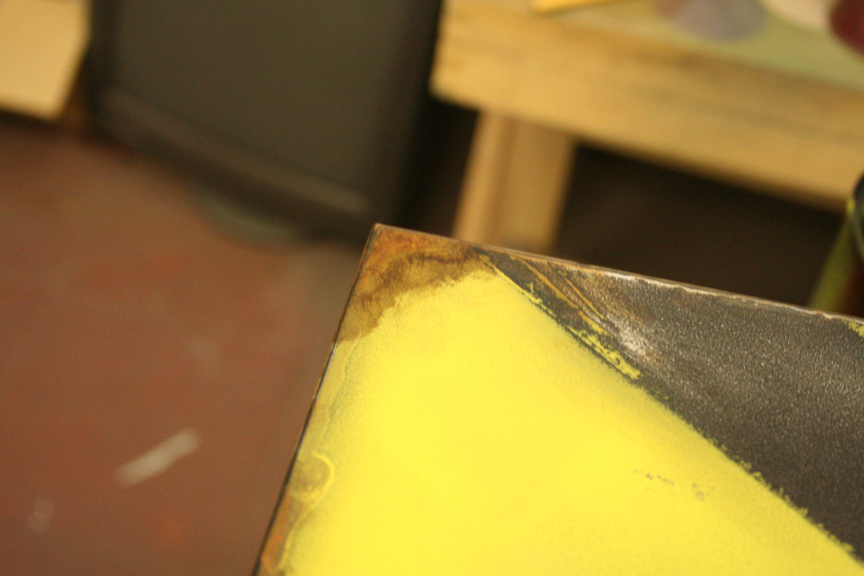
and applied the rusting effect:
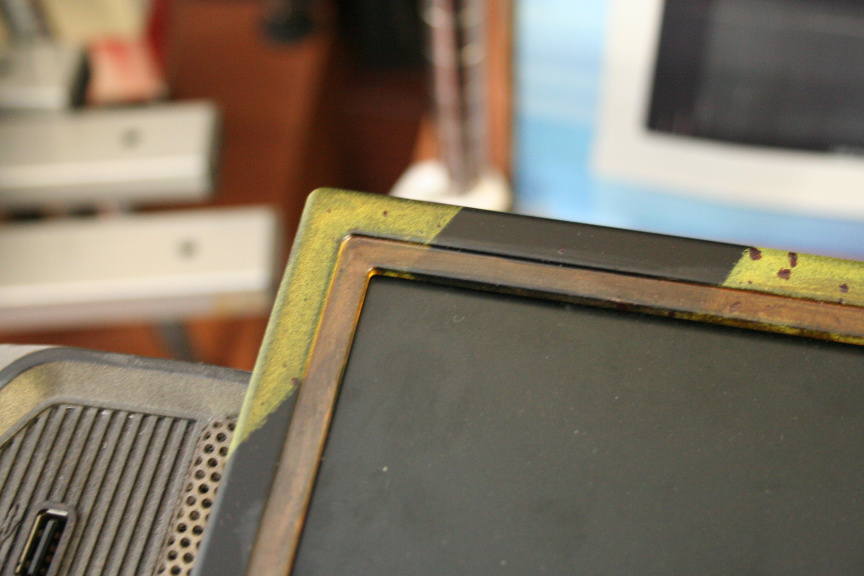
Repeated the process with the lcd panel´s frame:
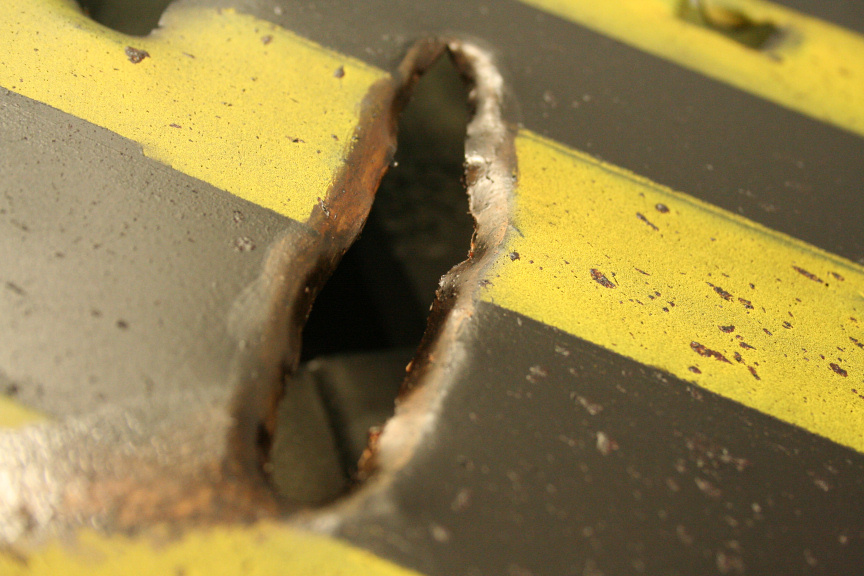
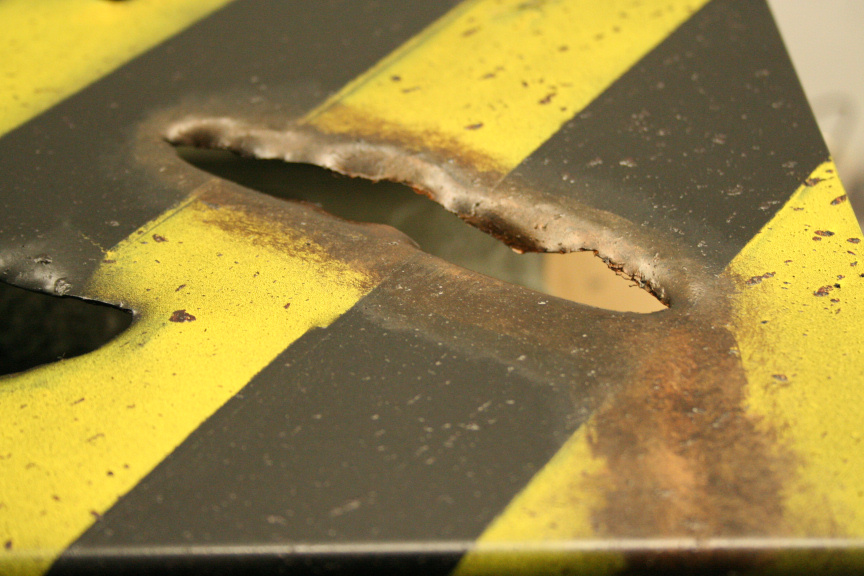
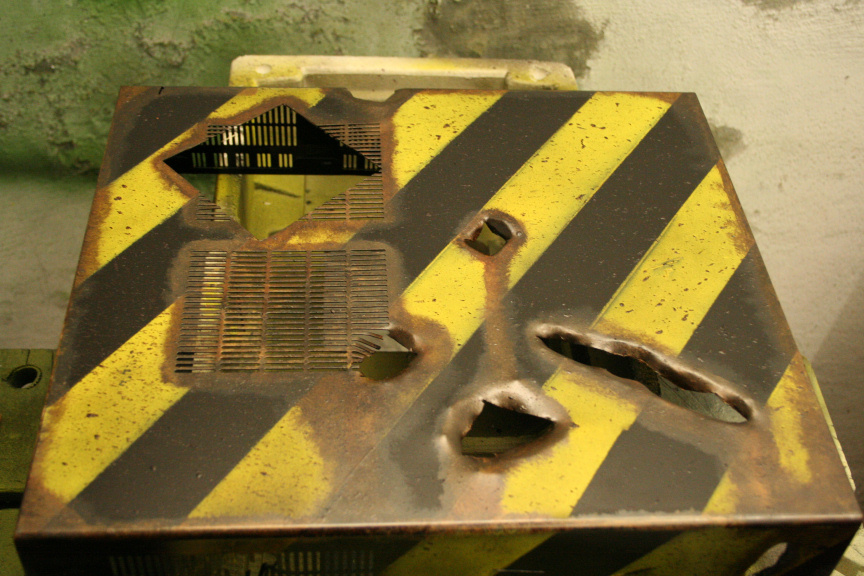
Now that it´s dry, I started doing the rust effect to one of the openings on the side of the case, here´s the first layer:
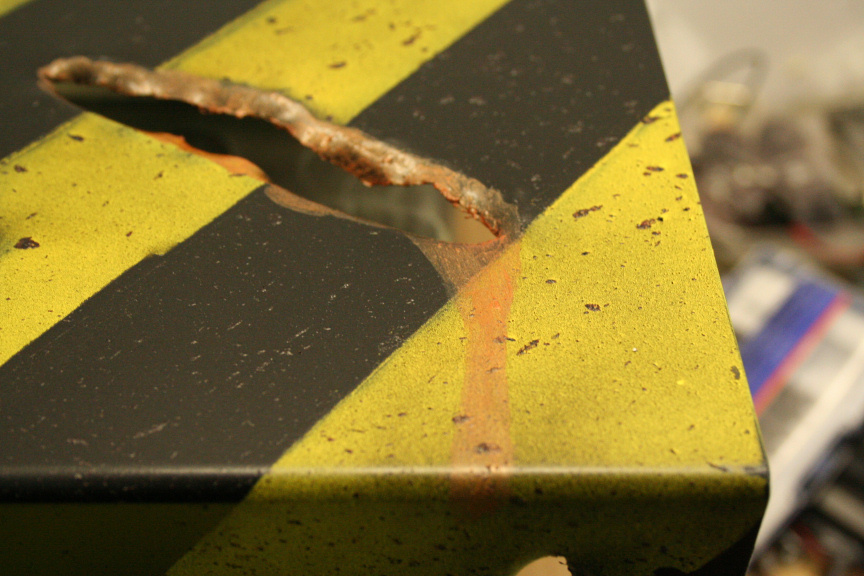
And the second irregular layer with the second component, essentially giving the final look to the rust on that opening:
That´s it for now, a second update later today, thanks for reading!
//////
5th Day - Wednesday 30-11-11 - Update 2
Cold cathodes and wirless keyboard/mouse arrived which I´ll be using (and in the case of k+m, modifying it) on this project.
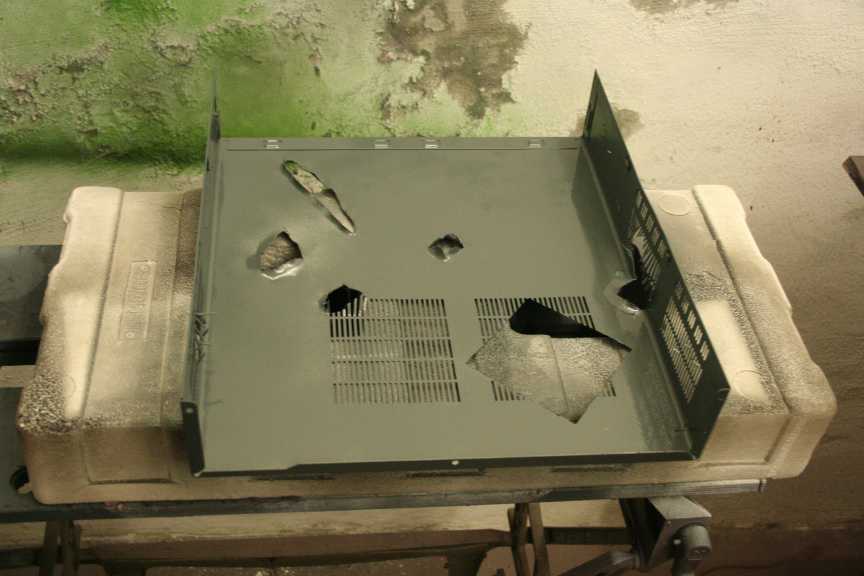
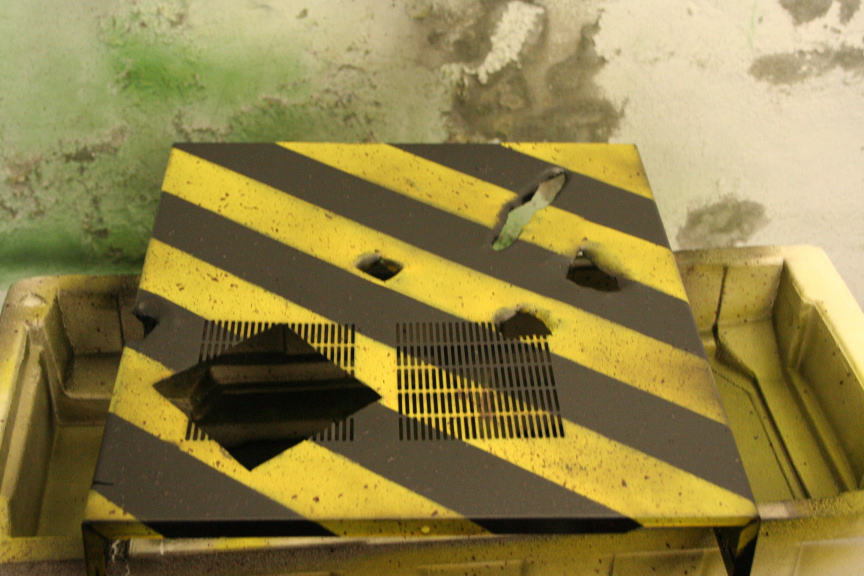
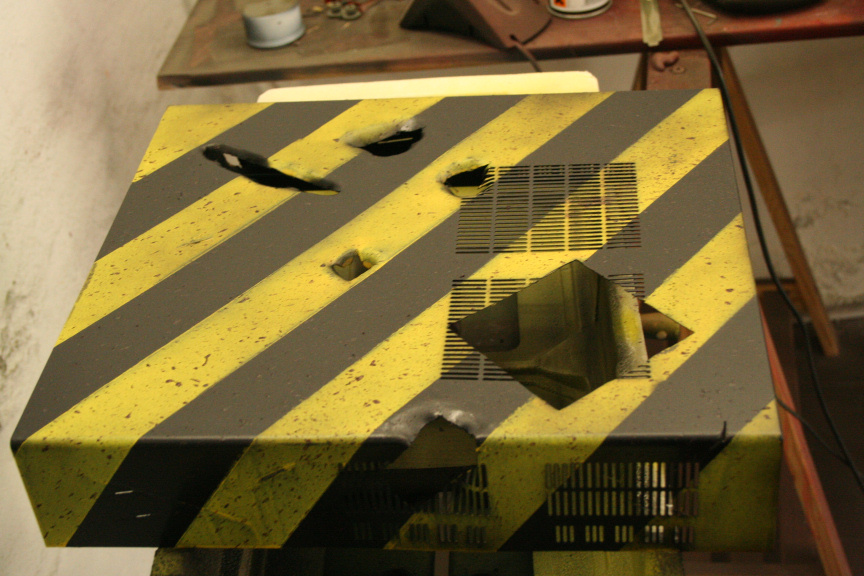
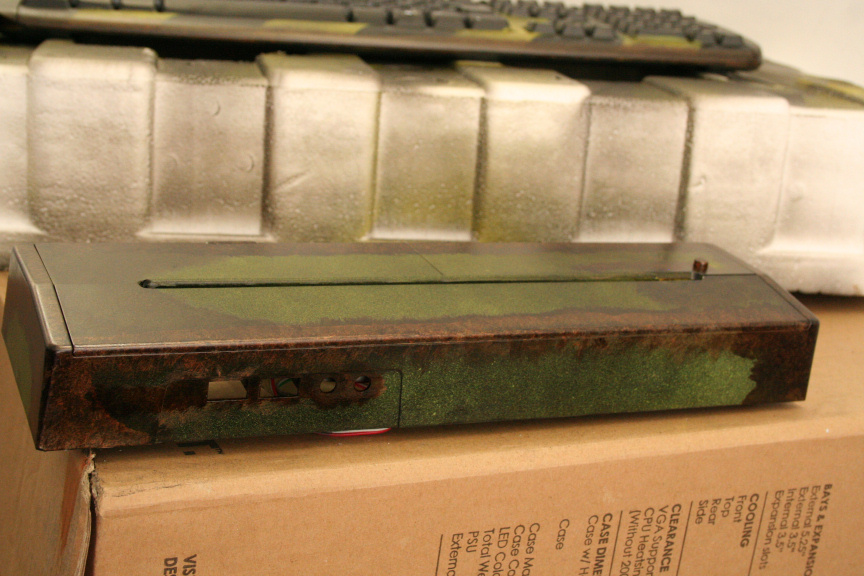
I continued applying usage, abuse and rusting to the borders, openings and imperfections of the case:
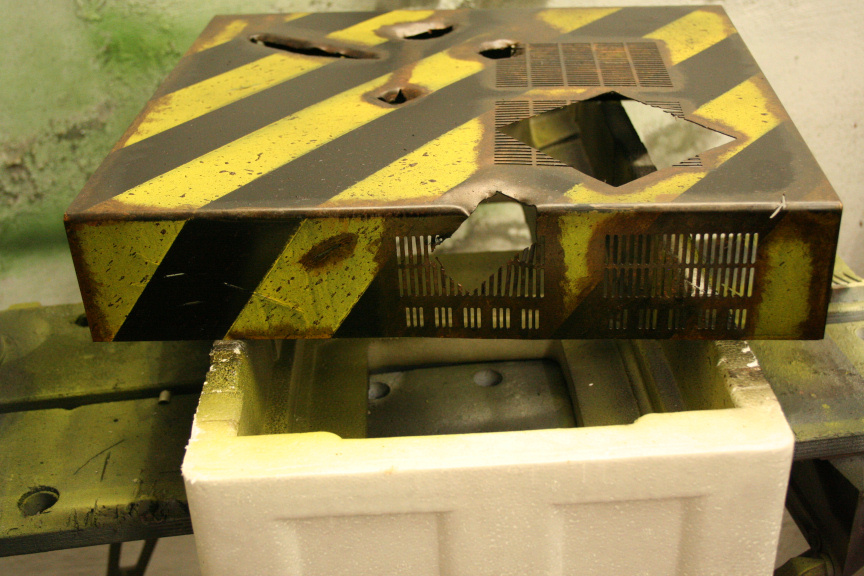
Now the back of the case, which you wont eventually see much off since the screen will be mounted on it but still:
And finished with the front side:
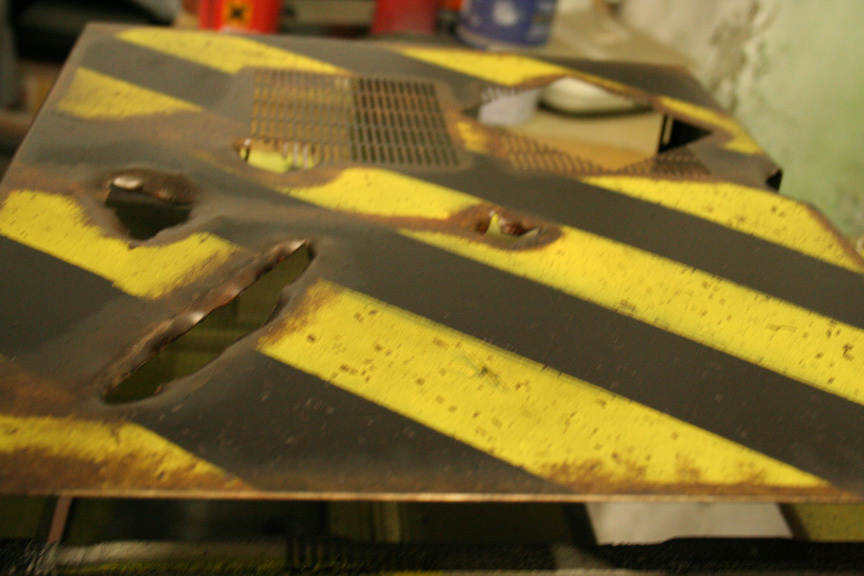
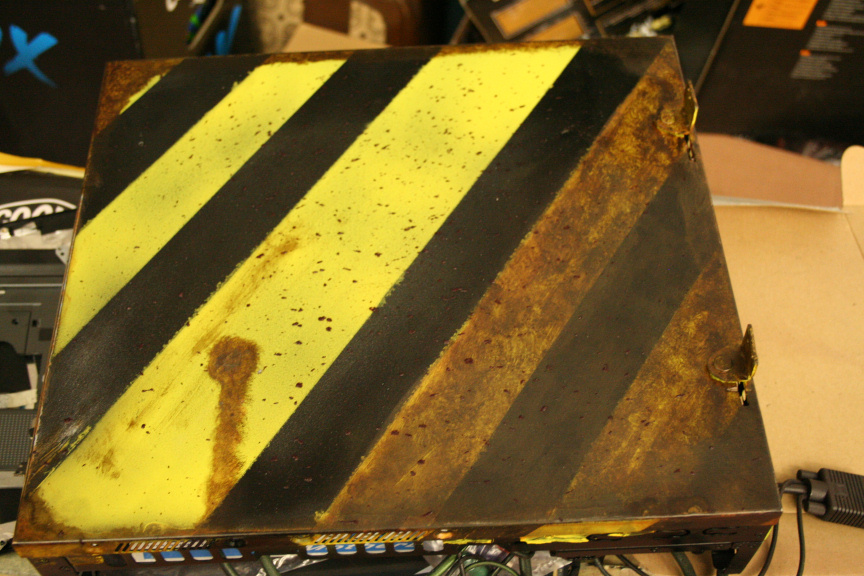
And the top:
Tomorrow I will deal with the front:
Still haven´t decided what to do with it.
Once that is out of the way I will assemble the case to have a complete look to it and see if I feel like changing something or if I have to do any touch ups and so on.
I will also get started (and hopefully finish?) with the keyboard and mouse.
The day after that, which is the final day I will assemble the whole thing and take some final picks.
Thanks for reading!
-
6th Day - Thursday 01-12-11 - Update 1
1st of the month, white rabbits!

cough*cough*ahem... aniway!
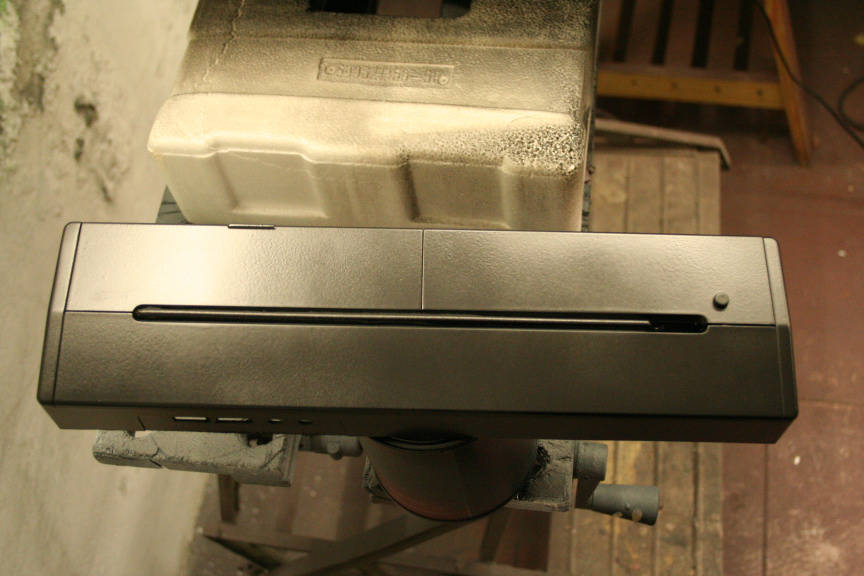
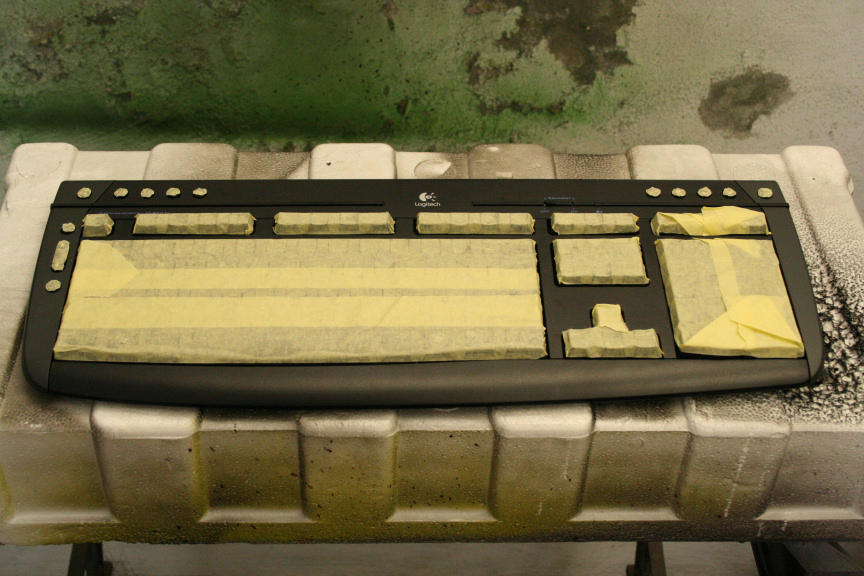
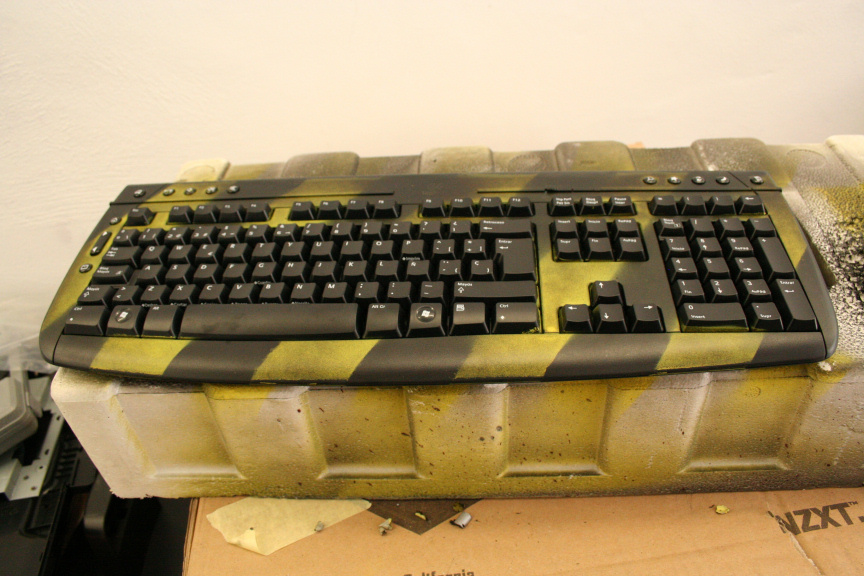
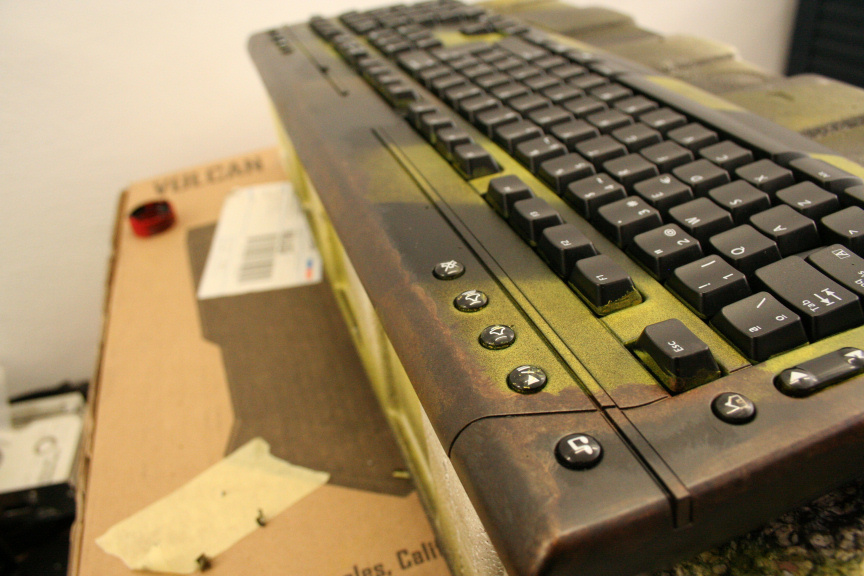
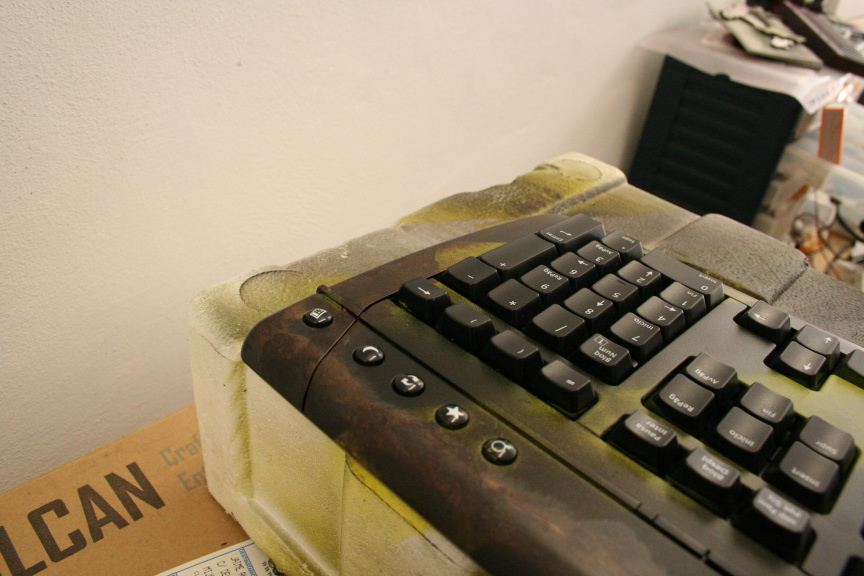
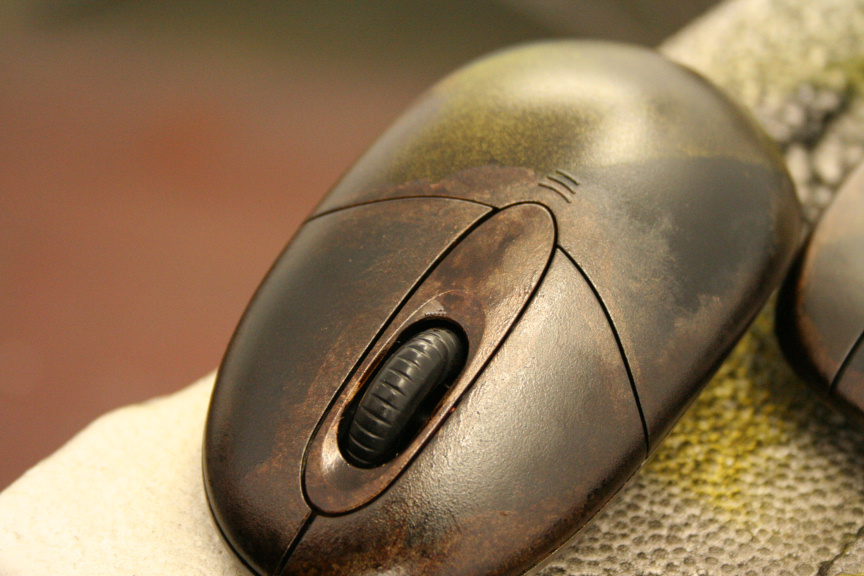
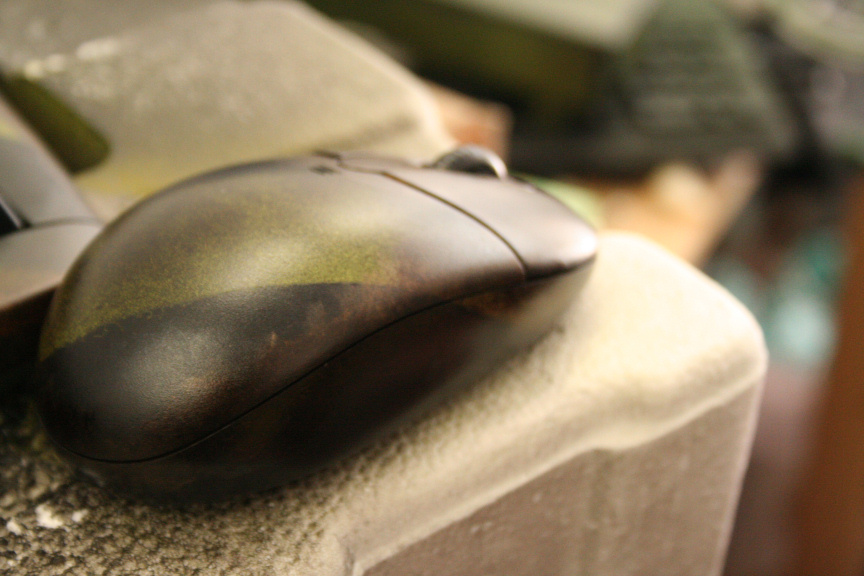
As I mentioned yesterday, the wireless keyboard and mouse arrived. I could´ve gone for something fancier but to be honest I really like the standard logitech oem combo, it´s cheap, great quality, sturdy and lasts just about forever. So here we go, keyboard sanded down, masked and ready for painting:
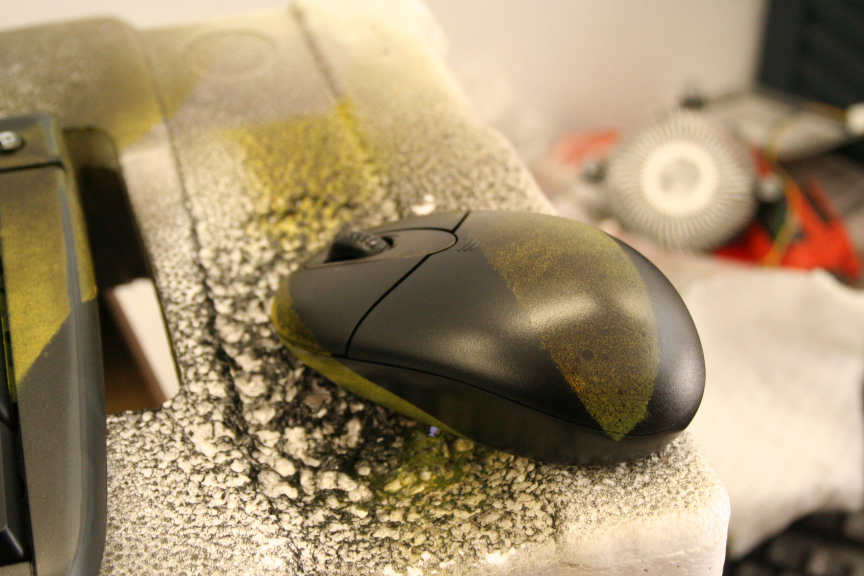
First layer done:
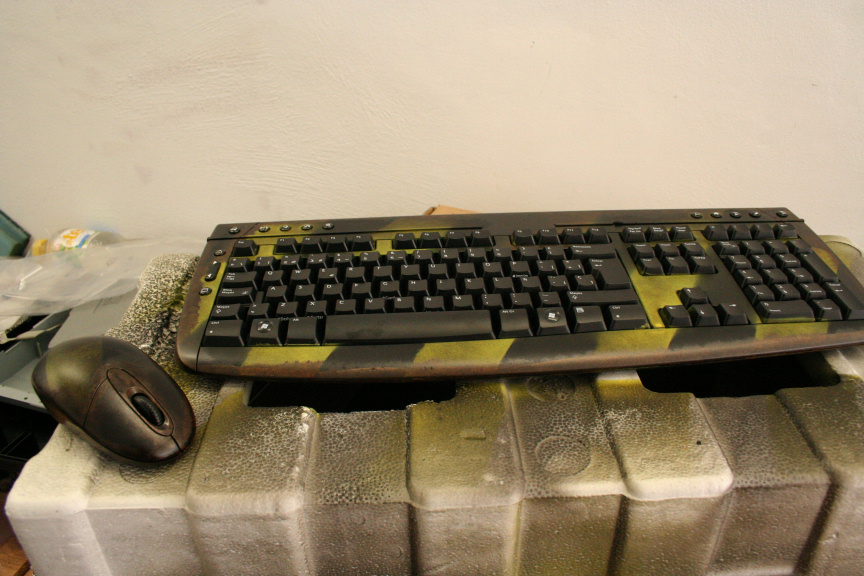
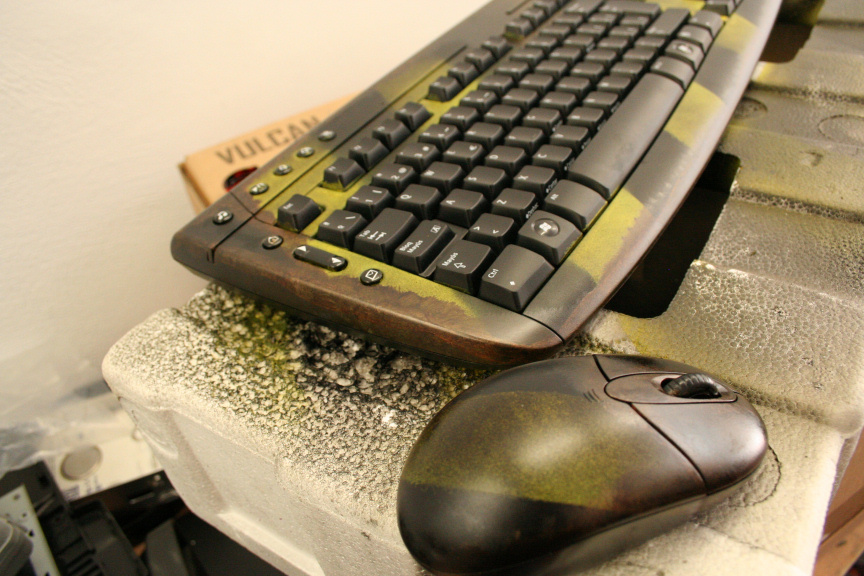
And the same process as with the rest, darkening, particles, and... rust! I´d never though I´d say this, but, I really really really like the whole rusty look it´s turning out to have (originally I planned for only a bit).
And now I´d like to thank everyone on every forum this is posted who helped me out with suggestions for the front of the case.
I ended up mixing two suggestions, one was rusted out front and the other one was olive green light coat with a light coat of the yellow I used on the rest of the case on top, so here you have the result:
More later today, thanks for reading!
//
6th Day - Thursday 01-12-11 - Update 2
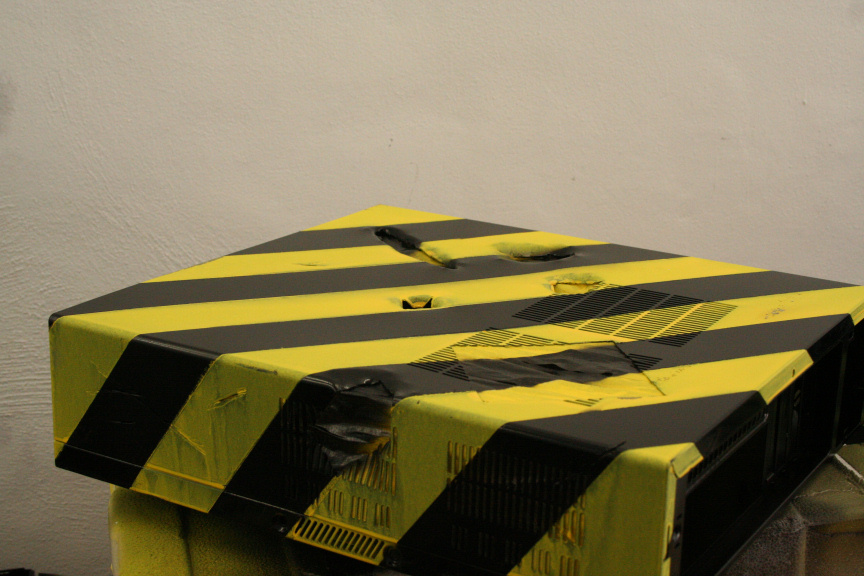
This for me is quite simply, the cherry on top:
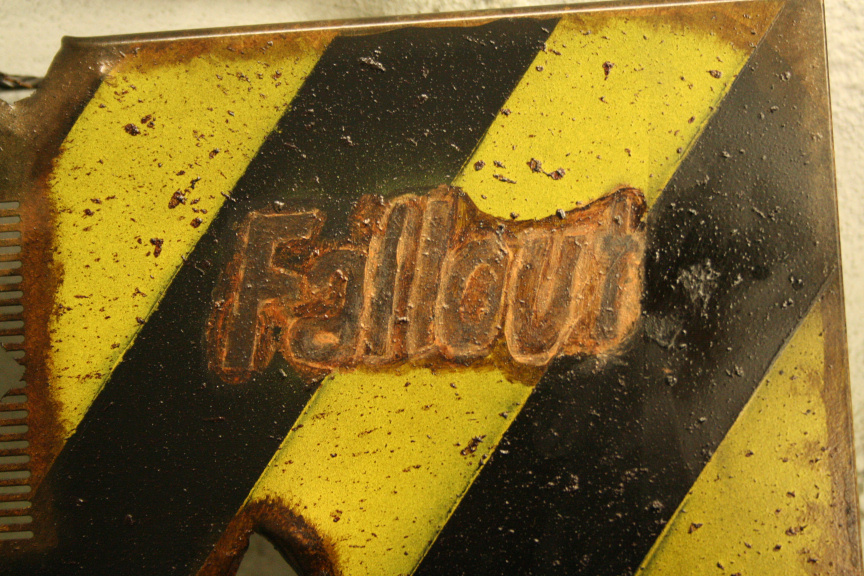
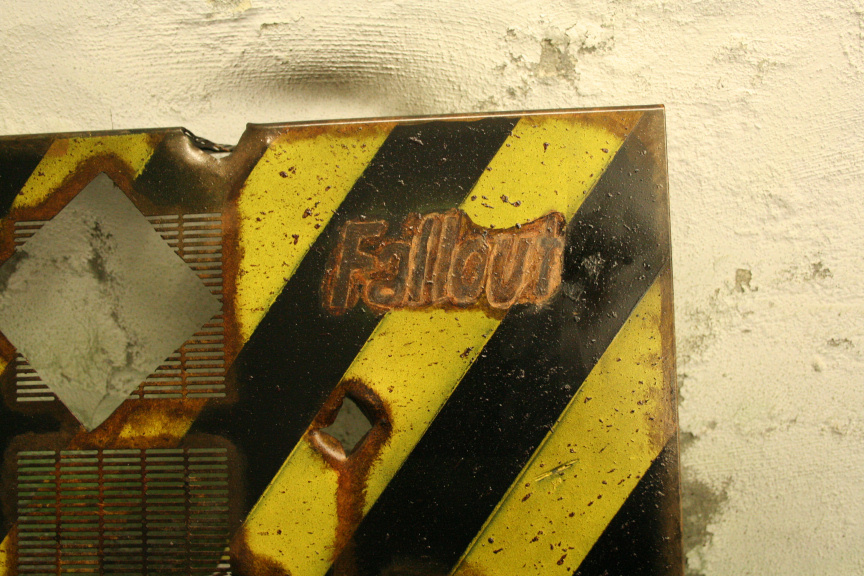
Took me about 2 and half to 3 hours to get it just right, to get that look like it´s been stamped on the case rather than painted (in my oppinion aniway), hope you guys like it!
Tomorrow starts the final day (ends mid-day saturday), and as of now, all the modifying and painting is finished so tomorrow I will be assembling it all togueter (ps: didn´t take pictures but the psu, dvd rw and hd have been painted black, it´s almost my signature thing to paint all possible components so... nothing fancy, just mainly so no ugly grey bits to see through the openings) and taking loads of pictures of the final look which will conclude succesfully the "Mod in a Week" challenge.
Thanks for reading : )
/////////
7th Day - Friday 02-12-11
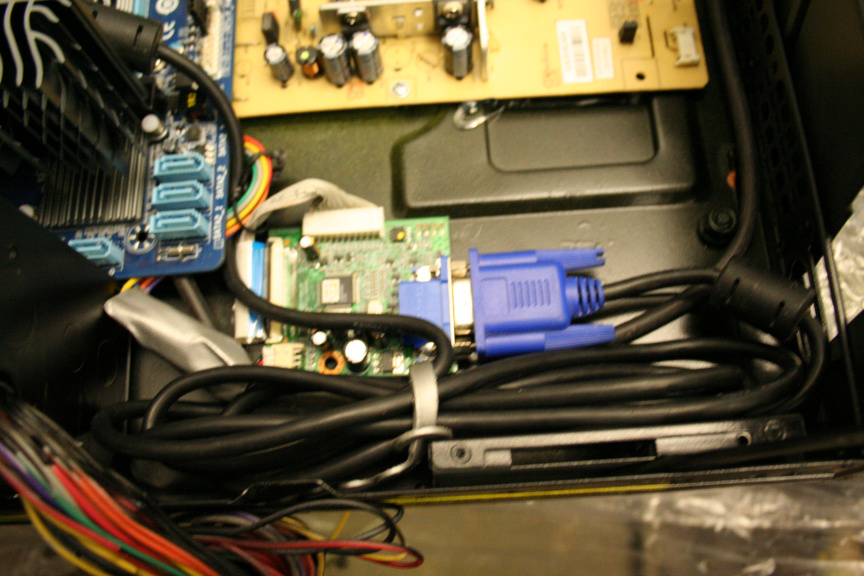
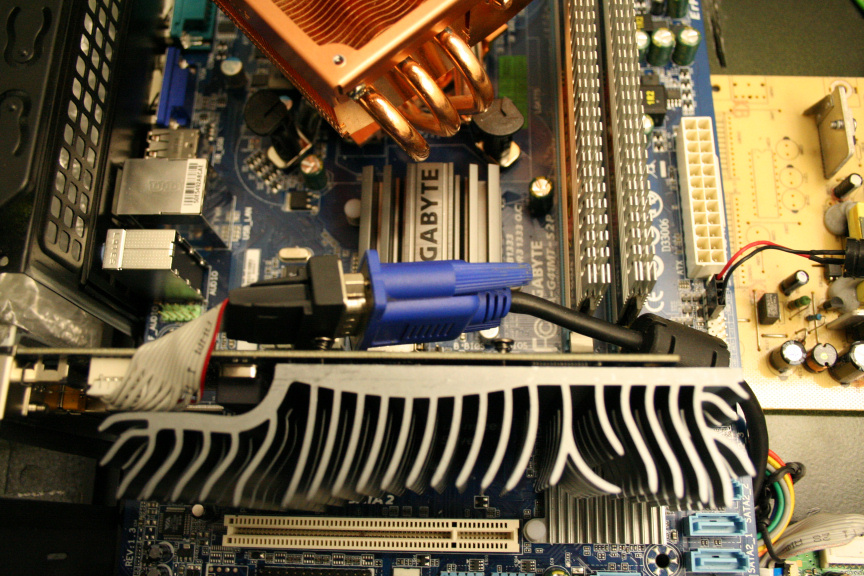
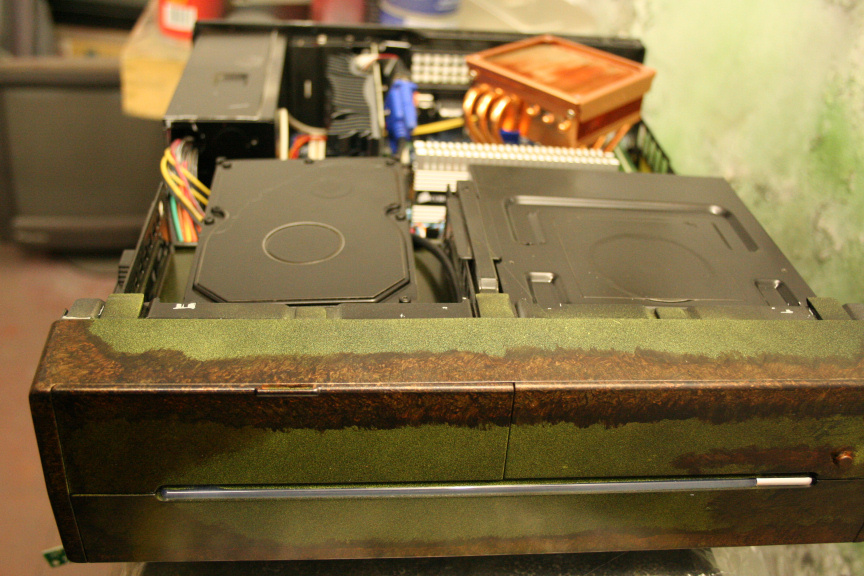
Assembly took longer than I thought it would but almost there, the following pictures are the process, because I had to remove the HDD cage from bellow to install the monitor´s hardware and hide cables I had to dismantle the memory card reader to take out the pcb and cut the frontal plastic part that goes with it. Once done and used silicone glue to put them togueter and again to attach it to the case (as you will see in one of the pictures), this allowed me to install the hdd where that would normally go (i.e. enough space to do so now). The cathodes are barely visible but are at the top and on the right side. Also due to popular demand, I replaced the cpu cooler with another exactly the same one, modified the 775 adaptor so I could shift it half a centimetre to right so I´d be able to rotate the cooler to a possition where the heatpipes are pointing up and down as opposed to the side so it doesn´t prevent me from installing both modules of ram:
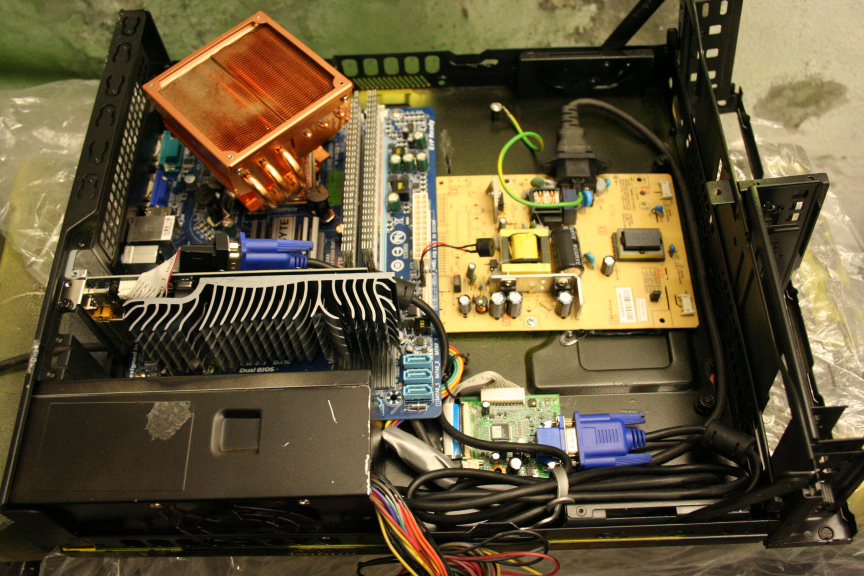
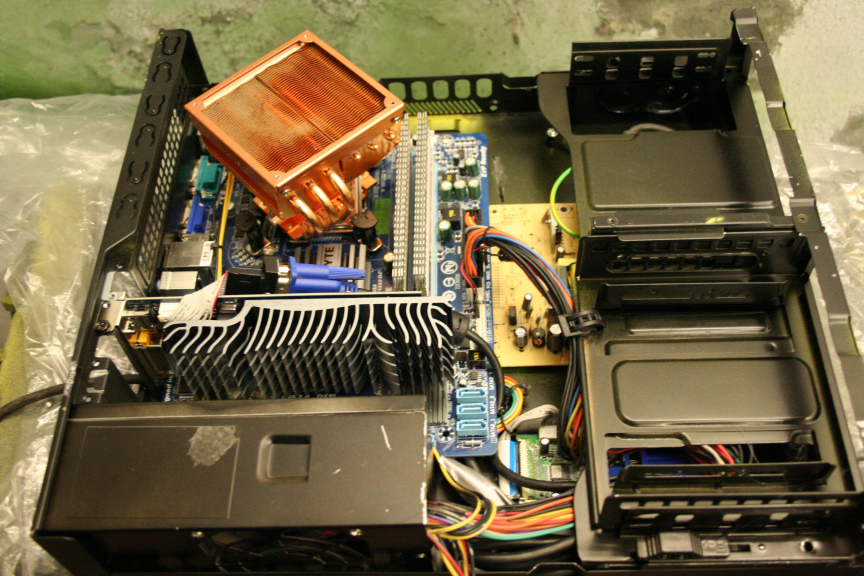

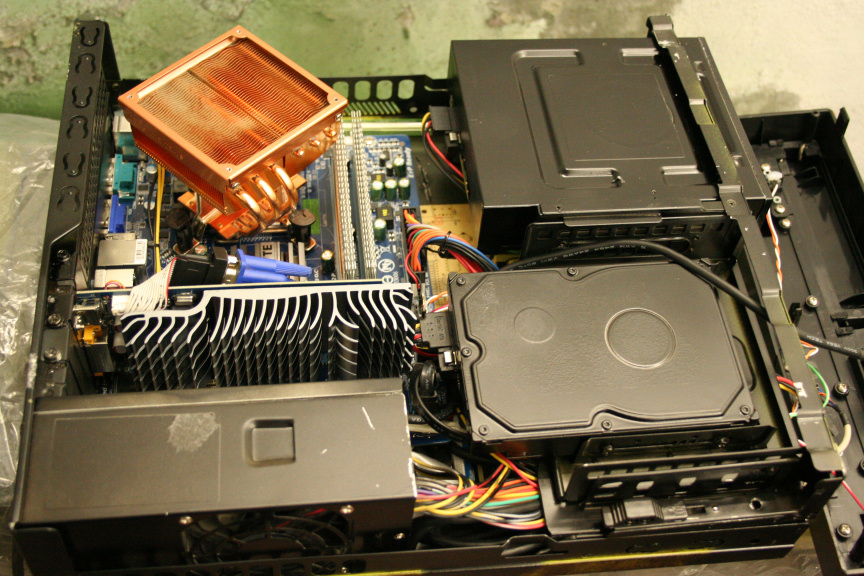
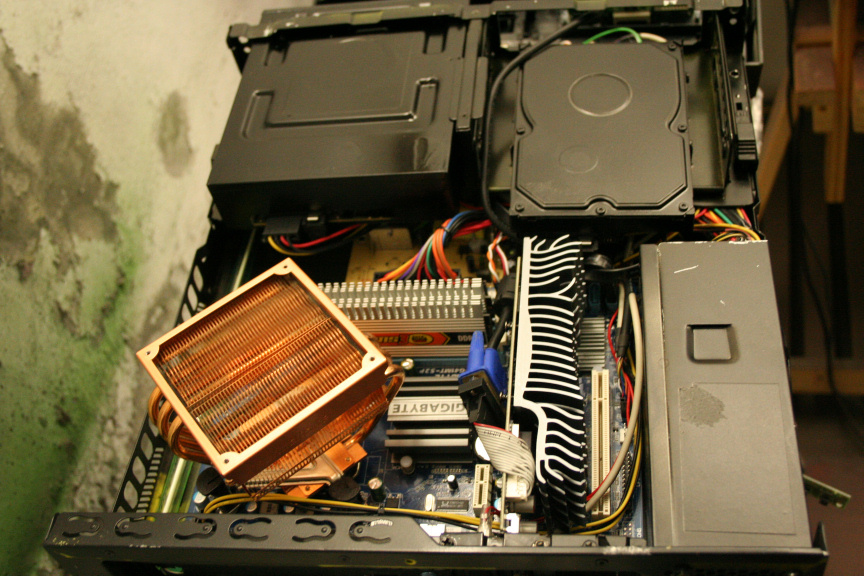
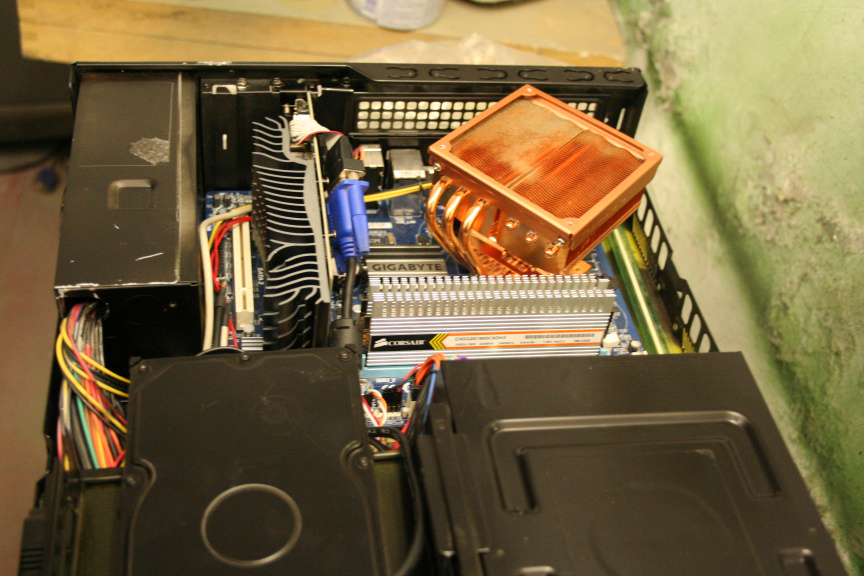


Now I just have to mount the screen, make sure it works and I can take some sweet final pictures, all done by tomorrow at around 6-7pm gmt+1 in order to meet the one week challenge.
Thanks for reading!
//////////
Update
Project is now completed however I have ran in to a problem with the mounted screen, it doesn´t seem to be getting power, I´ve checked the usual culprits to no avail and I dont currently own a voltimetre which is unconveniente. Going to dismantle the screen´s hw and test it on a wooden bench, maybe it´s shorting out. Because I want the final picks to show an image I will wait to upload them till I get this fixed between today and monday.
------------------------------------------
Update:
Fixed the screen, one of the cables must´ve cought somewhere and was damaged, severing the link between the screen´s psu and the lcd panel. So I cut that section off and soldered new cable to both ends, works fine now. Took me hours of looking and trying stuff till I saw the small brake in the cable and of course later I had to put it all togueter in the case again.
Aniway, I´m knakered and now I have to go some event to be social which I don´t really feel like but promised I would so... Aniway, I will set it all up for a shoot tomorrow to get a nice gallery of final pictures.
//////////
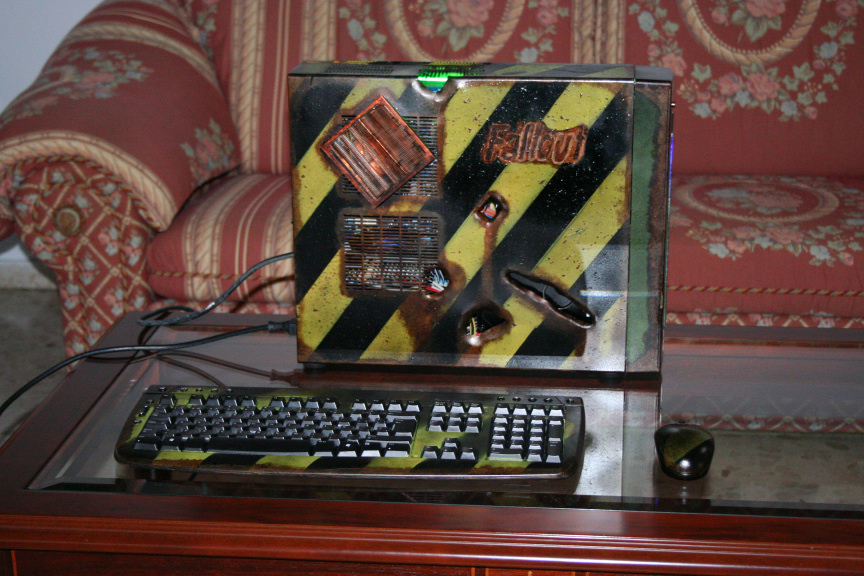
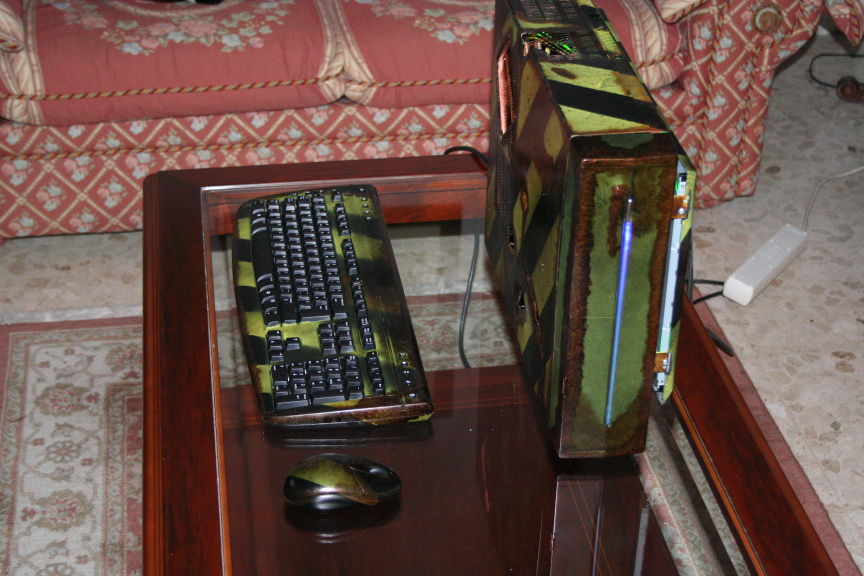
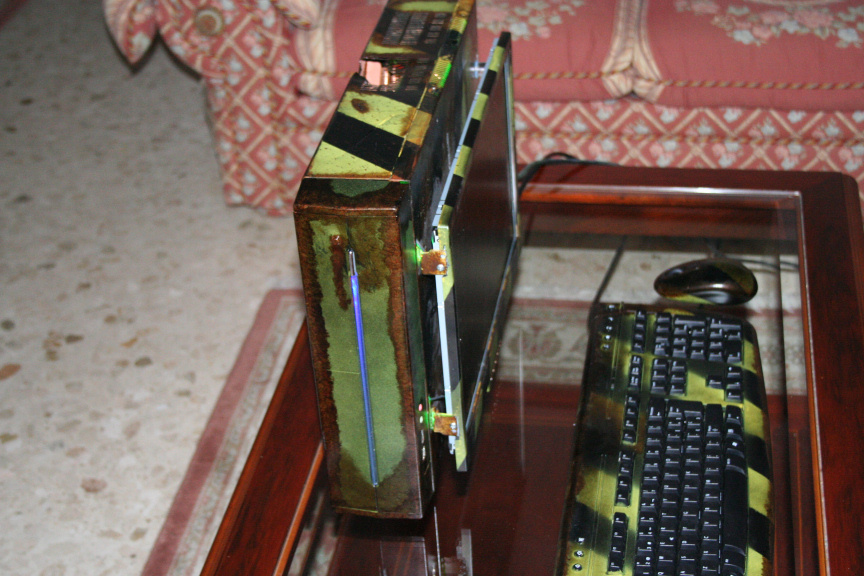
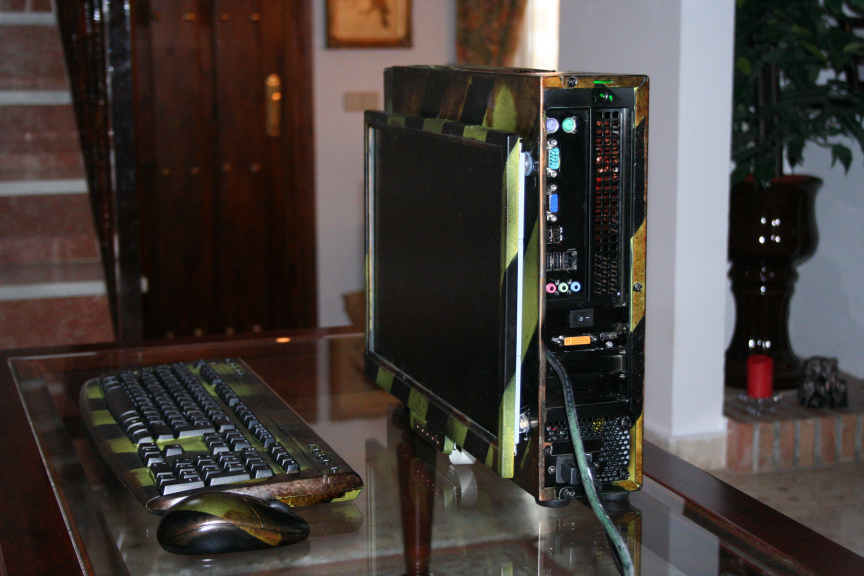
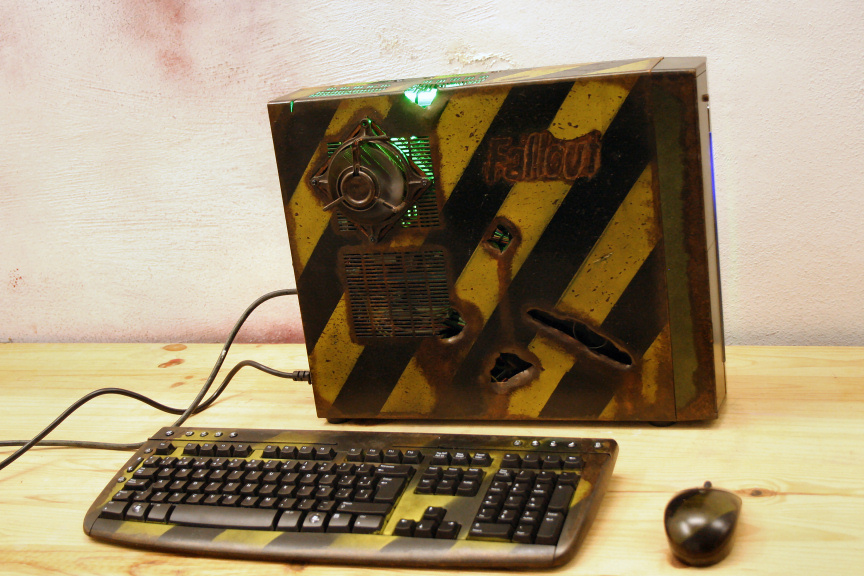
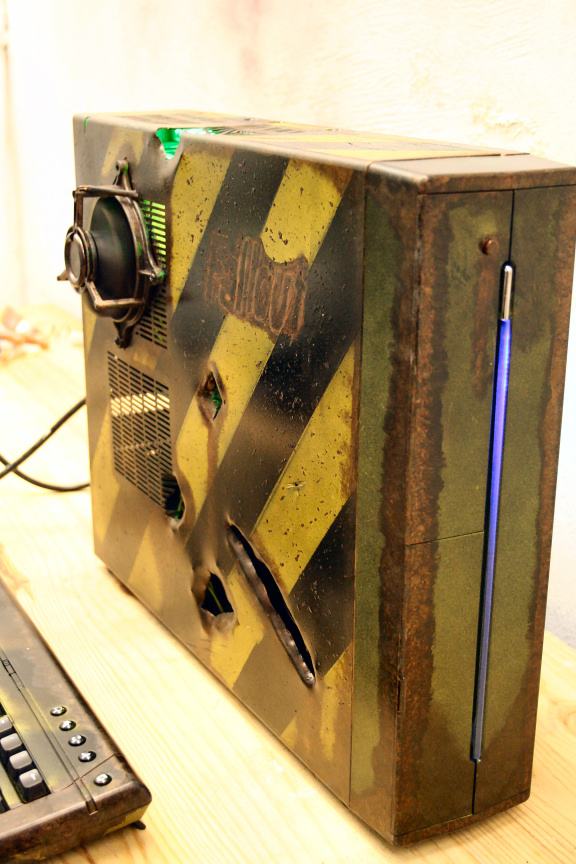
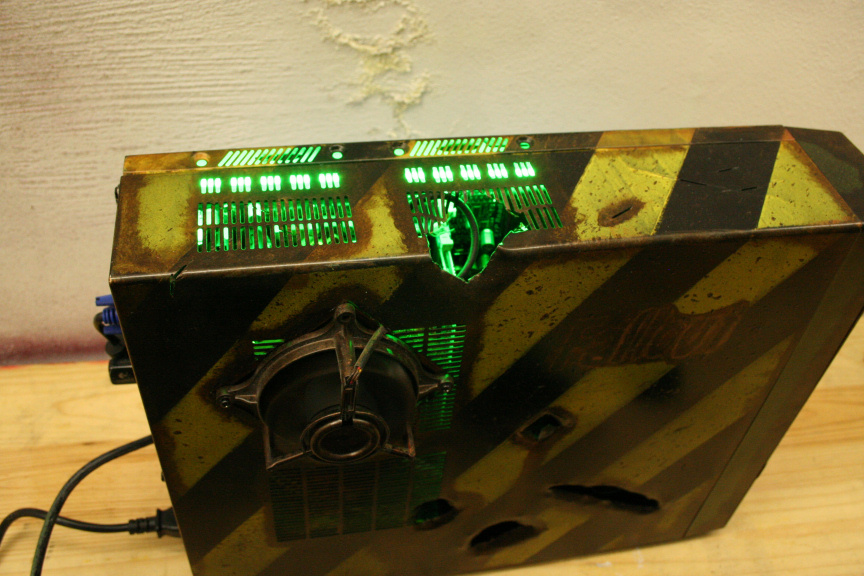
Final Pictures - Set 1
Hi everyone!
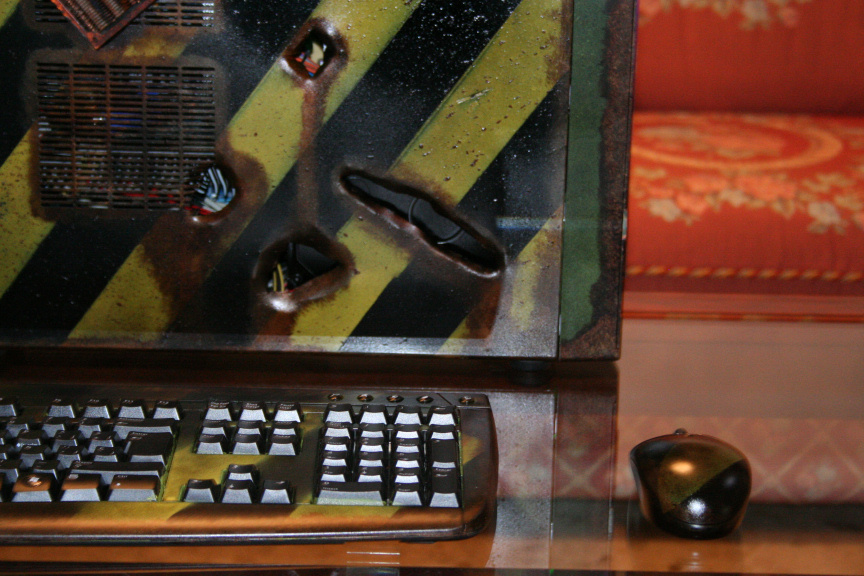
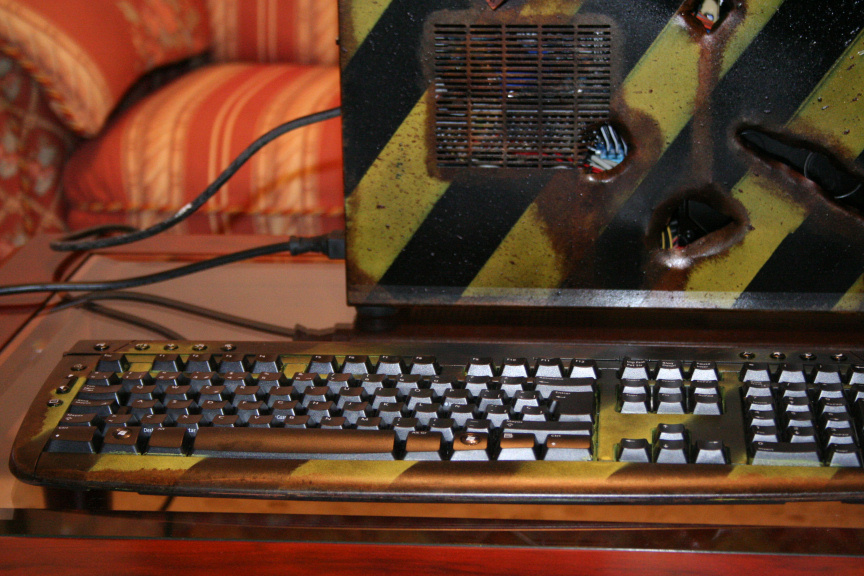
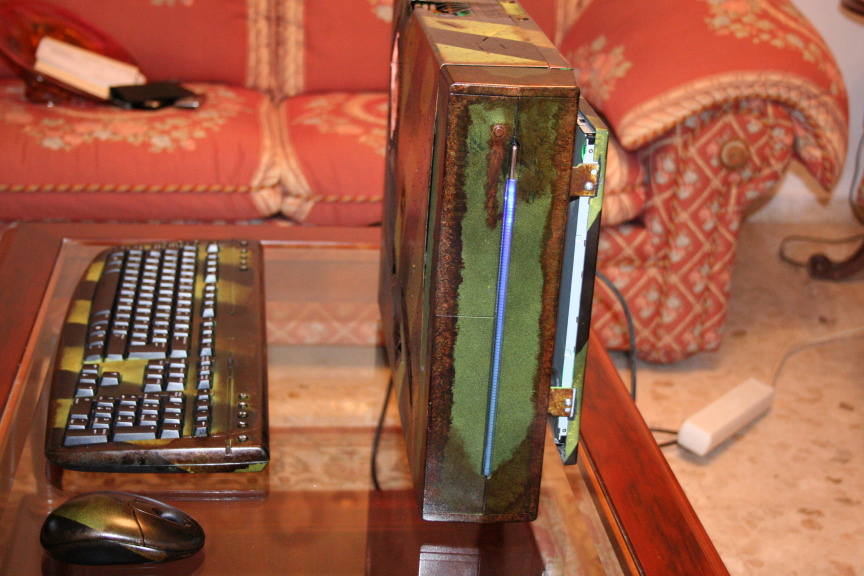
Right, as promised, here is a first set of the final pictures. I say first set because I´m not happy with them, light conditions, the need to use flash and reflections on the case by nearby windows, the table (that was a dumb idea) and so on, make the project look different, they make it look shiny (which is not), they distort the colors, you can barely see the green glow, etc
The point is, because I´m out of time right now I give you these just as a preview of some nicer final pictures which I will take at the modding event starting tuesday. Regardless, I hope you enjoy them : )
That´s it for now, I´m going to get it ready (install the OS, drivers, and so on, and pack it so it´s ready for tuesday. Once that´s out of the way I will start the final stage on Project: AIO AL and Project: Diabolo in the hopes of having them ready for tuesday as well.
This concludes the "Mod in a Week" challenge (for the second time, anyone remember my first one or has it been forgotten already? :P) and I hope you enjoyed reading and watching as much as I did doing it.
Thanks for reading!
//
just thought I´d add that Fallout Cause SP won 1st price at the Future Arena Modding competition (casemod section)

-
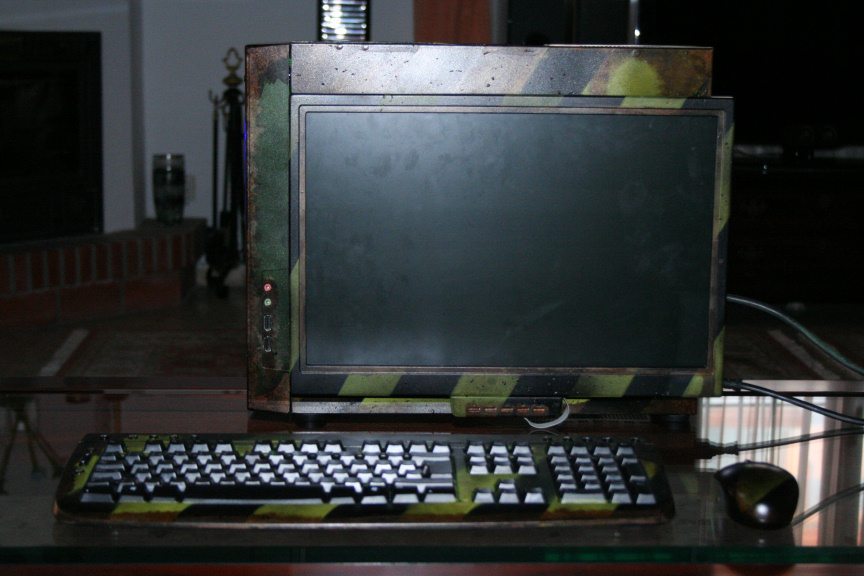
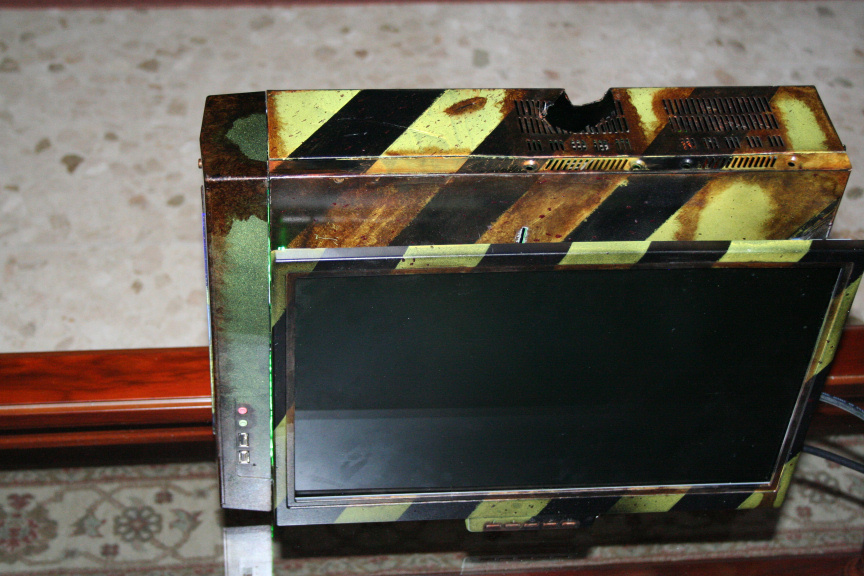
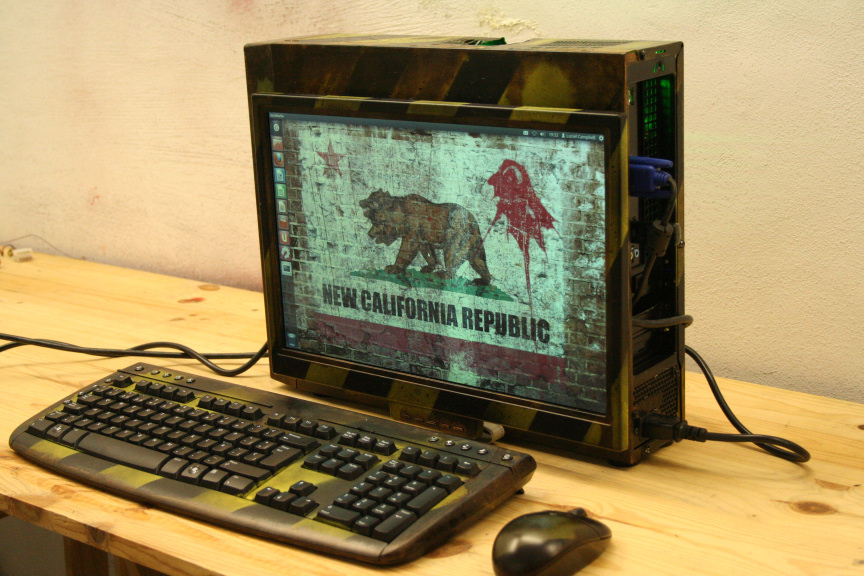
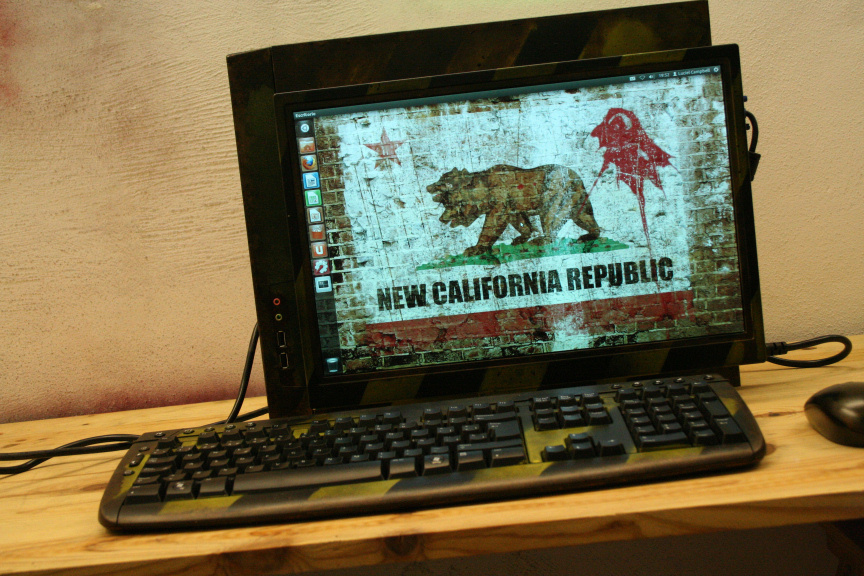
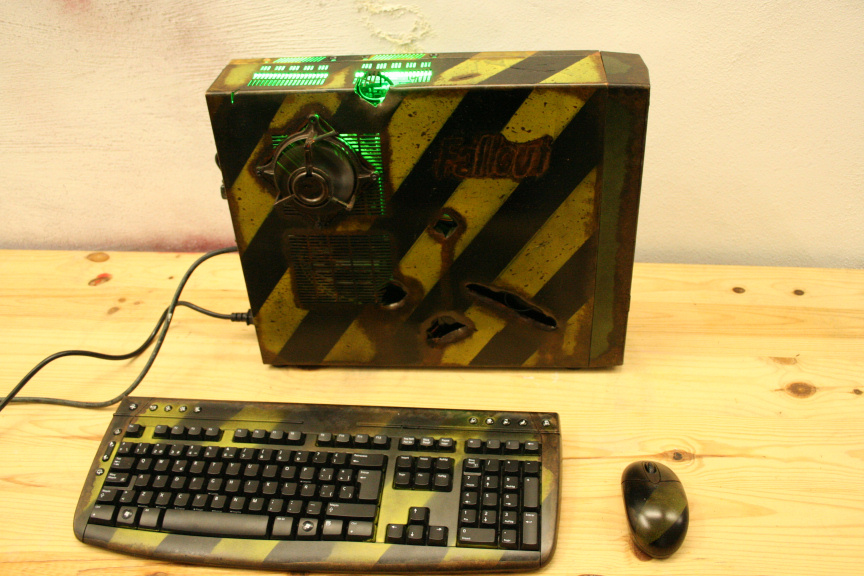
As promised, set 2 of the final pictures, the ones I consider the true final pictures. As you´ll notice there´s a fan on the cpu cooler, this is because I have just gotten back from the modding event and because it was on 24h for 6 days, I didnt feel comftable leaving it with no cooling whatsoever being on for such a long time.
Thank you everyone for reading and I can now trully say this project is completed, enjoy:
//
I´ve just started my youtube channel, and with it, a finishing touch to this project, a video-worklog of it, hope you like it : )
-
amazing very goood job bro

-
very good work
-
Very nice work!! I'm just wondering at what you can do in six months
-
Diabolo took 6 months, but for different reasons I guess, and a lot of people hated it so... : / the project I will be presenting to the tournament will provably take me around 1 month, depending if I get the parts I need quickly (already have the hardware and all the sponsored parts, but need some extras like a second 360 rad, a custom reservoir and the copper piping
-
wow
-
I love it! It looks like a nuclear powered PC that melted down. :n2mu:
-
thanks guys! : )
-
Luciel ha scritto:
Diabolo took 6 months, but for different reasons I guess, and a lot of people hated it so... : / the project I will be presenting to the tournament will provably take me around 1 month, depending if I get the parts I need quickly (already have the hardware and all the sponsored parts, but need some extras like a second 360 rad, a custom reservoir and the copper pipingSpoiler inside

-
Very very good work
-
Le085 ha scritto:
Spoiler inside
lol

Ciao! Sembra che tu sia interessato a questa conversazione, ma non hai ancora un account.
Stanco di dover scorrere gli stessi post a ogni visita? Quando registri un account, tornerai sempre esattamente dove eri rimasto e potrai scegliere di essere avvisato delle nuove risposte (tramite email o notifica push). Potrai anche salvare segnalibri e votare i post per mostrare il tuo apprezzamento agli altri membri della comunità.
Con il tuo contributo, questo post potrebbe essere ancora migliore 💗
Registrati Accedi